Create a blank CDA document
Contents
Now that you’ve had a chance to examine the final product, it’s your turn to create it! Let’s start from scratch by deleting almost all the code from the main script. Once we have a clean slate, we will add some code that will create a brand new, empty CDA document.
Step 1: Delete the sample code
Let’s get rid of the code so we can practice building the CDA sample ourselves:
- Delete all the code listed after the “require” statements found at the top of the script. You should be left with these nine lines of code:
 Do not worry about the error that appears; we will fix this in the very next step.
 - Add the
main()function back in: Another error? Don’t worry, we will fix this shortly.
Step 2: Create a new document
Let’s build a brand new CDA!
- Add the following code to the empty
main()function: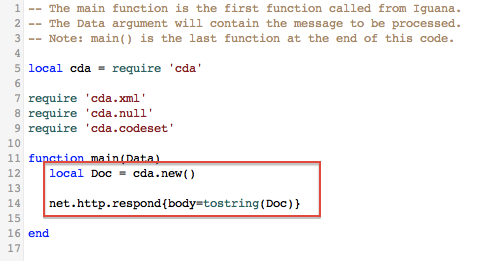 The first line of code creates a new, “blank” CDA document header with some predefined header metadata. The local variable
 Docnow holds a parsed tree structure that represents the XML document.In the second line, thenet.http.respondcall sends the required HTTP response for our channel. This resolves that lingering error! - Commit a milestone to save your work.
Here are the resulting annotations:

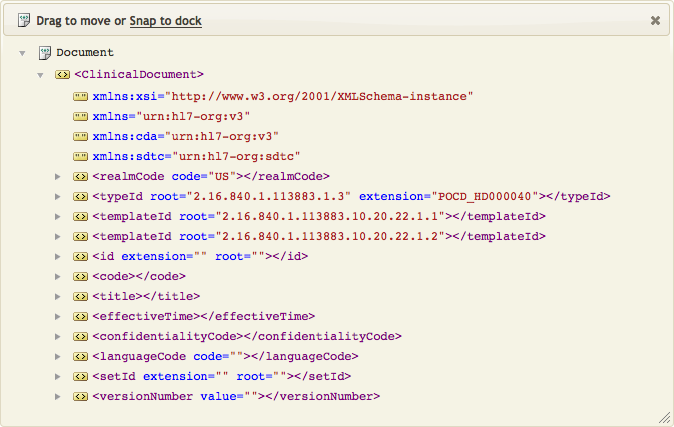
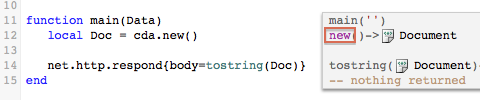
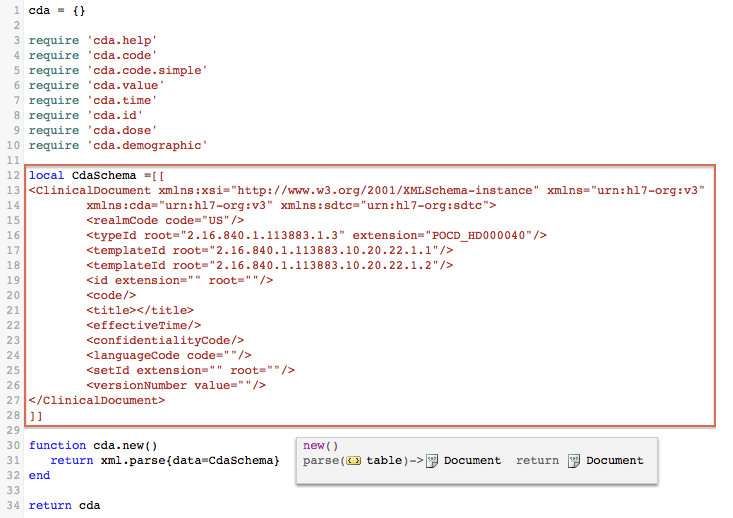
Did you know? The header structure that we’ve just created is based on templates stored in the CDA API’s ‘cda’ module. Click on the cda.new() functions’ corresponding annotation to step into the module’s code and check out the template:
At the end of this tutorial, we’ll have a quick chat about how to tweak this template to suit your own CDA requirements.
Step 3: Review the results
Throughout this tutorial, we are going to regularly check the final results of our changes. To make this easy, we are going to add some code to the bottom of our main() function that will save our script’s resulting XML to two different external files: an unformatted file (“cda_xml.xml”), and one with an XSL stylesheet applied (“cda_web.xml”). This will allow you to use any browser to view the CDA document you are building (as either a nicely formatted CDA, or as raw XML).
- Save this XSL stylesheet to the Iguana install directory: WebViewLayout_CDA.xsl
- Copy and paste this code to the
main()function:-- TEST CODE: write CDA to file (in Iguana install dir) if iguana.isTest() then -- unformatted xml local f = io.open('cda_xml.xml','w+') f:write(tostring(Doc)) f:close() -- formatted with xsl stylesheet f = io.open('cda_web.xml','w+') f:write('<?xml-stylesheet type="text/xsl" href="WebViewLayout_CDA.xsl"?>\n') f:write(tostring(Doc)) f:close() end - Commit a new milestone to save your work.
- Want to see this in action? Browse to the Iguana install directory and open cda_web.xml. The following formatted version of the empty CDA should launch in your web browser:

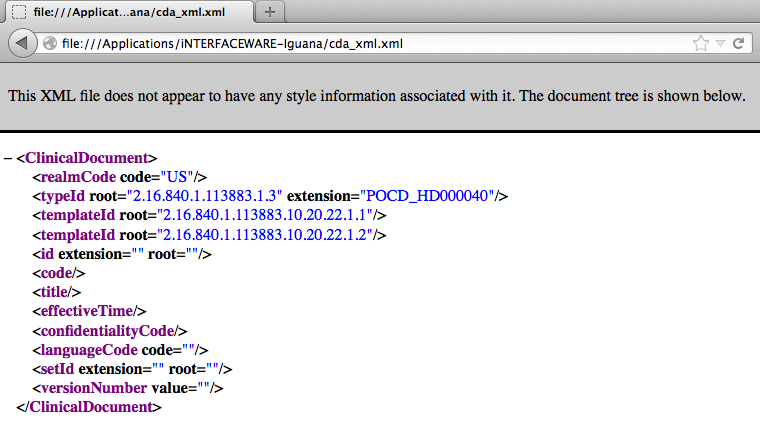
- Using a web browser or a text editor, browse the Iguana install directory and open cda_xml.xml. The following unformatted XML appears:
Step 4: Test the results
Throughout this tutorial, we will ask you to verify our work using NIST’s online validation tool. We will walk you through the procedure here; however, in later steps, we will assume that you are comfortable with the process.
- Browse to the NIST website’s Validation Tool.
Tip: If the NIST site is unavailable you can also use the Lantana validation tool
- Following the instructions NIST provides, browse to the Iguana install directory and select the unformatted XML file that we produced in the previous step.
- Complete the form using the following selections (marked in red):
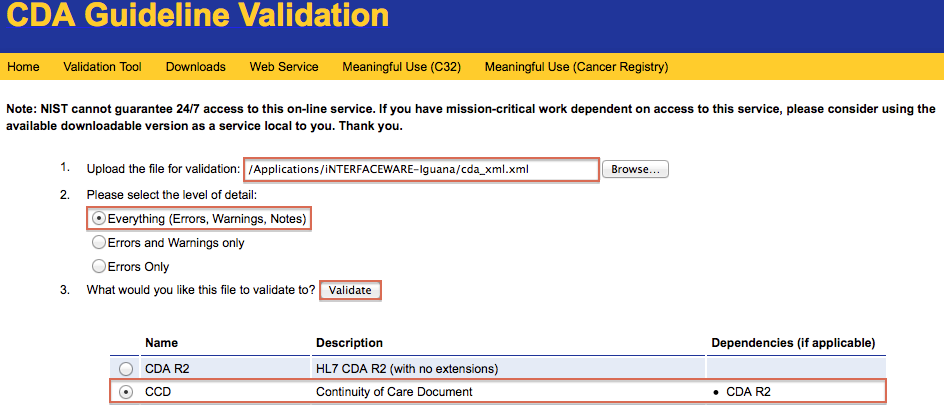
- Click the Validate button. The following results should appear:
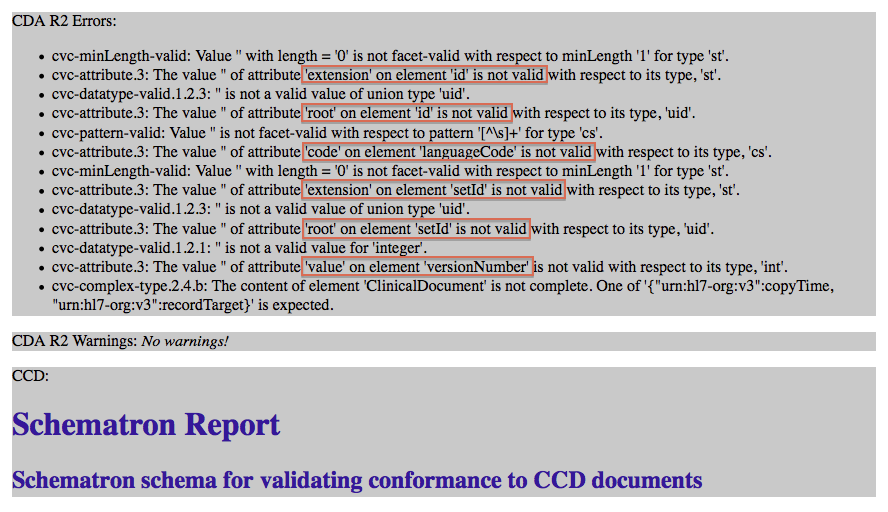
As you can see above, the validation has failed because we are still missing five required values in our header.
What’s Next?
As the NIST report has pointed out, we only have empty nodes representing some vital CDA header metadata. Let’s start building code to populate these elements.