Add a 'patient' element
Contents
Our next task is to add a brand new ‘recordTarget’ element to the header that will capture specific patient information. We will follow exactly the same steps as we did for the ‘author’ element, but because CDA requires such a large volume of content for the ‘recordTarget’ element, we are going to provide you with some pre-built code. Regardless, in real-life scenarios, you would still implement the same process:
- Create and append the new element (‘recordTarget’) to the header.
- Create a “fill” function (
FillPatient()) to populate the element correctly. - Use the following tools to build out the “fill” function and develop the element’s node tree:
- CDA API modules and functions
- addElement and addAttr variable shortcuts
- auto-completion
- Test the results for errors.
Don’t forget! We need to add the ‘recordTarget’ element before the author element:
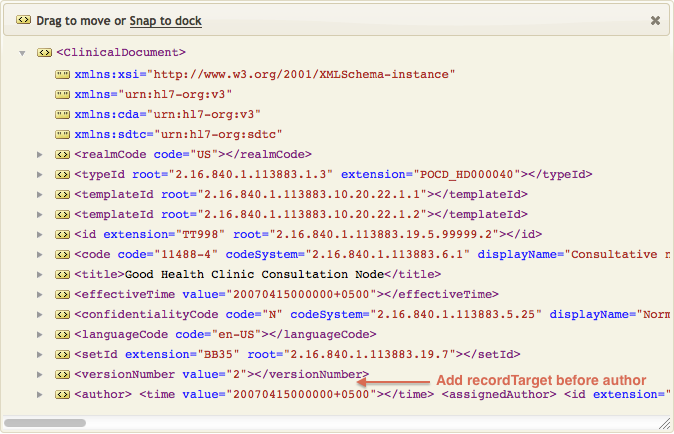
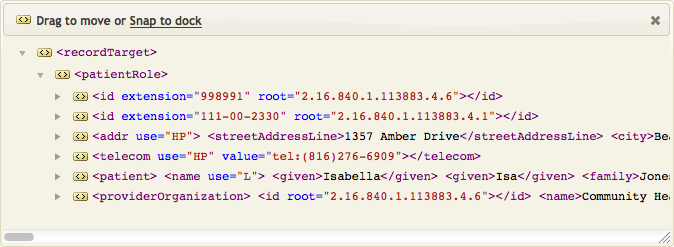
The list of required patient information is very long. For the sake of brevity, we are going to skip the usual table and just provide a snapshot of the final results. You will need to make sure that your final code produces this data:

Adding Code
We have already shown you how to create “fill” functions to both add and populate elements. All the remaining “fill” functions follow a similar pattern, so there is no point in making your build them up from scratch. Because ‘recordTarget’ is such an extensive element, we are going to take this opportunity to simply provide you with the completed script. Then we’ll go back and add any missing code to finish the process.
- Download this project zip file: NIST_Validated_CDA_Example_with_fill_ functions.zip
- In the Translator’s Project Files panel, select main > Import Project.
- In the dialog that appears, choose Import project from zip file, browse to the project zip file, then click Import.Iguana will load in the new code with the several extensive “fill” functions already completed for you. We will review the
FillPatient()function’s code and examine its accompanying annotations once we’ve completed the rest of the procedure. - Notice that we still haven’t actually created/appended the ‘recordTarget’ parent element. Add the following lines of code to the
main()function to complete this action: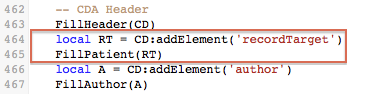 Remember to add it before the “author” code!
 - Click on the associated annotation to see that the patient information has been successfully added:
Finished! Now let’s quickly review all that pre-built FillPatient() code that you’ve just added to your project.
Patient information consists of an extensive node tree with several elements/attributes. To simplify this, we’ve broken down the code by creating four local “Fill” functions. This is standard programming practice for managing complexity, making it much easier to find/update code down the road.
Note: Yes, it’s true! Lua allows you to create local functions nested within a function.
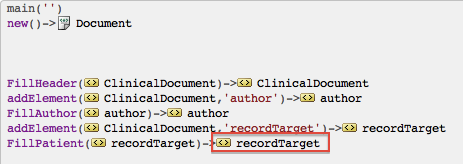
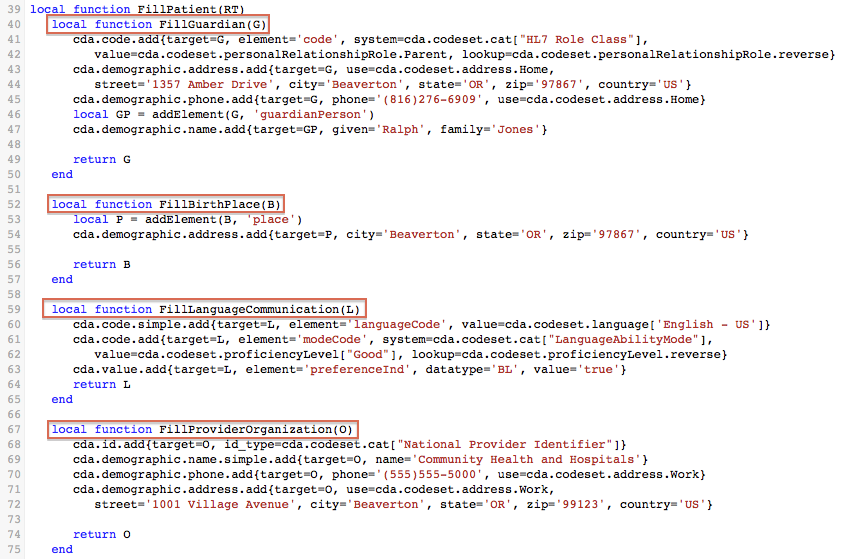
We created these four functions at the start of the FillPatient() function:
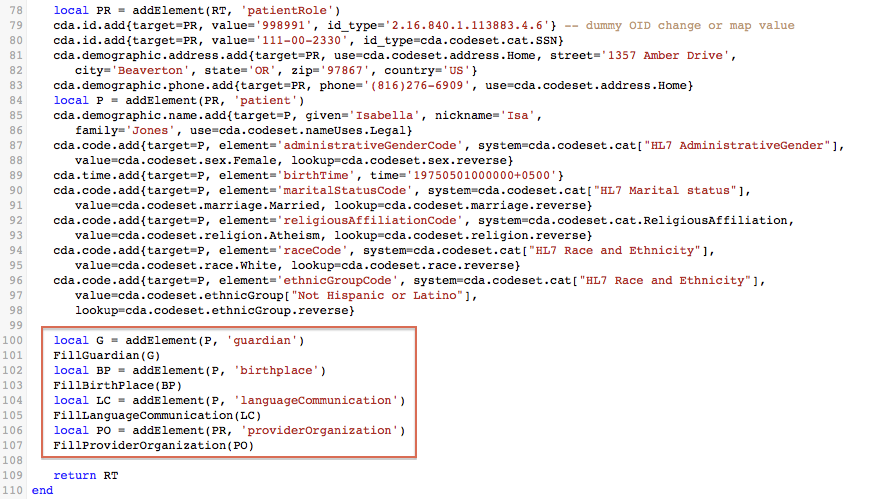
At the end of the FillPatient(), we call these functions fill in the last four elements:
This is repeating exactly the same process that we used before to add elements, just on a slightly larger scale. Use addElement() to create the element and then use a “Fill” function to develop and populate its node tree. The only difference is that the four “fill” functions are local to the FillPatient() function.
Wait, why did we make these functions local to FillPatient()?
- Efficiency: By making these four functions local, they run up to 30% faster (remember Roberto’s performance tips article).
- Scope: We can make these local because they are only called from within
FillPatient().
Tip: We use the exact same technique with other complex elements (FillEncounters(), FillProblemList(), and so on).
Review and Validate
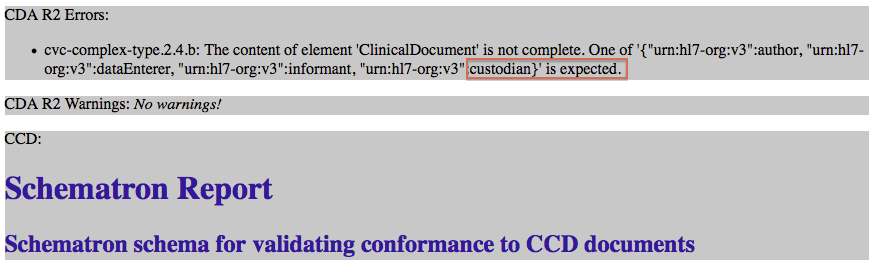
At this point, let’s use the NIST Validation Tool (or the Lantana validation tool) to check our changes to the cda_xml.xml file.
As you can see below, we get an error warning us that the ‘custodian’ element is missing: