In the latest Iguana release (5.5), we added the ability to work with the LuaCOM library. Now it’s possible to call COM interfaces from within Iguana!
The luaCOM library is only included in Windows builds of Iguana (COM is a Windows feature).
The biggest benefit of this upgrade? Now you can execute scripts that push and pull messages from Microsoft Message Queue (MSMQ). To demonstrate, I’ve attached a couple of project zip files that we pulled together for James Maxwell from 3AM Technologies. James Wang from MD Anderson has also reported having success with these scripts.
Note: When automating Microsoft Office applications (Word, Excel etc) you must run Iguana at the command line, it does not work when you run Iguana as a service. This is also discussed in this forum thread on luaCOM.
Please be aware that luaCOM always needs the environment variable CHM_LUACOM_ENABLE=true, you can create it in Iguana or in Windows.
Warning! Please use the LuaCOM library that we ship with Iguana. Because Iguana hosts Lua in a multi-threaded environment, we had to modify the initialization of LuaCOM to make it stable with our product. We strongly advise against using your own copy.
Before You Start
- Set the environment variable CHM_LUACOM_ENABLE=true, you can create it in Iguana or in Windows.
Note: This is required whenever you are using luaCOM. - Before you can run the code for this example, you will need to install MSMQ on Windows.
Note: The code uses a local MSMQ queue, so you must install MSMQ on the same machine that will run the sample code.
If you get an “assertion failed!” error like this one, it means that MSMQ is not installed:

How It Works
We will use two channels. The first channel will receive HL7 messages from an LLP source component and push them into MSMQ. The second channel will then retrieve messages from MSMQ and send them out via LLP. The code uses a private local queue, this queue will be created if it does not exist.
Note: A guid (845f119e-b8de-490d-8165-144e5e99a404) is used for the queue name, to prevent potential name conflicts.
How To Install and Run the Example
- Create a channel with a From LLP source and a To Translator destination.
- I named the channel “LLP_MSMQ”, but you can a different name if you wish.
- Load the LLP_MSMQ_To_Translator.zip project zip into the To Translator script.
- Create a channel with a From Translator source and an LLP Client destination.
- I named the channel “MSMQ_LLP”.
- Load the MSMQ_LLP_From_Translator.zip project zip into the From Translator script.
How to Test the Example
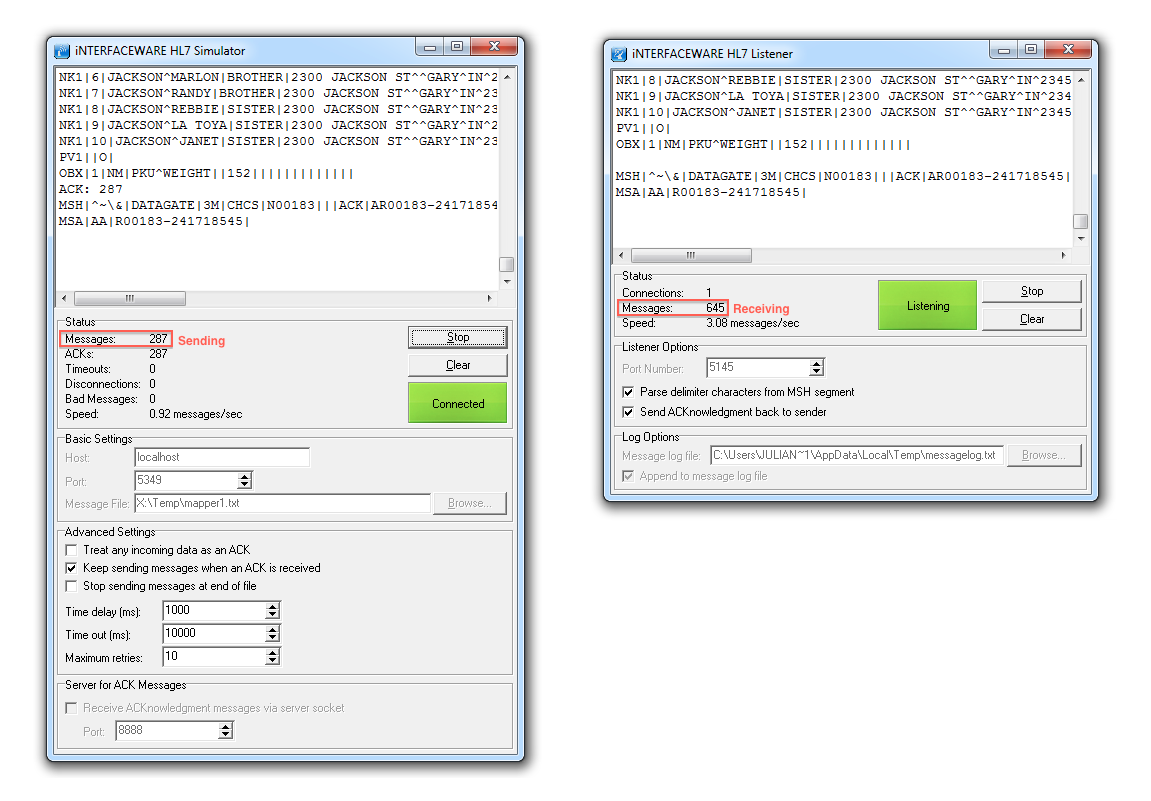
We will use the HL7 Simulator to send HL7 messages to the first channel, and the HL7 Listener to retrieve them from the second channel.
- Start an HL7 Simulator, sending on port 5349.
- We used mapper1.txt as sample data (it contains a single HL7 message).
- Start an HL7 Listener, sending on port 5145.
- Start both the channels that you created above.
You should see messages being sent and received:
How the “msmq” Module Works
We supply the msmq module to handle reading and writing to MSMQ. This module is very easy to use, with only two functions:
send(): This function pushes a message into the specified queue.- The queue will be created if it does not exist.
receive(): This one pulls a message off the specified queue.- You will receive an error if you try to receive from a non-existent queue:

- You will receive an error if you try to receive from a non-existent queue:
There are also two properties that you can set:
- PathName: This is the name of the queue that you want to open<
- The name of the queue defaults to ‘.\\PRIVATE$\\845f119e-b8de-490d-8165-144e5e99a404’
- This default value is set in the msmq module.
- You can change the name of the queue in
main()usingmsmq.queue.PathName = '.\\PRIVATE$\\'..'My queue name'Warning!: Do not change ‘.\\PRIVATE$\\’ at the beginning of the string.
- The name of the queue defaults to ‘.\\PRIVATE$\\845f119e-b8de-490d-8165-144e5e99a404’
- Label: This is a user-friendly name for documentation purposes only.
Tip: There are two types of msmq queues: Private queues which are simple fifo queues, and Public queues which are more complex and include routing etc. For this example we are using the simpler Private queues.
Note: The reason for ‘.PRIVATE$’ at the start of the queue name is twofold:
- The “.” indicates the queue is on the local machine (you can also use the machine name but the “.” is more concise).
- The “\\PRIVATE$\\” indicates that this is a Private queue.
This article has more information, also Google is your friend.
How the Example Code Works
We simply use a pair of channels, the first pushes messages into MSMQ, the second retrieves messages from MSMQ.
- The LLP_MSMQ channel uses
msmq.send()to push messages into MSMQ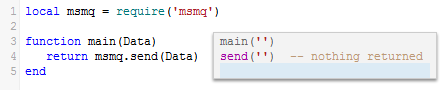
- The MSMS_LLP channel uses
msmq.receive()to pull messages off MSMQ
That’s all you need! It really is that simple.
If you need to use multiple MSMQ queues, you can use multiple channels, one pair for each queue. For example, this setup has four queues using eight channels :
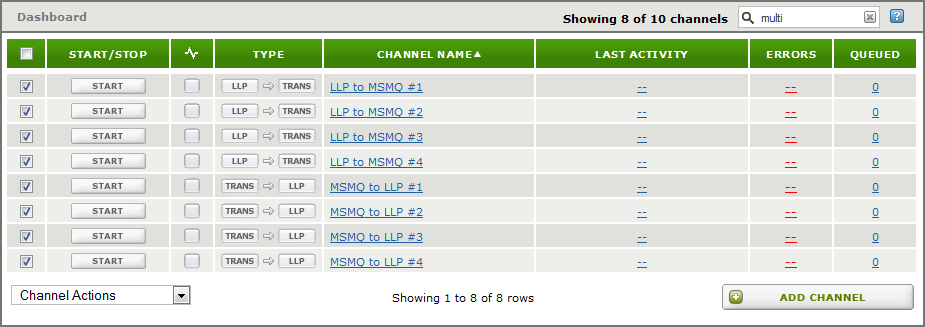
You will need to change the msmq.queue.PathName of the channel for each pair. In this example, we simply appended “_channel_<no>” to the channel name.
These are the the main() functions for “LLP_MSMQ #1 ” and “MSMQ_LLP #1”. We want them to use the same queue, so we append “channel_1” to the PathName in both cases:

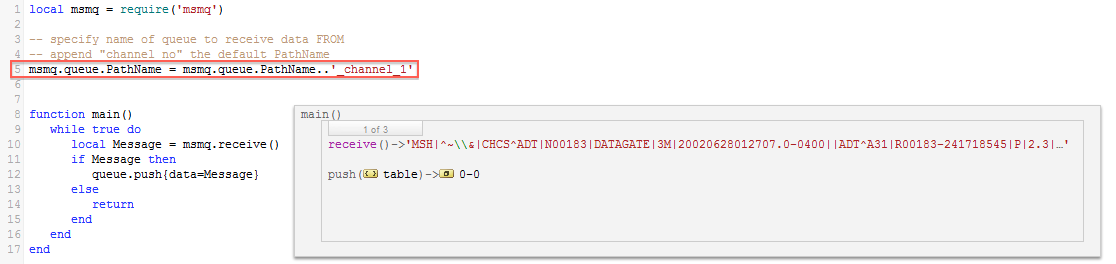
We made similar changes to the other channels.
Using Remote Queues
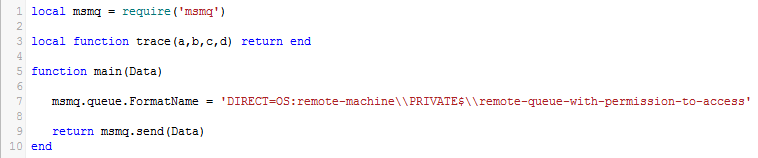
To access a remote queue you need to use the the FormatName property (for more information see this MSDN page). You will need an existing remote queue, and permissions that allow you to access it.
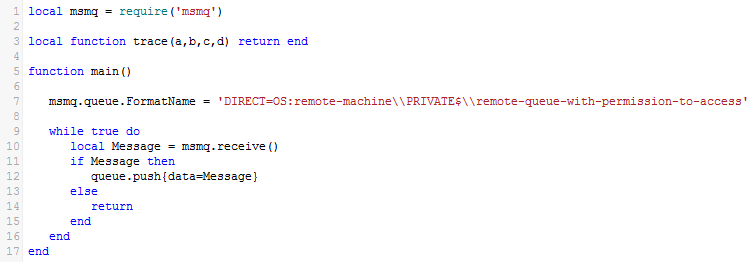
You can set the FormatName in main() like this:
From component:
To component:
If you attempt to use a queue that does not exist you will get an error like this:

Attempting to use an unknown remote machine gives this error:

Note: I have confirmed that using FormatName works correctly on the local machine, but it has not been tested against a remote queue as I did not have one available.
What’s Next
If you have any questions or comments, feel free to discuss them in our user forums. You can also contact support at support@interfaceware.com if you need more help.