Settings
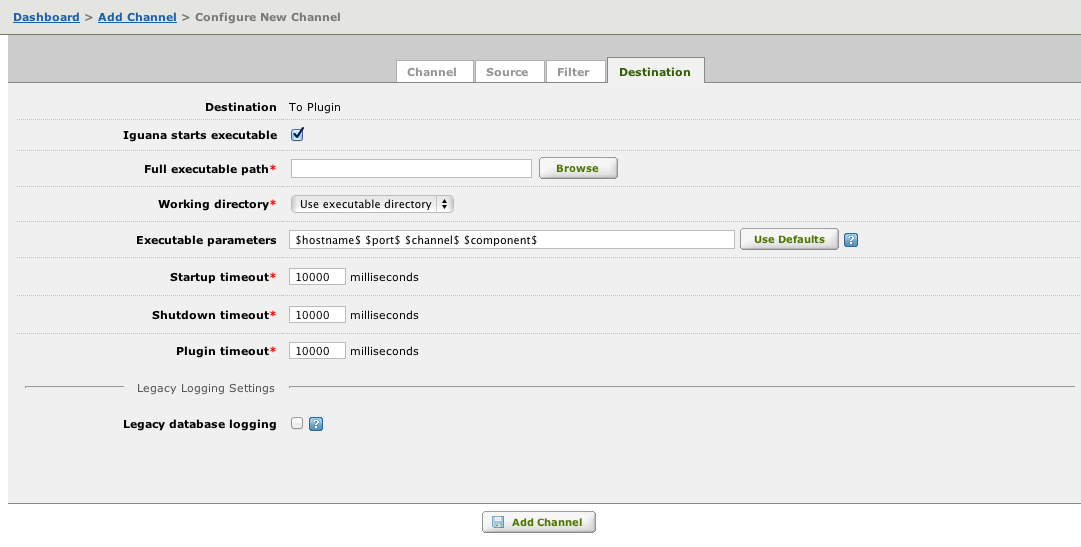
If you have specified To Plugin as the destination component for your channel, the Destination screen for this channel definition enables you to configure this destination component:
Note: In versions of Iguana that are older than Iguana 4.0, the To Plugin destination component is known as the To Client Executable destination component.
Once you have created a plugin component the plugin output can be monitored from the channel properties.
To configure the To Plugin destination component:
- Select the Iguana starts executable check box to start the plugin when the channel is started and shut it down when the channel is stopped. If this check box is not selected, the channel waits for a connection from the plugin.
Note: If Iguana starts executable is not selected, the Full executable path, Working directory, Executable parameters, Startup timeout and Shutdown timeout fields disappear. The values that you have typed into these fields are preserved. If Iguana starts executable is selected, you can monitor the plugin output while the channel is running.
- In the Full executable path field, type or browse for the location of the plugin to be run. When you supply the file path for the plugin, its absolute path is displayed.To include the value of an environment variable in the file path, use ${name}, where name is the name of the environment variable that you have defined. For example, the file path ${MYDIR}\myfile.exe includes the value of the MYDIR environment variable.The iguana_dir environment variable, which is defined by Iguana, is set to be the location of the Iguana configuration directory. To include this directory in your file path, specify ${iguana_dir} as part of the path.
- From the Working directory list box, select Use executable directory if the working directory and the executable directory are the same. Select Use alternate directory if your working directory is not the executable directory. If you have selected Use alternate directory from the Working directory list box, a text field appears. In this text field, type the complete path of the working directory.
- In the Executable parameters field, type any parameters that you want to supply to the plugin when it is started. The default parameters are the macros $hostname$, $port$, $channel$ and $component$, which are described in the table below. If you have changed the parameters and want to go back to using these defaults, click Use Defaults.The following table lists the macros that can be included as executable parameters:
Macro Description $hostname$ The host name of the Iguana server. $port$ The port number of the Iguana server. $channel$ The name of the Iguana channel. $component$ Set to source if the plugin is communicating with a source component, or to destination if the plugin is communicating with a destination component (as it is here). $clientid$ A string consisting of the channel name with dest1 appended (for example, mychannelname.dest1). This macro is provided for plugins that use the deprecated connect method, which expects this as a parameter.If you are creating a new plugin, use $channel$ and $component$ instead of $clientid$. To include the value of an environment variable in the Executable parameters field, use ${name}, where name is the name of the environment variable that you have defined. If you include an environment variable, a preview field appears that displays the value of the field after the environment variable is replaced by its value.
- In the Startup timeout field, type the time, in milliseconds, that Iguana will wait for a connection from the plugin after it has been started. After this time has elapsed, an error is logged and the plugin is terminated.
- In the Shutdown timeout field, type the time, in milliseconds, that Iguana will wait for the plugin to be shut down after a shutdown request has been issued. After this time has elapsed, an error is logged and the plugin is terminated.
- In the Plugin timeout field, type the time, in milliseconds, that Iguana will wait for the plugin to respond before timing out.
- Select the Legacy database logging check box if your plugin requires log entries to be written to a database. In this case, two database tables are required: a log table and an index table. For more information, see Specifying Legacy Logging.
Specifying Legacy Logging [top]
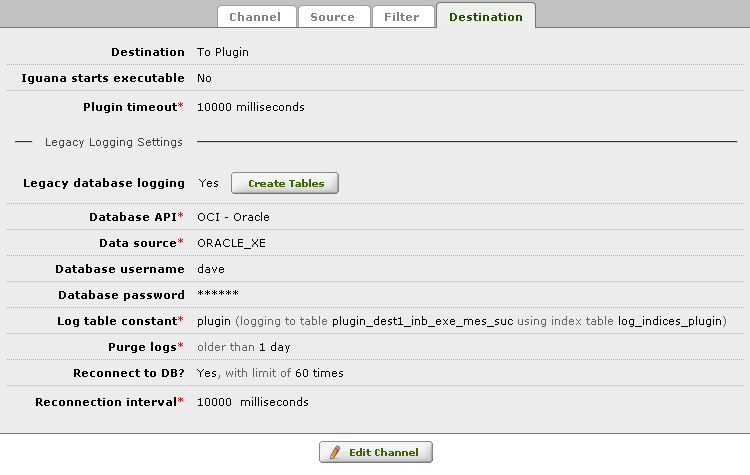
If you select the Legacy database logging check box when configuring the To Plugin destination component of a channel, fields appear that enable you to supply the database information:

To specify legacy logging:
- From the Database API field, select the database that you are using.
- In the Data source field, type the name of the database.
- If your database requires a username, type the username in the Database username field.
- If your database username requires a password, type the password in the Database password field.
- In the Log table constant field, you can optionally type a constant to uniquely identify the database tables that will contain log information. This constant will be added as a prefix to the name of the database table containing log information, and will be added as a postfix to the name of the database table containing the index information. If you leave this field blank, the default is to use the channel name, converted to lower case and with white space removed, as the log table constant.
Note: For an example of how the log table constant is used: if your channel is named plugin and you do not specify a value in the Log table constant field, the log table is named plugin_dest1_inb_exe_mes_suc and the index table is named log_indices_plugin. In version 3.3.2 of Iguana, the database table name had to be the same as the name of the channel. In this version of Iguana, you can change the name of the channel without having to change the names of the legacy log tables.
- Select the Purge logs check box if you want Iguana to automatically purge the log table for you. When this check box is selected, a field appears that enables you to specify the number of days to wait before purging log table entries from the database.
- In the Custom DB columns field, type the names of any additional columns that the database table contains. These names must be separated by ; (semi-colon) characters.
- From the Reconnect to DB? list box, select whether you want Iguana to try and reconnect to the database if the connection is lost. Select No if you do not want Iguana to reconnect, Yes (unlimited) if you want Iguana to keep trying to connect forever, or Yes, with limit if you want Iguana to make a limited number of reconnection attempts.If you select Yes, with limit in the Reconnect to DB? list box, you must specify the number of times to try to reconnect and the number of milliseconds between reconnection attempts. 10000 milliseconds is commonly used here.
Note: If you have selected the Legacy database logging check box, you can export the legacy database tables after you have created the channel. See Exporting the Legacy Log Database Tables for details on how to do this.
Exporting the Legacy Log Database Tables [top]
You can export your database when your channel specifies To Plugin as its destination component and you have selected the Legacy database logging check box:
To export legacy log database tables:
- Click Create Tables. If no errors were detected in the database export process, a confirmation screen appears. This screen lists the database commands that will be used to export the tables:
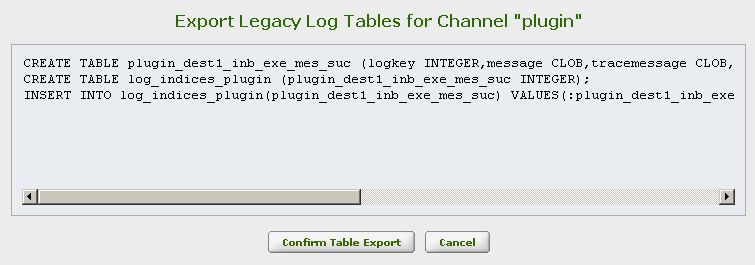
- Click Confirm Table Export to confirm that you want to export the tables. A screen appears, indicating that the database tables have been exported:
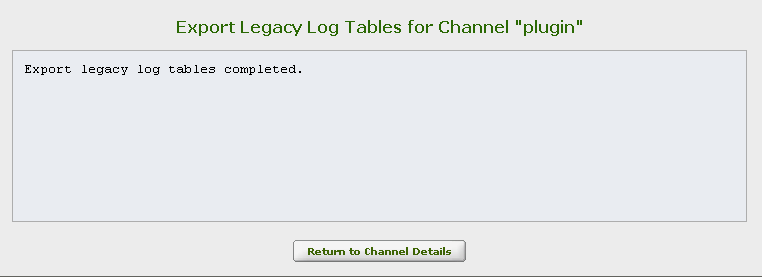
- Your legacy log tables have now been added successfully. Click Return to Channel Details to close this screen.
Warning: If you export data tables that already exist, the existing tables will be dropped and new ones will be created. This may lead to data loss.