- Introduction
- Email server settings
- Troubleshoot your SMTP server
- Validation Email
- Notification rules
- Standard Notification Rules
- Channel Inactivity Rules
- Best practices for Email Notifications
- Log entries generated for notifications
- User friendly email notifications
- Email Notification Rule Examples
Introduction
Iguana supports a rich error notification system that can send both email and SMS messages and log notification activity.
From here you can:
Useful links:
- Best practices for Email Notifications.
- Log entries that are generated for notifications.
- Making user friendly email notifications.
- Email Notification Rule Examples.
Also see Raising a VIP Alert which walks you through creating a user and an email alert.
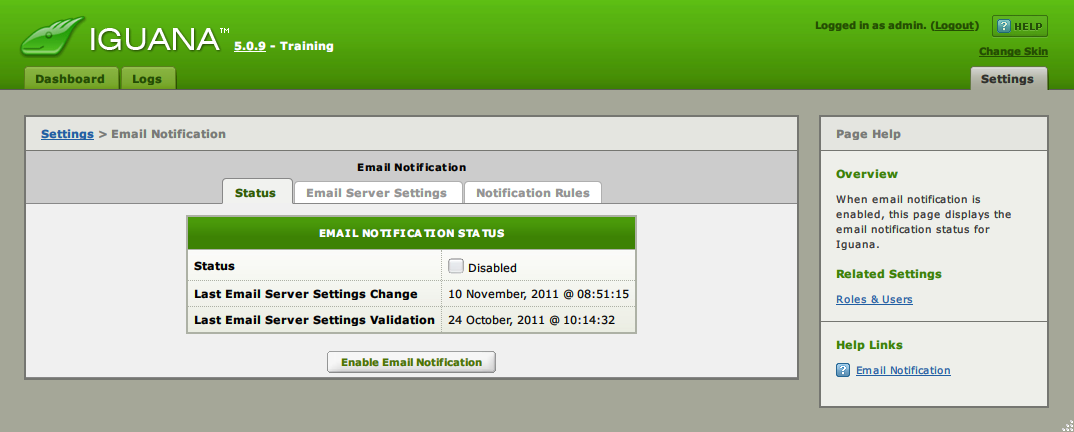
Email server settings [top]
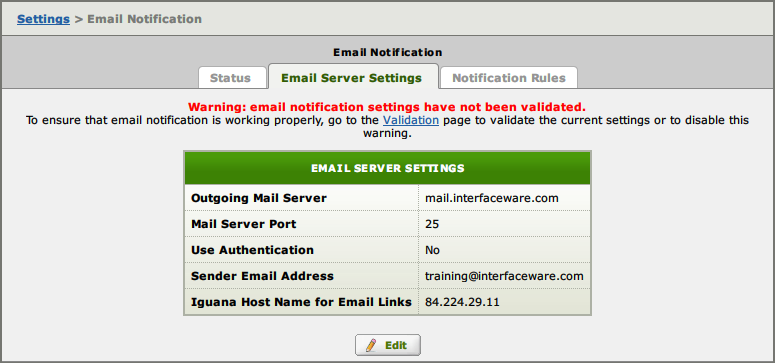
Use the Email Server Settings tab to configure the SMTP server that Iguana will use to send email notifications.
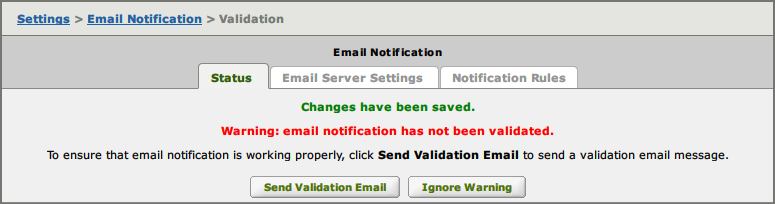
Note: If you see a warning message about validation similar to the screenshot below, just ignore it for now. You will validate your settings at the end of this procedure.
- Click the Edit button to enable editing.
- In the Outgoing Mail Server field, enter the SMTP server that you wish to use to send notification emails.
- In the Mail Server Port field, enter the number of the port used by the email server. The default port is usually 25.
- Enable the Authentication option if your SMTP server requires that you log in correctly before sending messages. In the fields that appear, enter the correct login information:

- In the Sender Email Address field, enter the email address that you want to use to send the notifications emails.To include an Environment Variable in the Email Address, use ${variable name}. The Email Address will be previewed like this:
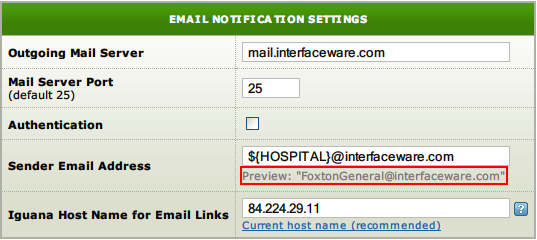
- In the Iguana Host Name for Email Links field, enter the base for URL links included in notification emails.
Note: If you have problems, you can troubleshoot your SMTP server connection.
You can enter a port number (myhost:80), or the Iguana Web Server Port used.
It is also possible to create links starting with https://. There are two options:
- If you enter 84.224.29.11 then links will start with http://84.224.29.11:6543/
- If you enter 84.224.29.11:80 then links will start with http://84.224.29.11:80/
- If you enter myhost then links will start with http://myhost :6543/
- If you enter myhost:80 then links will start with http://myhost :80/
- Set the Iguana Web Server Port to use https://
- Prefix the host name with “https://” (new in Iguana 5.5)
- Click Save Changes to commit your edits.
- Click Send Validation Email to test the results.
Warning! The Iguana Host Name for Email Links field is the IP Address for the server machine used to send email notifications. If this IP address changes, the emails may not work. For example, if using a 3G mobile internet, this feature will not send email reliably. Ideally, you should assign this field a static IP; alternatively, use DNS resolution (talk to your network guy).
Troubleshoot your SMTP server [top]
Follow these steps:
- Do you know your SMTP Server and the port number?
- If you are not sure of the port number try 25.
- Choose [Show SMTP log…] while sending a Validation Email.
- Check if the firewall, antivirus or spyware is interfering.
- You may need to open the SMTP Server port in the firewall.
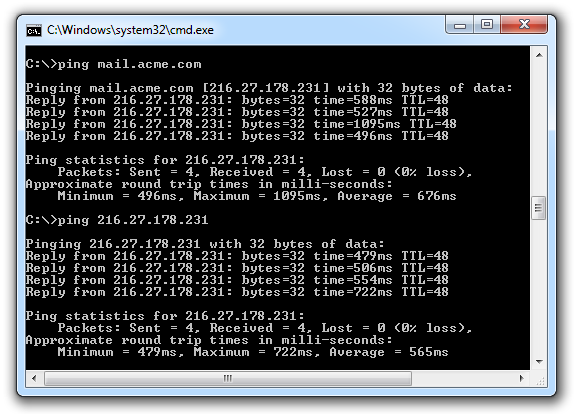
- Ping your SMTP server to see if it is alive.
- This is of limited use:
- You cannot ping a port.
- Ping may be disabled on the server.
- This is of limited use:
- Telnet to the mail server.
- Enabled by default on Mac OS X, Linux and Unix.
- On Windows you can enable telnet or use PuTTY.
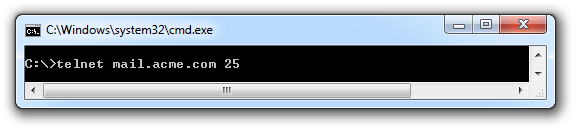
- Commands to use:
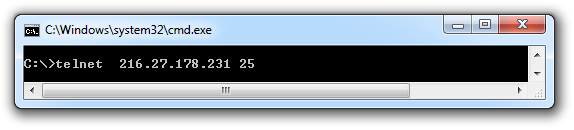
- telnet <SMTP mail server name -OR- IP address> <port number>
- telnet mail.acme.com 25
- telnet 216.27.178.231 25
- Once telnet connects try the help command.
- telnet <SMTP mail server name -OR- IP address> <port number>
- Interpreting the results:
- If telnet or PuTTY works your settings are correct.
- If ping works the SMTP server is alive.
- If telnet or PuTTY fails the port is incorrect (or blocked).
- If ping fails the SMTP server IP/name is probably incorrect.
- If telnet or PuTTY works then settings are correct.
- If telnet or PuTTY fails then Server IP/name and/or port are incorrect (or blocked).
- At this point you may want to check again if your firewall is blocking the SMTP Server port.
- If you still cannot connect you need to confirm the SMTP Server name and port with your network administrator.
Steps in more detail:
- Do you know your SMTP Server and the port number?
- If you are not sure of the port number try 25.
- Choose [Show SMTP log…] while sending a Validation Email.

- Check if the firewall, antivirus or spyware is interfering.
- You may need to open the SMTP Server port in the firewall.
- Ping your SMTP server to see if it is alive.
- This is of limited use:
- You cannot ping a port.
- Ping may be disabled on the server.
- This is of limited use:
- Telnet to the mail server.
- Enabled by default on Mac OS X, Linux and Unix.
- On windows you can enable telnet or use PuTTY.
- Commands to use:
- telnet <SMTP mail server name -OR- IP address> <port number>
- telnet mail.acme.com 25
- telnet 216.27.178.231 25
- Once telnet connects try the help command.
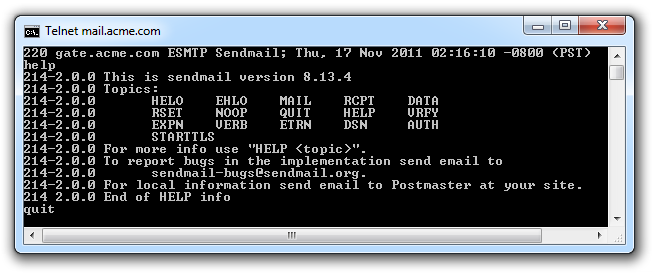
- You should see something like above (will vary depending on the mail server).
- Type quit and press enter to leave the telnet session.
- telnet <SMTP mail server name -OR- IP address> <port number>
- Using PuTTY on windows to make the telnet connection.
- Download and install PuTTY.
- Commands to use:
- Enter the <SMTP mail server name -OR- IP address>
- Change the port number.
- Select Telnet for Connection Type.

- Set telnet negotiation mode to passive.
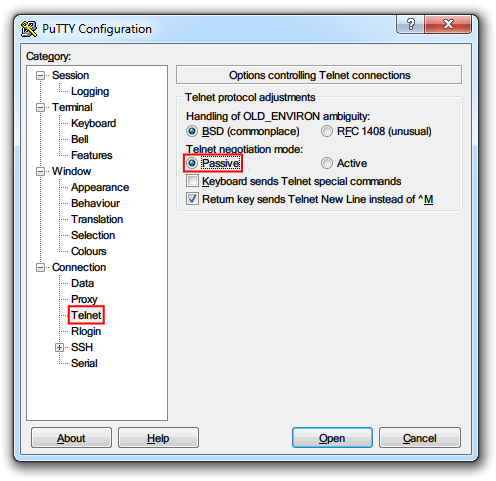
- Press Open to start the PuTTY (telnet) session.
- Once PuTTY connects try the help command.
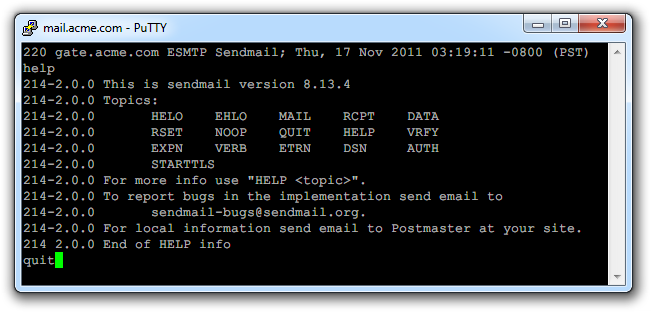
- You should see something like this (will vary depending on the mail server used)
- Type quit and press enter to leave the PuTTY session.
- Interpreting the results:
- If telnet or PuTTY works your settings are correct.
- If ping works the SMTP server is alive.
- If telnet or PuTTY fails the port is incorrect (or blocked).
- If ping fails the SMTP server is probably incorrect.
- If telnet or PuTTY works then settings are correct.
- If telnet or PuTTY fails then Server and/or port are incorrect (or blocked).
- At this point you may want to check again if your firewall is blocking the SMTP Server port.
- If you still cannot connect you need to confirm the SMTP Server name and port with your network administrator.
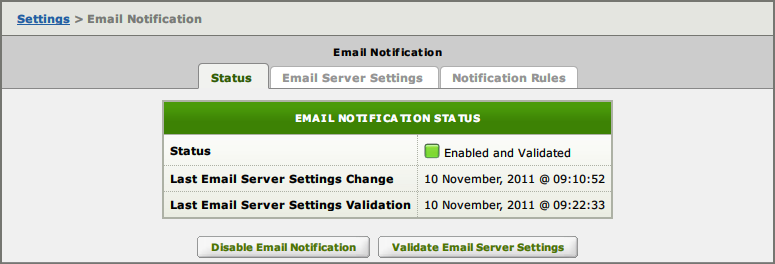
Validation Email [top]
It is important to test that the email notifications are correctly configured. Iguana makes this easy using this validation mechanism to verify that the SMTP server settings are correct.
Select Send Validation Email.
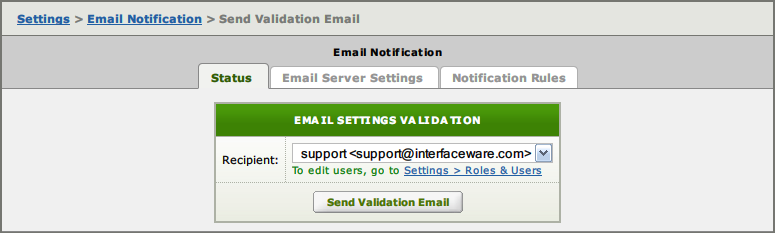
Select the email recipient and click on Send Validation Email.

You will see a progress bar as the email is generated.
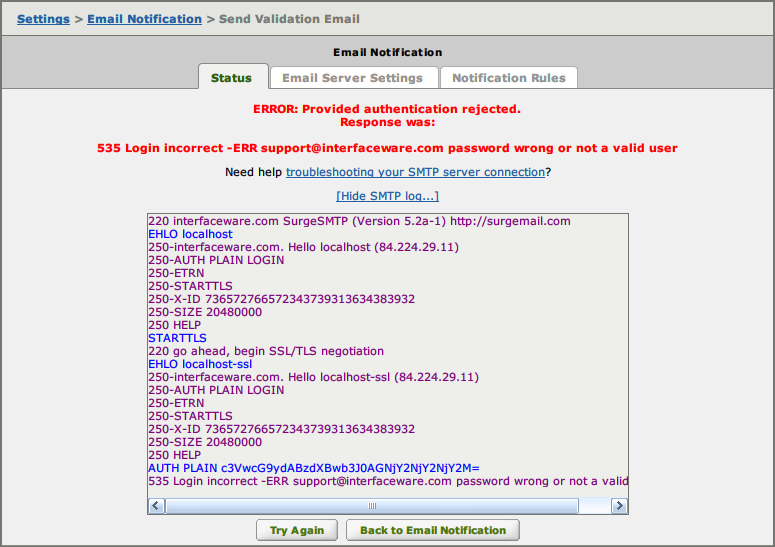
Click on [Show SMTP log…] to see the exact details.
This can be useful for troubleshooting errors – such as invalid login information for the mail server:

The email notification that gets sent will be like this (if it does not arrive promptly check your junk/spam folder)
This is to confirm that the email server settings in Iguana are working correctly.

Click the link below to complete the email settings validation.  If the link does not work,
check that the "Iguana Host Name for Email Links" option is set correctly:

http://192.168.0.190:6543/email_status.html?Action=validate_email_settings&Revision=5
If the link opens an Iguana login screen – enter your local Iguana user and password (default = admin + password)
After you have logged in you should see this confirmation screen:
Notification rules [top]
is tab is where you define notification rules for the server.
From here you can:
- Manage Standard Rules – to monitor for specific errors in the logs.
- Manage Channel Inactivity Rules – to monitor server activity.
You can create a notification rule without a Recipient and monitor it in the logs. See log entries generated for notifications.
Also see Create the Notification rule which is part of the Raising a VIP Alert example.
Standard Notification Rules [top]
Standard rules are the most flexible. They are triggered by log messages that match the pattern defined by the rule.

Select Edit to modify or Add a Rule to create a new rule:

When adding a rule you need to choose the Rule Type.
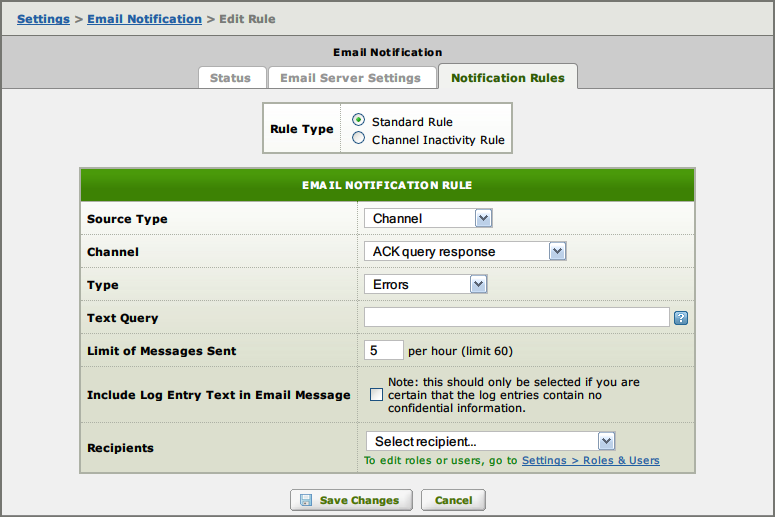
Enter desired settings and Save Changes.
Source Type:
- All entries.
- Service Entries – log entries generated by the Iguana web service.
- Channel or Group.
Channel [Group]:
- If Source Type = Channel then select a Channel to monitor
- If Source Group = Group then select a Channel Group to monitor
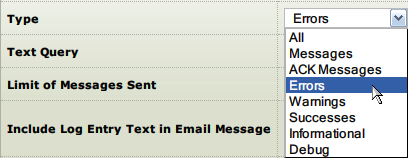
Type:
- Select the type of log entry to monitor.
Text Query:
- Specify the text strings to match.
- You can use strings with boolean logic and regular expressions.
Limit of Messages Sent:
- Limit the number of messages sent per hour.
Include Log Entry Text in Email Message:
- Choose whether to include the log entry text in the alert email.
Recipient:
- Choose the Users or Roles to email alerts to.
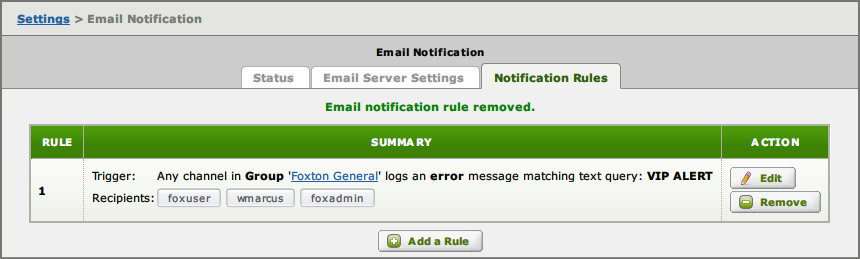
For example we might want to set up a VIP Alert for Foxton General.
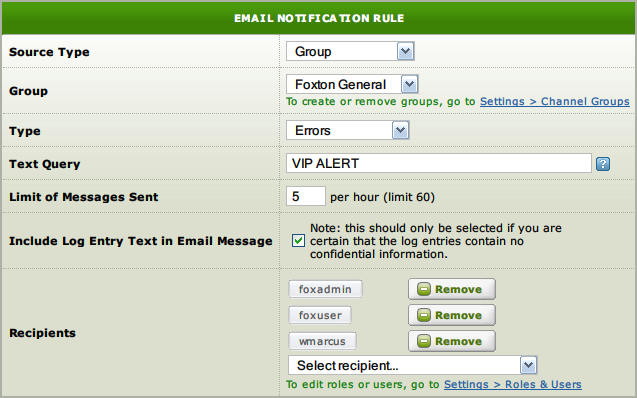
- Select the Foxton General channel group.
- Choose to monitor Errors.
- Set Text Query to look for the string VIP ALERT.
- Limit messages to 5 per hour.
- Include the Error Text in the email.
- Send emails to foxadmin and foxuser Roles and to the User wmarcus.
Note: we also need to write channel code to raise errors including the string VIP ALERT.
Channel Inactivity Rules [top]
Channel inactivity rules are triggered when a channel has no transactions for a specified period of time.
Select Edit to modify or Add a Rule to create a new rule.
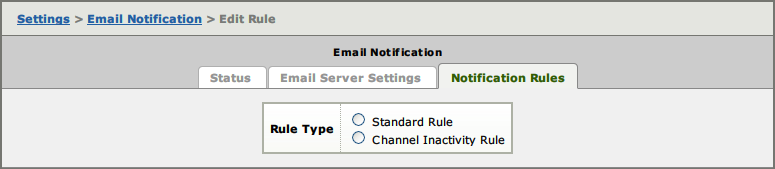
When adding a rule you need to choose the Rule Type.
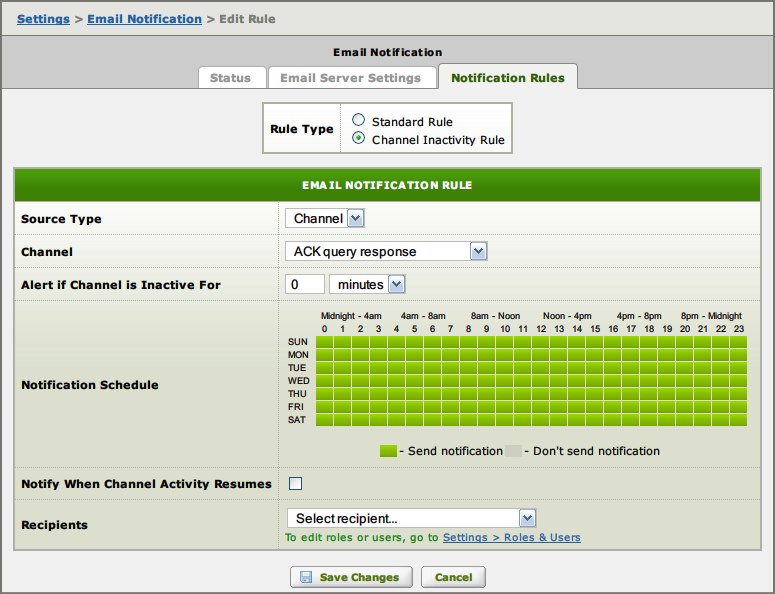
Enter desired settings and Save Changes.
Source Type:
- Choose a Channel or a Channel Group.
Channel [Group]:
- If Source Type = Channel then select a Channel to monitor
- If Source Group = Group then select a Channel Group to monitor
Alert if Channel is Inactive For:
- Set the inactivity period in minutes or hours.
Notification Schedule:
- Select when to send out alerts.
Notify When Channel Activity Resumes:
- Choose whether to alert when activity resumes.
Recipients:
- Choose the Users or Roles to email alerts to.
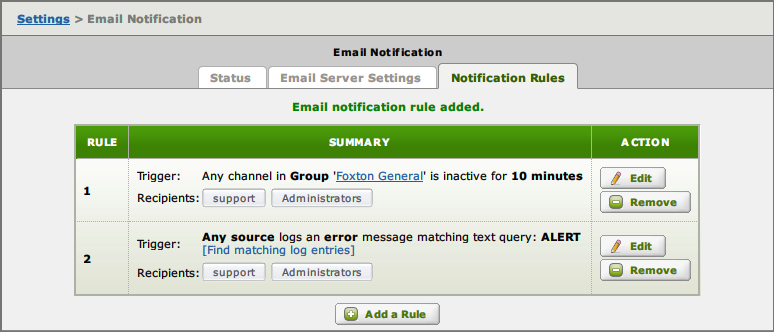
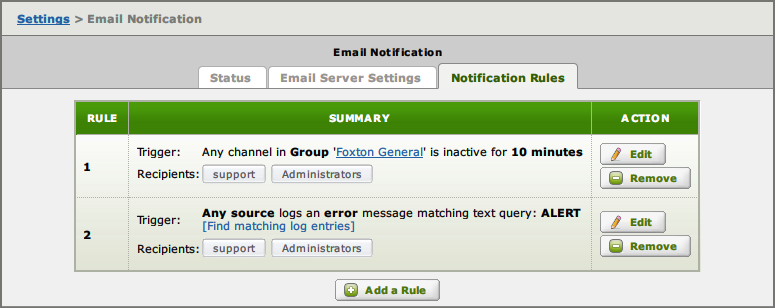
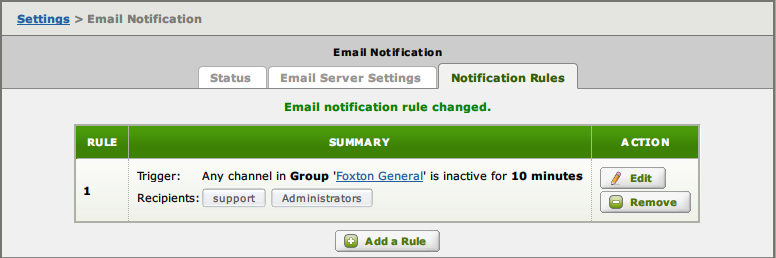
For example: Foxton General Hospital is very busy from 6am to 10pm – so we might set up a rule like this:
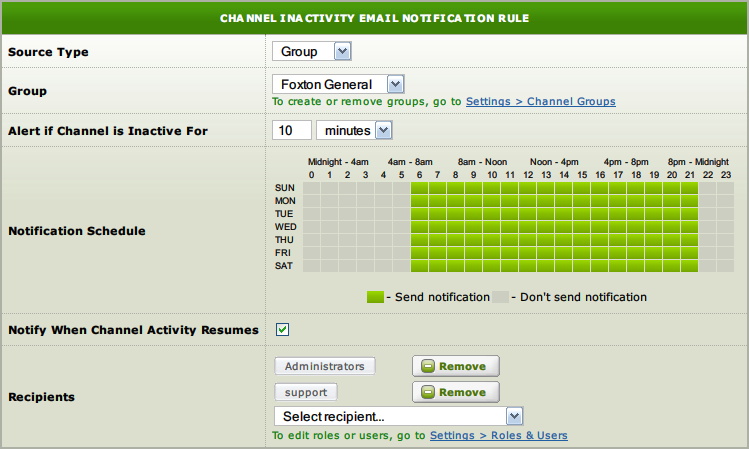
- Select the Foxton General channel group.
- Monitor from 6am to 10pm.
- Send alerts if any channels are Inactive for 10 minutes.
- Advise when Activity Resumes.
- Send emails to the support User and the Administrators Role.
Best practices for Email Notifications [top]
The following tips are designed to help you use email notification more effectively:
- Keep your email notification strategy simple.
- For best results, send error alerts to email-enabled smart phones or use SMS.
- Many organizations create an email alias like iguana_support@yourorganization.com – for Iguana administrators.
- The advantage of this is that it can be administered outside Iguana.
- You may be able to use a group that exists already (eg: server_support@yourorganization.com).
- This is easier to administer than emailing individuals.
- If you cannot create an email alias, you can use a Role in Iguana.
- See Roles and Users for an explanation of how roles work in Iguana.
- It is probably best to create a Role like yourorganization_notifications.
- Though you could just add administrative users to the built in Administrators role.
- You will probably have some people who only need notifications from specific channels.
- If there are several people with similar requirements you can use a Role.
- Otherwise just assign individual Users to the notification rules they need.
- Notifications will work best for your organization if there are clearly defined procedures to deal with them.
Log entries generated for notifications [top]
When a notification is triggered it generates an Error like this in the log:

An email and/or SMS is also generated, if sending is successful there is no log message.
However if there is a problem an error will logged.
For email:

For SMS:

User friendly email notifications [top]
One useful way to consider errors for an interface are those which are:
- Errors that should be fixed by the interface developer. These are problems that are pure errors on the part of the person that built the interfaces – they simply need to fixed and should be fixed for good. These problems are not predicted (otherwise the interface engineer would not make them!). They mostly occur when an interface is new and are mostly fixed after some time in production. Typically the error messages will be more technical and less ‘user friendly’.
- Re-occurring operational events. These represent business events which will always be occurring periodically and need an on going operational process to resolve these problems.
For an example of the later you might have an issue with a downstream application that has difficultly dealing with periodically occurring real life situation. Like perhaps a prenatal screening system which assumes that the mother is the guardian of the enfant child – but in a facility where mental illness and/or drug addiction issues mean that the mother is not the legal guardian.
The action required to correct the problem would typically be handled by non technical clerical staff that would have the responsibility of doing what ever manual procedure is designed to deal with this re-occurring event.
For these types of re-occurring operational events it becomes much more important to put attention in the format and information that is raised in these notifications. Because the users are non-technical the language should be crafted carefully to indicate the nature of the event in a ‘user friendly’ way. It should make it simple and obvious how they can go about resolving the problem.
Fortunately the Iguana translator gives you all the power you need to do just that. Because you can log arbitrary text into the logs and then trigger notifications off that data it possible to carefully craft the content on any notification you might need. See the Lua code for a VIP alert in the tutorial for an example.
Combined with the techniques for doing HL7 Conformance the translator provides an extremely power environment for making exceptionally friendly notifications and error messages to fit any kind of requirement you can imagine.
Email Notification Rule Examples
In Iguana you can use email notification rules to monitor channel activity on your system.
For example, you can create notification rules to notify you when:
- A service or channel error has occurred
- A user starts a channel
- A user stops a channel
- An idle channel has started receiving messages again
- A VIP is admitted to a hospital
- A channel that processes multiple message types detects that messages of a particular type have stopped arriving
For more information on email notification, see Email Notification.
Note: You must be a member of the Administrators Role to create an email notification rule. See the Role page for more information.
Detecting Service Errors [top]
The most common use of email notification rules is to inform you when a serious error has occurred in the system or in a channel. To create a notification rule that tells Iguana to send you an email message when a system error has occurred or a channel has stopped because an error has occurred, perform the following steps:
- Click the Settings tab at the top right of the screen. In the Settings screen, click E-mail Notification.
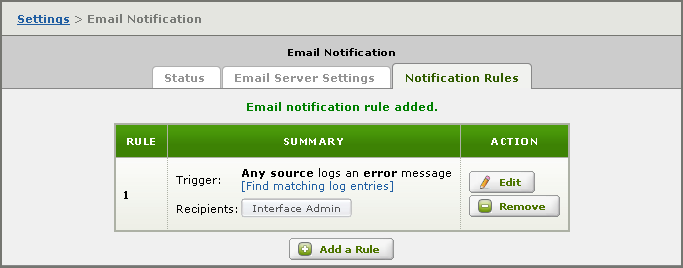
- Click the Notification Rules tab.
- In the Email Notification Rule screen, click Add a Rule.
- Select the Standard Rule radio button. A screen appears, enabling you to configure the email notification rule:

- From the Source Type list box, select [All Entries].
- From the Type list box, select Errors.
- In the Limit of Messages Sent field, type 10.
- Select the Include Log Entry Text in Email Message check box. This will include the contents of the error in your email message.
- From the Recipients list box, select one or more users or groups that will receive notification email messages when a log message appears that matches the criteria defined in this rule.
- Leave all other fields unchanged.
The Edit Rule screen should now look something like this:
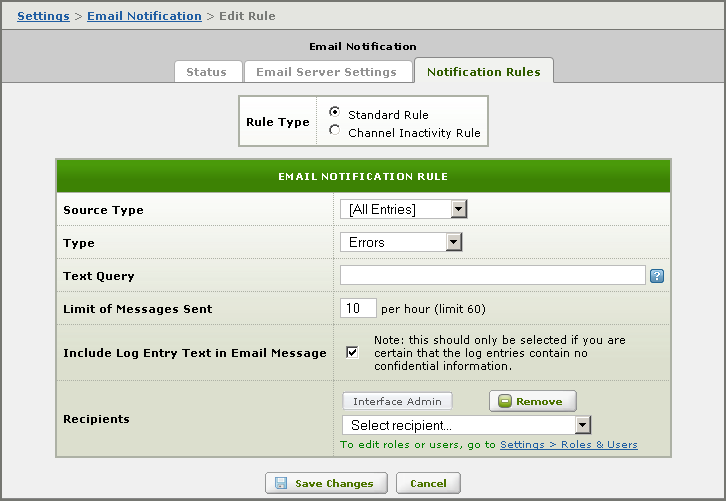
- Click Save Changes to create this rule:
When User Starts a Channel [top]
To create a notification rule that notifies you when a user has started a channel:
- Click the Settings tab at the top right of the screen. In the Settings screen, click E-mail Notification.
- Click the Notification Rules tab.
- In the Email Notification Rule screen, click Add a Rule.
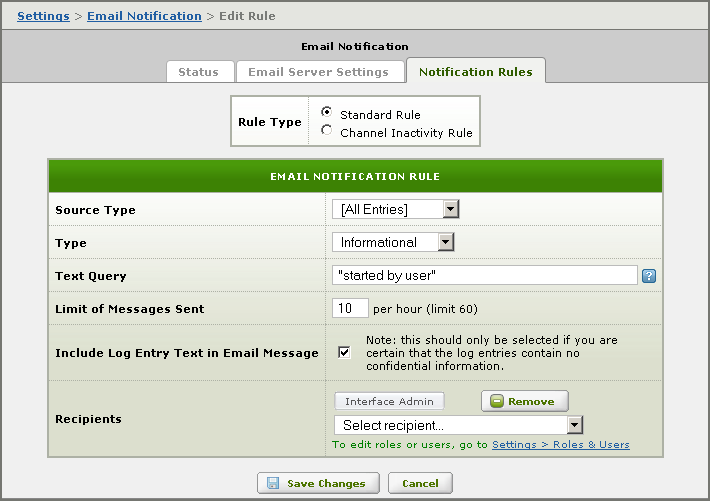
- Select the Standard Rule radio button. A screen appears, enabling you to configure the email notification rule:

- From the Source Type list box, select [All Entries].
- From the Type list box, select Informational.
- In the Text Query field, type “started by user” (including the quote characters).
- In the Limit of Messages Sent field, type 10.
- Select the Include Log Entry Text in Email Message check box. This will include the contents of the log message in your email message.
- From the Recipients list box, select one or more users or groups that will receive notification email messages when a log message appears that matches the criteria defined in this rule.
The Edit Rule screen should now look something like this:
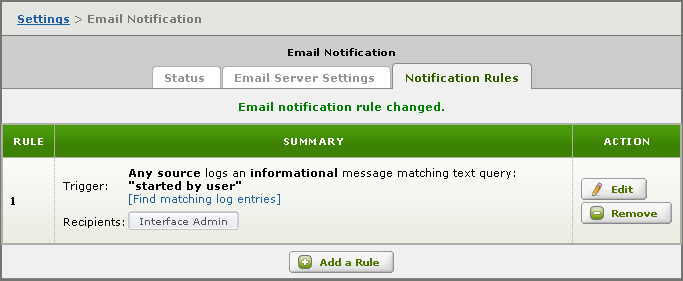
- Click Save Changes to create this rule. The rule now appears on the email notification rule page:
When User Stops a Channel [top]
To create a notification rule that notifies you when a user has stopped a channel:
- Click the Settings tab at the top right of the screen. In the Settings screen, click E-mail Notification.
- Click the Notification Rules tab.
- In the Email Notification Rule screen, click Add a Rule.
- Select the Standard Rule radio button. A screen appears, enabling you to configure the email notification rule:

- From the Source Type list box, select [All Entries].
- From the Type list box, select Informational.
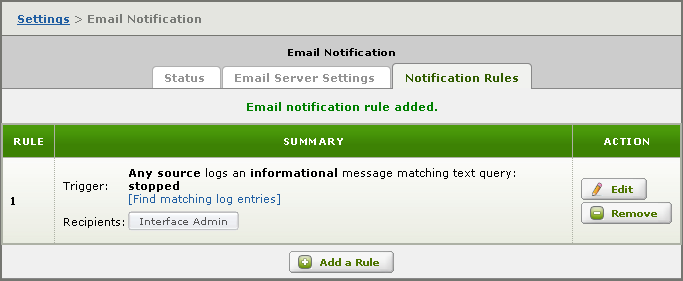
- In the Text Query field, type stopped.
- In the Limit of Messages Sent field, type 10.
- Select the Include Log Entry Text in Email Message check box. This will include the contents of the log message in your email message.
- From the Recipients list box, select one or more users or groups that will receive notification email messages when a log message appears that matches the criteria defined in this rule.
The Edit Rule screen should now look something like this:

- Click Save Changes to create this rule. The rule now appears on the email notification rule page:
Sending a Notification When the Server Is Restarted [top]
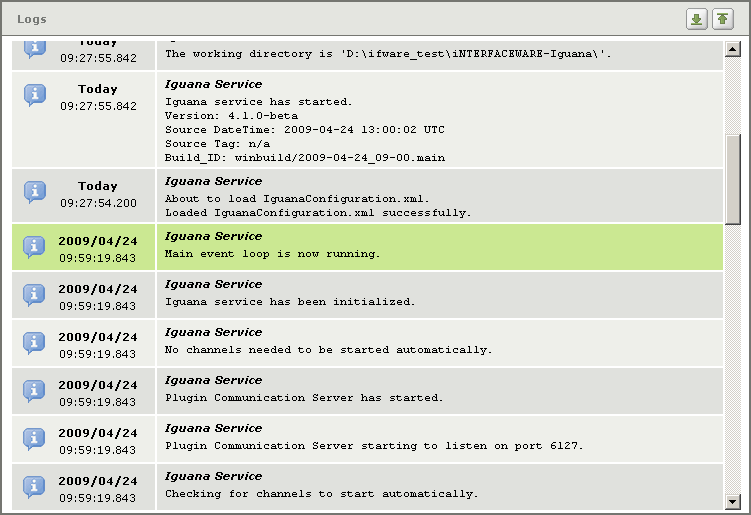
You can create an email notification rule that notifies you when your Iguana server is restarted. This email notification rule looks for occurrences of a message with the text Main event loop is now running, which is a message that is written to the log file whenever the Iguana server is started.
To create an email notification rule to notify you when your Iguana server is restarted:
- Click the Settings tab at the top right of the screen. In the Settings screen, click E-mail Notification.
- Click the Notification Rules tab.
- In the Email Notification Rule screen, click Add a Rule.
- Select the Standard Rule radio button. A screen appears, enabling you to configure the email notification rule:
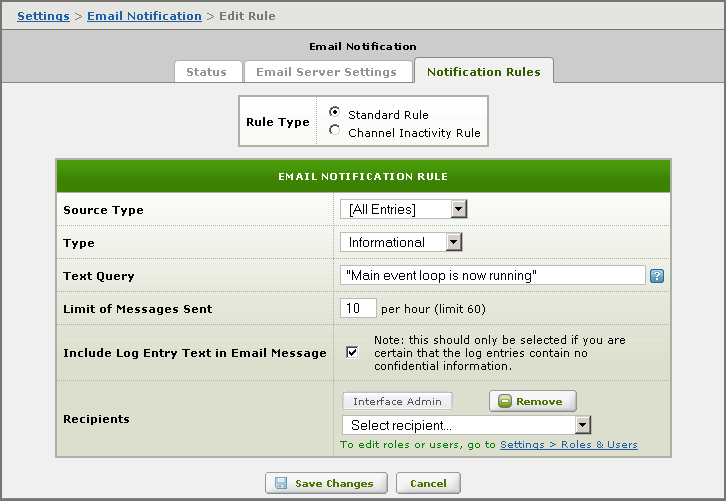
- Click Save Changes to create this rule. The rule now appears on the email notification rule page:
Note: If you are running the Windows operating system, you can instruct the system to restart Iguana if it fails. To do this:
- Open the Control Panel window.
- Select Administrative Tools and Services.
- In the Services window, right-click the Iguana service (for example, iNTERFACEWARE Iguana) and select Properties.
- Click the Recovery tab.
- From the First failure list box, select Restart the Service:
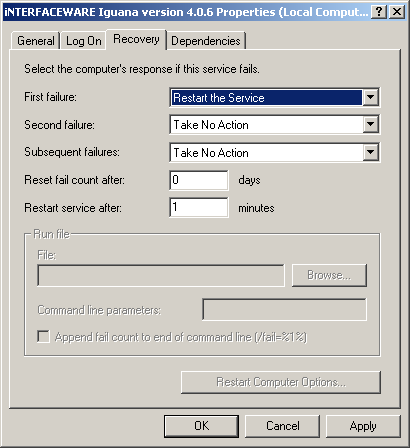
- Click OK to instruct Windows to restart Iguana if it fails.