When working with the following types of channels, you must also create and update database tables in the following situations:
- If you create a new channel whose source component is From Database, database tables must be defined for this channel. One database table is created for each table that you defined in your VMD file, and one status table is created for each message definition in your VMD file. (For an example of these tables, check out the Database to HL7 tutorial.)
- If you create a new channel whose destination component is To Database, database tables must be defined for this channel. One database table is created for each table that you defined in your VMD file. (If these database tables already exist, you can import them directly into your VMD file. See Using the Database Table Importing Wizard for more details. For an example of how these tables are used, see the HL7 to Database tutorial.)
In either of the above cases, if you edit the tables in your VMD file, you must ensure that your database tables are updated to match what you have edited.
From Iguana, you can export the database tables that your channel requires. To export the database tables:
- Create a channel that uses either From Database as its source, or To Database as its destination.
- Once you have finished setting up the channel settings, click Add Channel. The Configure Channel screen reloads to include a new Tables tab:
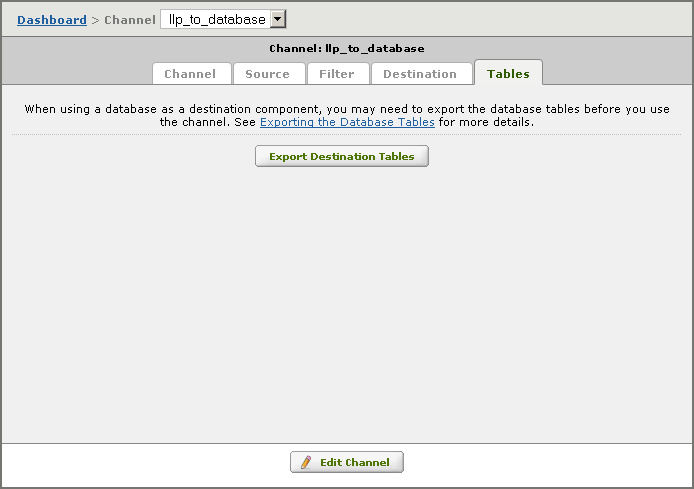
- Depending on how you have configured your channel, the new Tables tab will display one of the following buttons:
- Click Export Source Tables to export the database tables that the source component of your channel requires.
- Click Export Destination Tables to export the database tables that your destination component requires.
- Click Export Source and Destination Tables to export tables for both components.
- If no errors were detected in the database export process, a confirmation screen appears. This screen lists the database commands that will be used to export the tables:
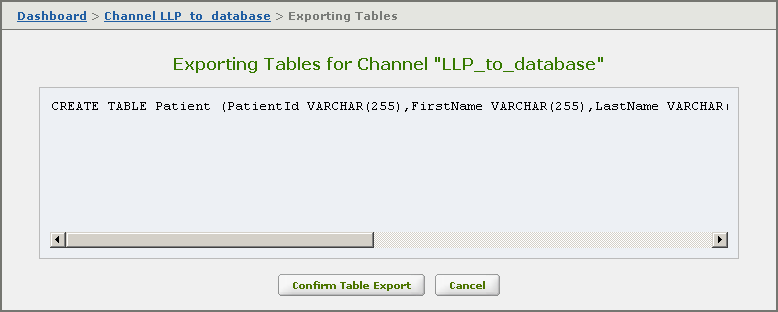
- Click Confirm Table Export to confirm that you want to export the tables. A screen appears, indicating that the database tables have been exported:
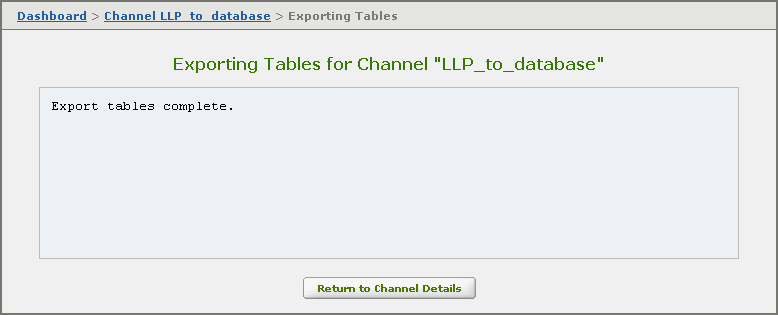
- Click Return to Channel Details to exit this screen. The database tables have now been added successfully.
Warning! If you export data tables that already exist, the existing tables will be dropped and new ones will be created. This may lead to data loss.