- Introduction
- Manage Users
- Manage Roles
- Synchronize Users and Roles with Remote Iguana Servers
- Manage External Authentication
Introduction
Iguana uses a rich Role Based permission system which allows enterprises to control access to different features and actions.
The Administrators Role and the admin User are built in to Iguana.
- Only user in the Administrators Role can make changes to the Administrators Role
Note: before Iguana 5.6 only the admin User could make changes to the Administrators Role - Neither can be deleted.
Also see Raising a VIP Alert which walks you through creating a user and an email alert.
Manage Users [top]
We use this tab to manage Users and the Roles they are responsible for.
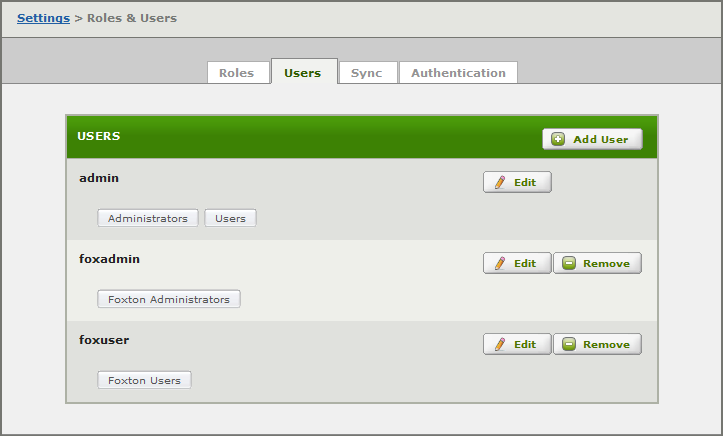
- Click Add User to create a new User.
- Edit to modify a User.
Note: the only difference between creating and editing is that you cannot change the user name while editing.
- Remove to delete a User.
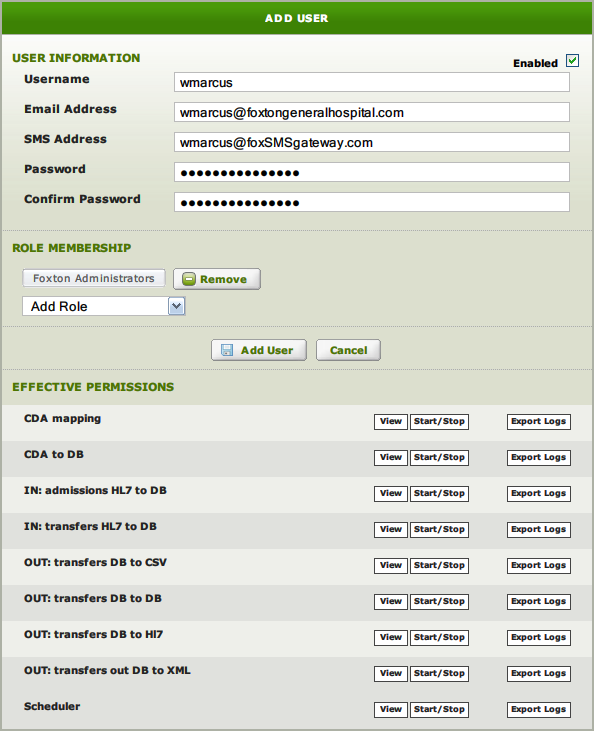
Enter the User details and select Add User – Save Changes when editing.
Enabled:
- Checkbox at top right.
- Use to enable/disable the user.
Username:
- User logon name for Iguana.
Email Address:
- Email address to use for notification alerts.
- Optional.
SMS Address:
- SMS address to use for notification alerts.
- Optional.
- SMS messages are truncated to 140 characters, to ensure they will pass through the SMS gateway.
Password / Confirm Password:
- Enter and confirm password.
Role Membership :
- Select the Roles for the user.
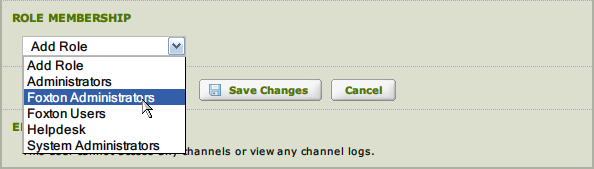
- Required – every user must belong to one or more roles.
Effective Permissions:
- Shows the total permissions for the user – the sum of access granted by all Roles.
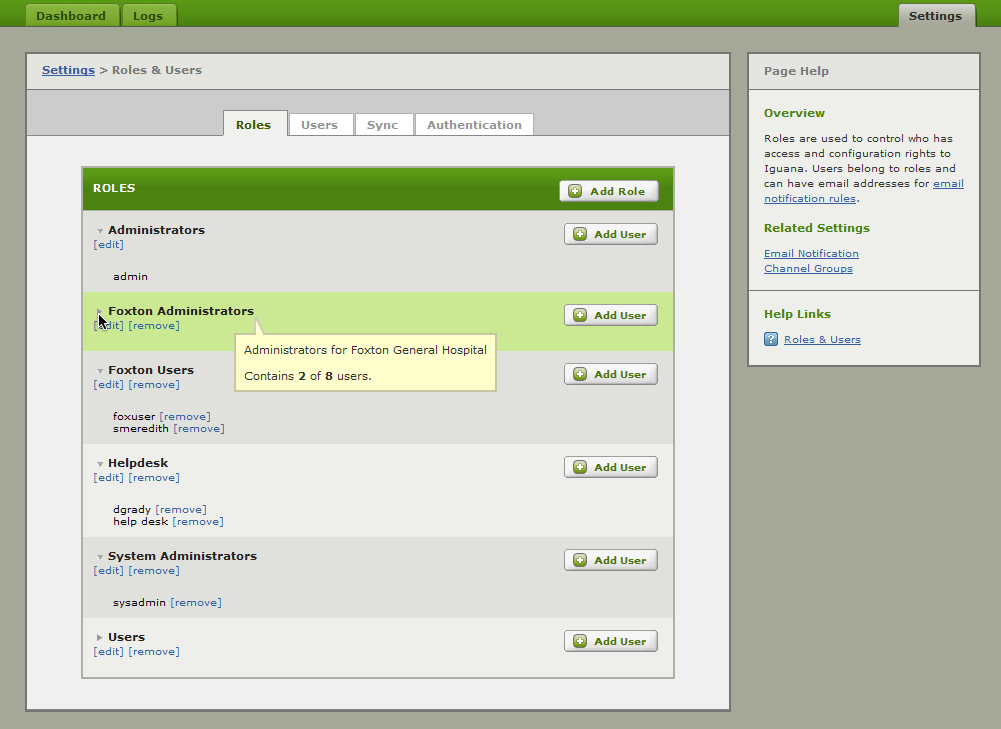
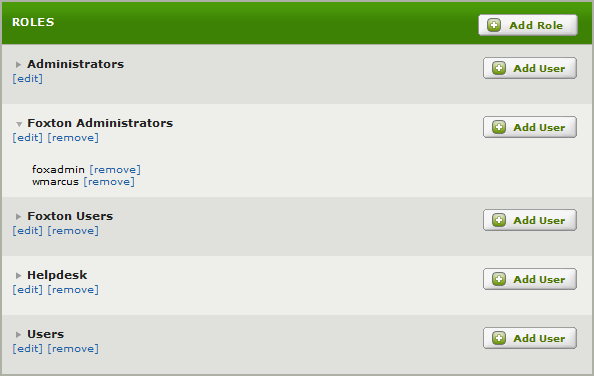
Manage Roles [top]
In this tab we manage Roles, and the permissions assigned to Roles. Roles are then assigned to Users to control access.
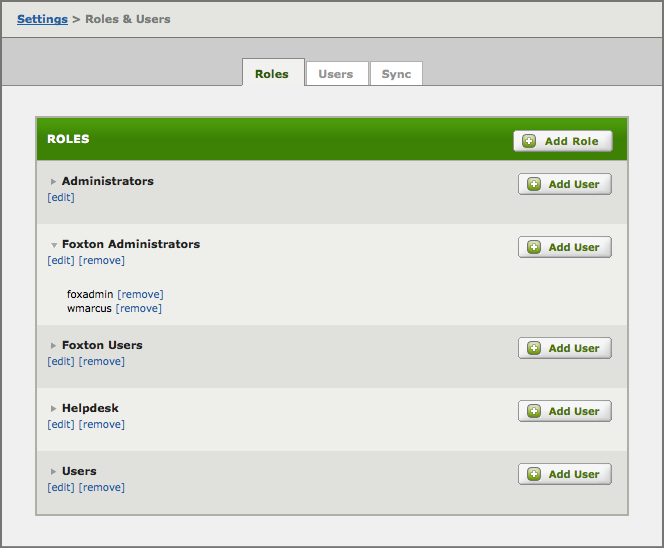
- Click Add Role to create a new Role.
- [edit] to modify a Role.
Note: the only difference between creating and editing is that you cannot change the role name

- [remove] to delete a Role.
Enter the Role details and select Add Role – Save Changes when editing.
Name:
- Name of the Role.
Description:
- Description of the Role.
Channel Groups:
- Select the Channel Group(s) for the Role.
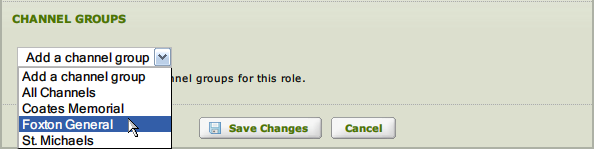
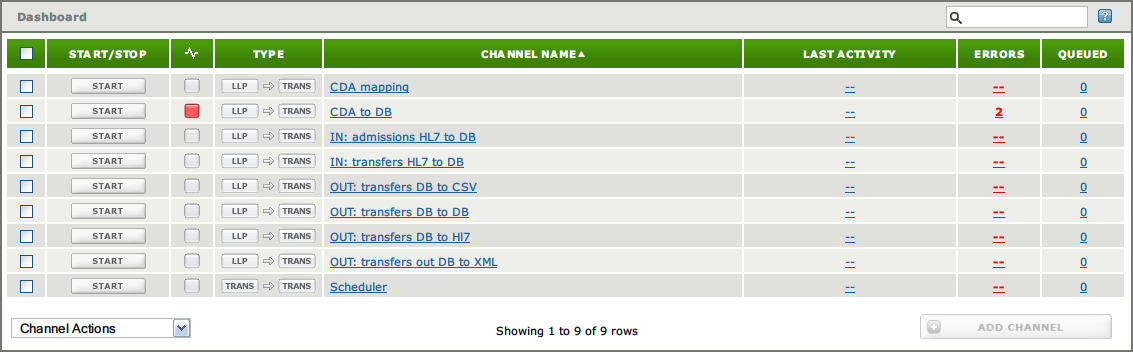
- Users assigned to this role will only see channels in the selected group(s) when viewing the Dashboard.
Note: if no group is selected the user will see an empty Dashboard (no channels visible).
Synchronize Users and Roles with Remote Iguana Servers [top]
Use this tab to Synchronize Users and Roles from a Master Server with one or more Remote Iguana Servers.
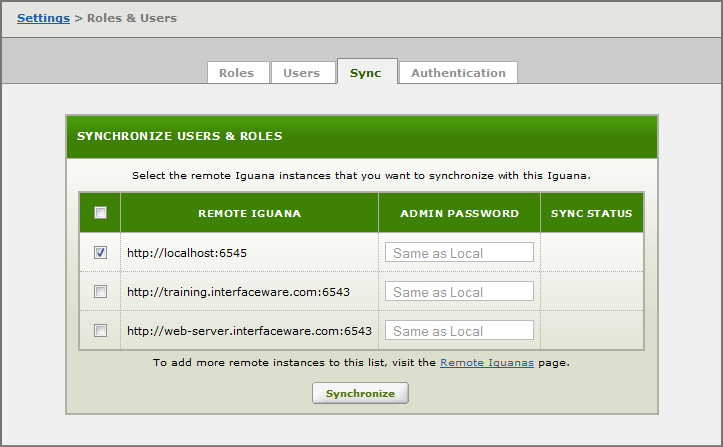
Select the target Remote Server and click Synchronize.
- All Users and Roles on the target server will be deleted.
- All Users and Roles on the Master Server (this server) will be copied to the target.
Note: Before synchronization, the remote server’s configuration file is copied from IguanaConfiguration.xml to IguanaConfiguration.xml.beforeSync. This enables you to manually roll back synchronization if necessary.
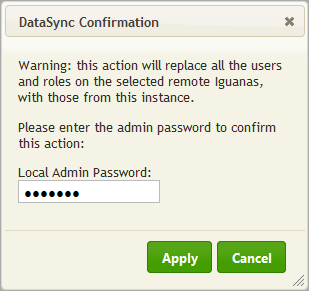
Enter your Admin Password and click Apply.

Select Undo to rollback the synchronization process.
- The Undo option is available while you remain on this tab.
- If you need to undo a synchronization later, use the IguanaConfiguration.xml.beforeSync file.
If you choose Undo you will see the following:
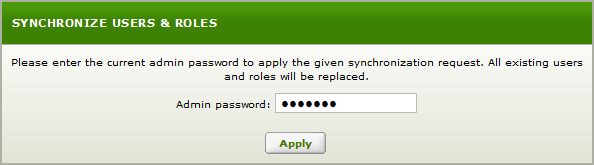
Enter the admin password and click Apply.
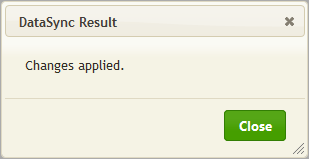
This dialog confirms that the synchronization was reversed, click Close.
You can also look at Synchronize Iguana Servers and Undoing an Iguana Synchronization.
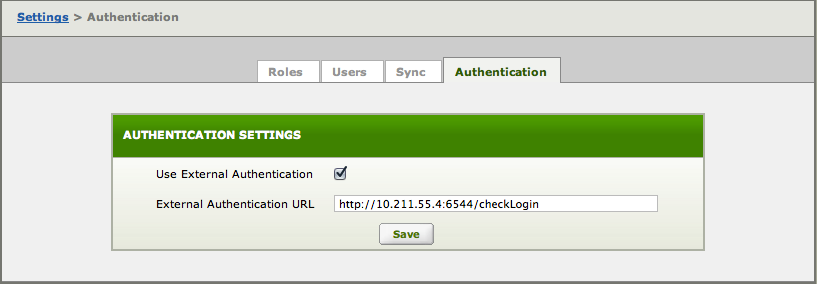
Manage External Authentication [top]
Use this tab to specify an External Identity Store to be used to check login credentials. This feature was introduced in Iguana 5.6.
Using a RESTful web-service to provide authentication is a simple and elegant solution that enables you to use any type of validation you choose (LDAP, SAML etc).
To setup external authentication:
- Go to the the Dashboard and choose the Settings tab.
- Click on Roles and and Users and choose the Authentication tab.
- Check Use External Authentication, to tell Iguana to try external authentication before local authentication.
- Enter the External Authentication URL to use when forming external authentication queries.
- Click Save.
See the How do I use External Identity Store for Authentication FAQ for more information on how this works, and a sample HTTPS Translator script that performs validation.
Warning: You must use a web service (http:// or https://), a direct LDAP link (like ldap://10.211.55.4:6544/checkLogin) does not work.
