For Modules and Functions
Contents
Auto-completion is no longer restricted to parsed message data! Now Iguana offers scripting support for any globally or locally defined item: modules, functions, variables, parameters, you name it. This is particularly useful when you are trying to call a function correctly but are unsure of what variables, parameters or syntax are required in order to use it correctly.
How It Works
- Start typing out the name of the module or function that you wish to use. Based on what you type, Iguana’s auto-completion tool will instantly search for and list all possible options available to you.In this example, we want to create a local variable (Orig) that organizes the contents of an incoming HL7 message into a node tree (this common practice makes working with message data much easier). As you can see below, we’ve already created and named the Orig variable. Now we just need to assign it a function that will read an incoming message and parse its contents into individual segments correctly.We suspect that such a function exists in Iguana’s shared libraries, perhaps in an HL7-related module? Let’s investigate by typing “hl7”:
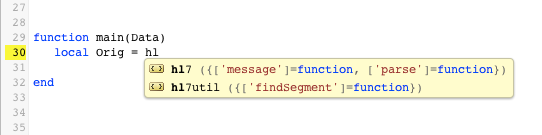
Before we even finished typing, auto-completion immediately responds and correctly guesses that we might be trying to access either the hl7 module or the hl7util module. - To choose an item from an auto-completion list, click on your selection using the mouse (or scroll up and down through the list using your arrow keys). Once selected, the auto-completion tool will type out the rest of the item for you.In this example, we decided to choose the hl7 module because it mentions a ‘parse’ function in its notation:
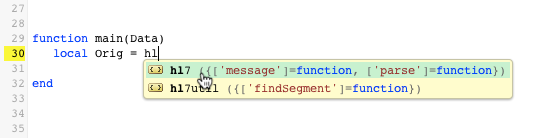
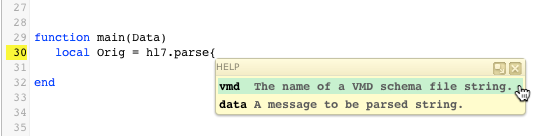
- Notice that Iguana doesn’t stop here! Auto-completion will continue to drill down and provide “what next” hints and options for each selection made until no other options are possible.In this example, auto-completion indicates that the hl7 module we’ve chosen offers two possible functions: message and parse:

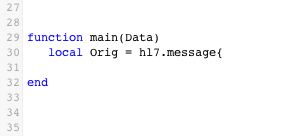
After reading the brief descriptions provided, we’ve found the one that we want to use. Once we select the correct option (parse), auto-completion types out the rest of the function using the proper syntax. It even remembers to include the required brackets:
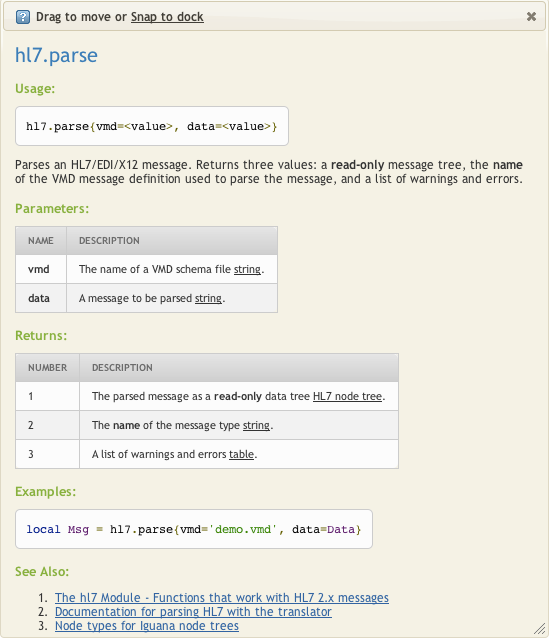
- Notice that some auto-completion lists are displayed using a yellow Help dialog. This indicates that further information is available via Iguana’s new help system. Whenever you come across this kind of dialog, simply click the expand icon to open on-the-spot, comprehensive help about the options being offered. In this example, auto-completion is telling us that in order to use the hl7.parse function correctly, we will need to define two parameters: vmd and data. To better understand how to define these items, we decide to take advantage of the help being offered:
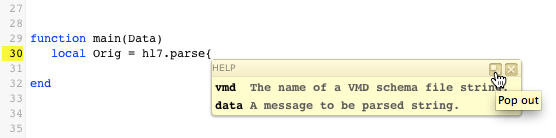
For the hl7.parse function, the following help dialog appears:
- When you are finished reading through the help provided, simply return to your script and continue selecting through each auto-completion list offered, filling in the blanks as you go.
Note: When you close the help dialog, you may have to “reactivate” auto-completion. Try hitting the space bar or pressing the delete key (or one and then the other).
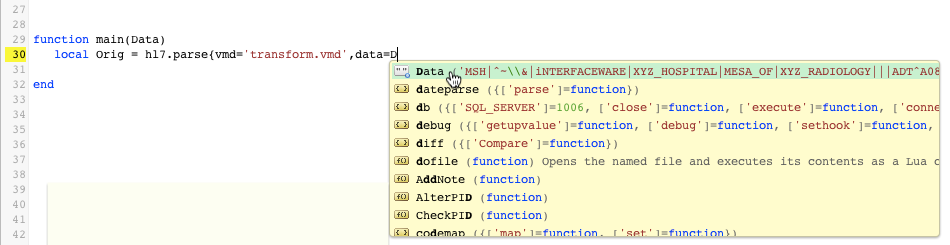
In this example, we’ve reviewed the help and figured out what is required. We have to define the vmd parameter with a file that describes the way we want each message to be segmented (‘transform.vmd’):
We also need to define the data parameter as any incoming messages called by the main function (Data):

Once all our selections are finished, auto-completion even ensures that we close the brackets to complete the script correctly:
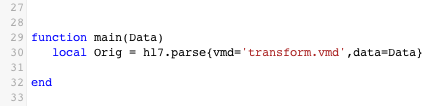
Success! Thanks to auto-completion, we were able to call a function and define its parameters correctly without having to look up APIs, search through modules or wrestle with errors.