Web Server Settings
Contents
Iguana has a web interface that makes remote administration and monitoring easy. By default, Iguana’s web server is configured to run on port 6543. If another application is using that port on your machine, you must change the default port that Iguana is run on.
Note: For information on how to use ports in Iguana, see Port Management Tips.
To change Iguana’s default web server port:
- Open Iguana, and click the Settings tab at the top right.
- Choose Web Server Configuration.
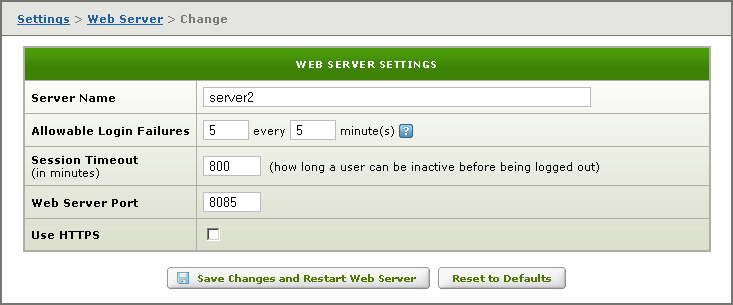
- In the Web Server Settings page, click Edit, then enter the Web Server Port that you want to use. In the example below, port 8085 is selected.
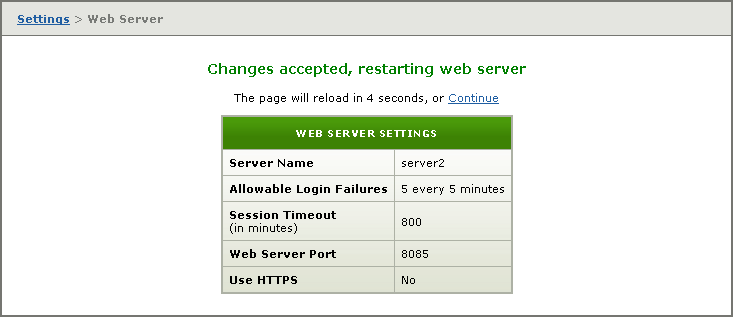
- Click Save Changes and Restart Web Server. A screen appears indicating that the web server is about to be restarted:
- Once the web server has restarted, the Web Server Settings page is redisplayed.
You can also change the web port by editing the Configuration XML File.
Changing the Server Name
Naming your Iguana instance gives it a label that makes it easier to manage multiple servers. This name will be displayed on Dashboard, and can be seen in the “ServerName” entry when running the http://localhost:6543/monitor_query? command.
Note: The Server Name is merely a label, it bears no relation the URL used to access your Iguana Server.
- From the Dashboard, click the Settings tab.
- Click the Web Server Configuration button.
- In the Web Server Settings window, here the server is unnamed. Click the Edit button:

- Enter the Server Name field, and click the Save Changes and Restart Web Server button:

The changes will usually be accepted without requiring a restart:

Changing the Web Port in the Configuration XML File
To change Iguana’s default web server port via the configuration XML file:
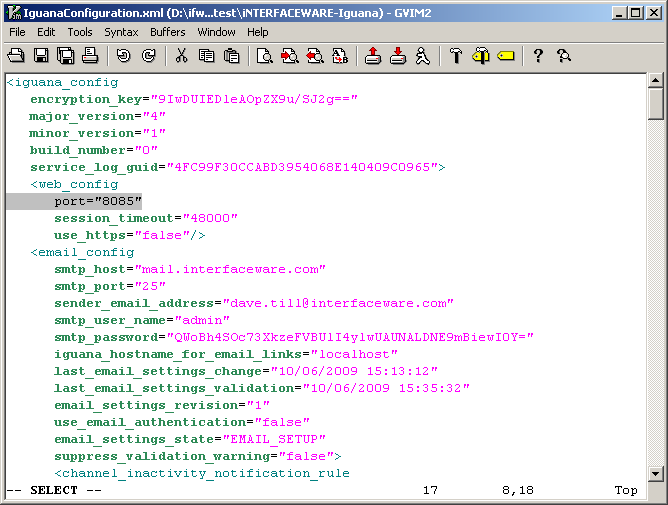
- In the Iguana installation directory (e.g. C:\Program Files\iNTERFACEWARE\Iguana), use a text editor to open IguanaConfiguration.xml.
- In the <web_config> section, edit the port attribute to be the port that you want to use. In the example below, port 8085 is used:
- Save your changes.
- In the directory in which you have installed Iguana, right-click the Iguana Internet shortcut and select Properties.
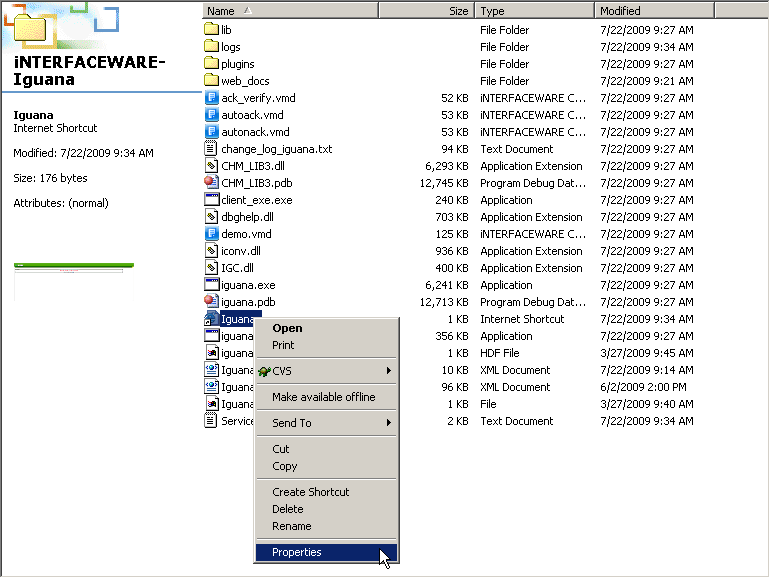
- The Iguana Properties window appears:

- Select the Web Document tab, and edit the URL field so that the port number after localhost: is the port that you chose above.
- Click OK to save your change.
- Stop and restart the Iguana Service.
Note: This is required when you change the web port on which Iguana is running.