- Introduction
- Create database tables
- Create the Channel
- Create From Translator Script
- NHCCVIS Test Data
- Write From Translator Script
- Run the Channel
- Add Translator Filter
- Import Sample Data
- NHCCVISREPORT Test Data
- Create an empty HL7 Message
- Prepare to Map Data
- Write the Mappings
- Test the Channel
- Resubmit a Message
- Test: Compare to old Interface
- Test: Generate Test Data
- Test: Make Data Comparable
- Test: Old Data versus New
- Test: Retrieve Old data
- Test: Compare Outputs
- Test: Code for the diff Module
- Test: Final Code Tweaks
- Next Steps
Introduction
This article was originally written for Iguana 5 so it contains version 5 screenshots, and may contain out of date references. The principles used however remain valid.
If you have any questions please contact us at support@interfaceware.com.
This tutorial uses the Iguana Translator to map patient data from a database to an outgoing stream of HL7 messages. It is based on work done to with a client to convert a legacy Iguana 4.5 Database channel to the Iguana Translator.
One thing that is a little unusual is the structure of the NHCCVSREPORT table that is used to populate the interface. This table was originally set up by our client specifically for driving the interface in Iguana 4. He used a mixture of stored procedures and VB.NET code to populate the table, which made sense for working with the From Database channel component in Iguana 4. With Translator it would be a lot easier to pull the data directly from the database, by using SELECT queries. However we decided to use the existing NHCCVSREPORT table as it is already available, and a reliable proven solution.
The Problem:
- The client currently uses a legacy Iguana 4.5 channel:
- The channel uses the a legacy From Database component
- Two database tables are supplied for retrieving the data:
- NHCCVS: A “queue” containing the messages to be processed.
- NHCCVSREPORT: A table containing the data for those records.
- The data is output using a custom HL7 message format NHCCVIS, as defined by the client.
- The client has supplied us with the CVISOutbound.vmd file that defines the format of the custom message, and the tables.
- The client needs to verify that the new solution produces the same results as the legacy channel.
The Solution:
- Implement a new channel in the Iguana Translator:
- It will use a From Translator component to poll the database for messages to be processed.
- It will use a Filter component to map the data to the NHCCVIS message.
- It will use an LLP Cient component to send out the HL7 messages.
- We will use the file to create the message and the database tables.
- We will create a regression test channel, to compare the output from the new and old solutions.
A Better Solution?
If we were creating this from scratch rather than converting an old channel we would suggest one change. We would not use the NHCCVSREPORT table, instead we would use SQL queries in the Translator to pull the data directly from the database tables. This would make the solution much quicker and easier to develop (certainly easier than stored procedures and VB.NET), and all the code is in kept in one place, contained in the Translator. Because of this, the solution would be simpler and easier to maintain.
Next Step?
Now we have defined the problem and the solution. The next step is to create the database tables that we will use for this tutorial.
Create database tables [top]
Obviously I did not have access to my client’s database on my system so I used the VMD file (CVISOutbound.vmd) they sent me to make a dummy From Database channel like this:

From there I clicked on the “Tables” tab:

And clicked on the Export Source Tables button which gave me the option to create the tables with this SQL code:
CREATE TABLE NHCCVISReport (MESSAGE_ID VARCHAR(50) NOT NULL  DEFAULT '',PARENT_ID VARCHAR(50) NOT NULL  DEFAULT '',MSHDateTimeofMessage DATETIME,MSHMessageControlID VARCHAR(50),PIDPatientIDExternalIDID VARCHAR(50),PIDPatientIDInternalIDID VARCHAR(50),PIDPatientIDInternalIDCheckDigit VARCHAR(50),PIDPatientNameFamilyName VARCHAR(50),PIDPatientNameGivenName VARCHAR(50),PIDDateTimeofBirth DATETIME,PIDSex VARCHAR(50),PIDPatientAccountNumberID VARCHAR(50),PVVisitNumberID VARCHAR(50),PVAdmitDateTime DATETIME,OBRFillerOrderNumberEntityIdentifier VARCHAR(50),OBRUniversalServiceIDIdentifier VARCHAR(50),OBRUniversalServiceIDText VARCHAR(50),OBRObservationDateTime DATETIME,OBRPlacerField VARCHAR(50),OBXSetIDOBX VARCHAR(50),OBXValueType VARCHAR(50),OBXObservationIdentifierIdentifier VARCHAR(50),OBXObservationValue VARCHAR(50),OBXObservResultStatus VARCHAR(50),OBXSetIDOBX1 VARCHAR(50),OBXValueType1 VARCHAR(50),OBXObservationIdentifierIdentifier1 VARCHAR(50),OBXObservationValue1 VARCHAR(50),OBXObservResultStatus1 VARCHAR(50),OBXSetIDOBX2 VARCHAR(50),OBXValueType2 VARCHAR(50),OBXObservationIdentifierIdentifier2 VARCHAR(50),OBXObservationIdentifierText2 VARCHAR(50),OBXObservationValue2 VARCHAR(50),OBXObservResultStatus2 VARCHAR(50),PRIMARY KEY (MESSAGE_ID,PARENT_ID)) ENGINE = InnoDB DEFAULT CHARSET='utf8';
CREATE TABLE NHCCVIS (MESSAGE_ID VARCHAR(50) NOT NULL  DEFAULT '',STATUS VARCHAR(255) DEFAULT 'W',PRIMARY KEY (MESSAGE_ID)) ENGINE = InnoDB DEFAULT CHARSET='utf8';
That gave me some basic empty tables to work with. After that I deleted this dummy channel.
Notice that the structure of tables for this interface is very flat. In the clients application they wrote stored procedures and VB.NET to populate the tables in question because at the time they wrote it was the easiest way. If this interface were being done from scratch it would probably make more sense to leverage the Translator to join together data from multiple smaller tables.
Just something to keep in mind when you are designing your own interfaces.
Next Step?
Now we have created the tables for the tutorial. The next step is to create the channel that we will use to read the database and transmit the HL7 messages.
Create the Channel [top]
I then created a From Translator to LLP Client channel using the Add Channel button like so:

I set the channel name as From DB:

And I clicked add channel and when back to the dashboard so that one could see the final channel:

The reason the From DB is highlighted in yellow is that I was filtering the dashboard with the phrase “From DB” so as to just see this channel.
Next Step?
Now we have created our From Translator to LLP channel. The next step is to insert some test data into the NCHVIS table.
Create From Translator Script [top]
So from the Dashboard I clicked the TRANS icon of the channel:

Notice I could have used the short cut “Edit Script” in the tooltip. Instead I went into the channel configuration page:

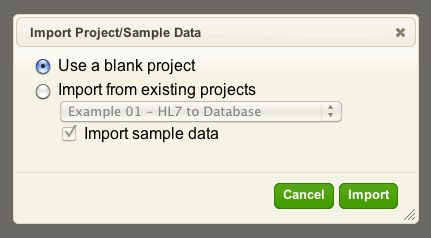
And then clicked on the “Edit Script…” link. This opened up the Translator environment. Because it was an initial instance I was greeted with this start up dialog:

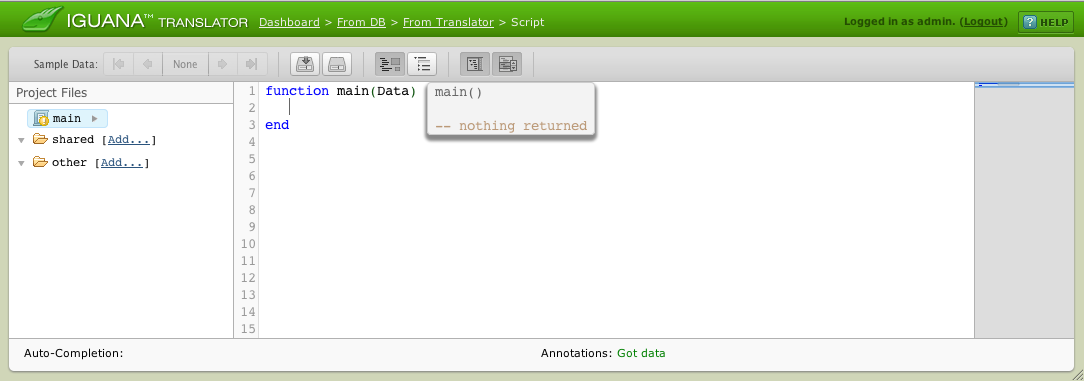
I selected “Use a blank project”. That opened up a blank Translator instance something like this:
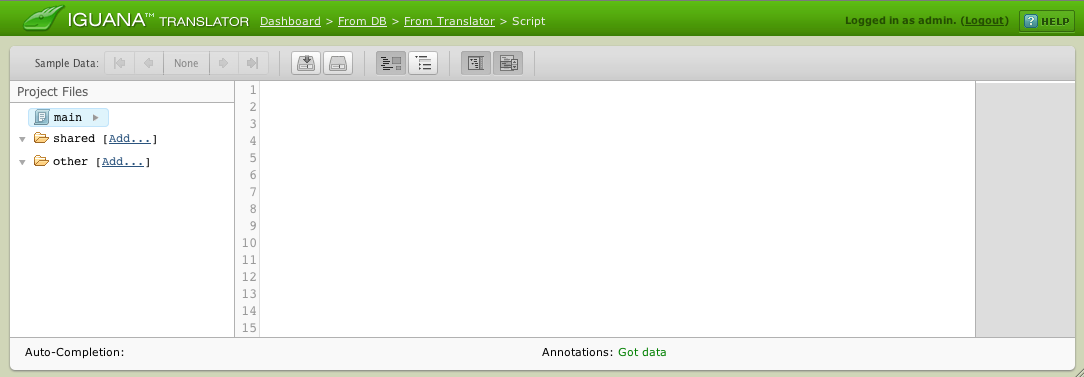
The first step from here was to put in a main function. This is the function that Iguana will periodically call when it runs the From Translator component within a channel. The screen now looked like this:
Next Step?
Now our first problem to solve is to actually have some data in the tables to actually poll. Creating the data is covered in the next page.
NHCCVIS Test Data [top]
We need to put some test data into the NHCCVIS table. This table is use to queue messages that have been updated (status “W” = written), and therefore need to be processed. In this case we will insert a single record only, though you could easily add more.
I did not have any SQL tools handy so I used the Translator, since it was convenient. The following code executes the SQL statemtent to insert a row in the NHCCVIS table. I used the SQLite REPLACE keyword to ensure that we cannot insert duplicate rows by accident (if a row already exists with the same key it will simply be updated). You can also use tools like the SQLite Administrator or SQLite Manager to add records.
This code is “plug and play” and it will automatically create the SQLite database database if it does not exist. The test database file will be created in the Iguana install directory.
Note: This code is “single use” and will be overwritten in the next step.

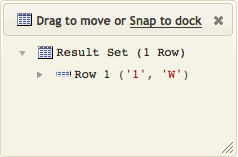
The SELECT query confirms that the test data has been created.

The queries you use in your environment may be a little different depending on the the database you use and the required name, user and password. Here’s the above code in a format which can be copy pasted:
local conn = db.connect{
   api=db.SQLITE,
   name='test',
   live=true
}

function main(Data)
   conn:execute{
      sql="REPLACE INTO NHCCVIS VALUES(1, 'W')",
      live=true
   }
end
Next Step?
Now we have inserted some test data into the queuing table NHCCVIS. The next step is to write the From Translator script to poll the table and push message IDs onto the Iguana queue.
Write From Translator Script [top]
The code below looks for any queued messages in the NHCCVIS table (status = “W”), and pushes their MESSAGE_IDs onto the Iguana queue. After each MESSAGE_ID is queued the UPDATE statement changes the status flag of each entry (to “R” for read).
Note: The code below replaces the code from the previous step.

The UPDATE operation is intentionally not executed within the editor. This is because the conn:execute() statement defaults to live = false, so the database is not updated. The channel will need to be run to execute the UPDATE operation and push the data into the iguana queue.
Note: The Iguana queue is not active in the editor (test mode). Data is only pushed into the queue when the channel is run.
Here’s the code in a format you can copy:
local conn = db.connect{
   api=db.SQLITE,
   name='test',
   live=true
}

function main()
   local R = conn:query(
      "SELECT MESSAGE_ID FROM NHCCVIS WHERE STATUS = 'W'"
   )
   for i=1, #R do
      PushId(R[i].MESSAGE_ID:nodeValue())
      conn:execute(
         "UPDATE NHCCVIS SET STATUS='R' WHERE MESSAGE_ID = "
         ..R[i].MESSAGE_ID
      )
   end
end

function PushId(Id)
   queue.push{data=Id}
end
Next Step?
Now we have written our From Translator script to queue the messages that need to processed. The next step is to run the channel to insert some MESSAGE_IDs into the queue, then we can use these as sample data.
Run the Channel [top]
We need to run the channel so that we can get some IDs inserted into the logs which we can then use as sample data to edit in the Filter channel.
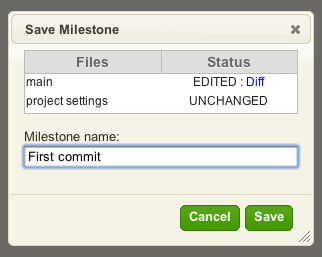
Before we can run the channel we need to create a milestone, to commit the From Translator code to the fossil repository. We do that by clicking on the left hand icon in the toolbar, the one that looks like a little disk with an arrow on it:

This gives a dialog something like this:
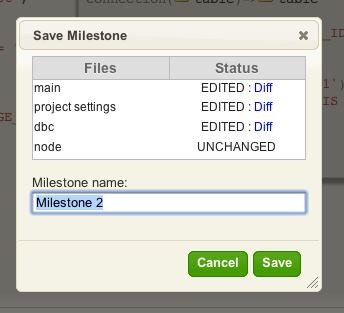
I usually rename the Milestone to some something meaningful before clicking Save.
Now going to the dashboard and clicking on the Start Button give you something like this:

The reason the light is yellow is that there is no host that is listening on port 5145. You can see this by hovering over the yellow icon with the mouse and reading the tooltip:
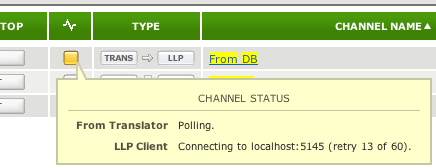
This is ok for our purposes, as it will have queued the MESSAGE_ID even without LLP Listener for the channel.
Next Step?
Now we have queued our sample MESSAGE_ID. The next step is to create the Filter component that will be used for mapping the data into the outgoing message.
Add Translator Filter [top]
I click on From DB to go to the channel:

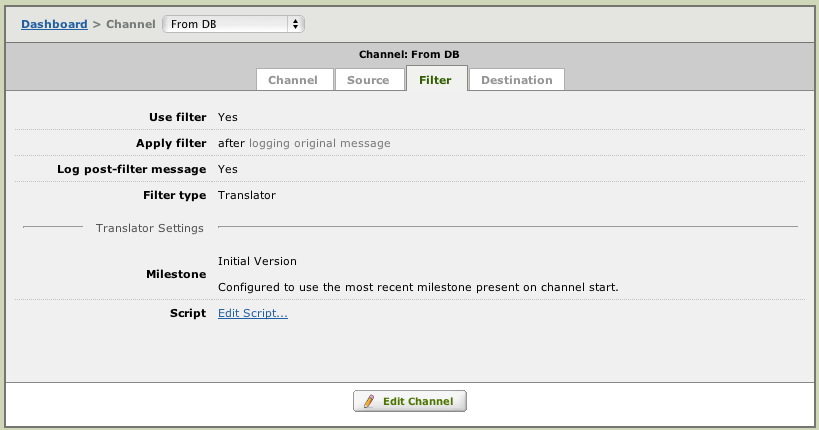
To add a Translator filter instance I went to the Filter tab:

From here I clicked on Edit Channel and selected the Use filter check box:

Then I clicked on Save Changes which gave me this:
Clicking on Edit Script… then opened up the new blank Translator filter instance with the familiar import project dialog:
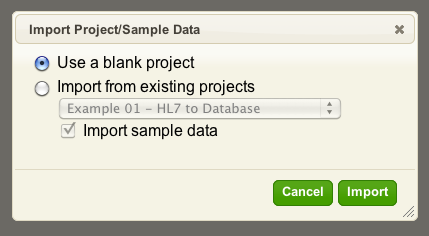
I selected Use a blank project. That brought up a empty editor which I typed in the beginnings of a main function. This function is called by Iguana with the contents of each queue entry as the data moves through Iguana. As expected a little warning window came up about there being no sample data:
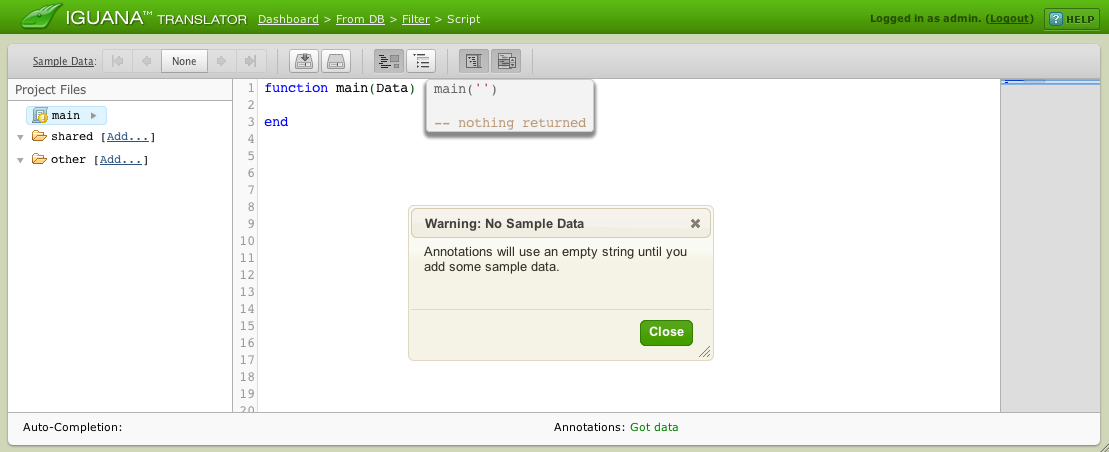
I clicked Close on the above dialog.
Next Step?
Now we have added our Filter component. The next step which is to import some queued MESSAGE_IDs from the Iguana logs to use as sample data.
Import Sample Data [top]
The Translator works best when you can drive it with sample data. This is one of the biggest motivations for breaking this channel into two Translator instances. The first part is intended to be a minimal as possible in terms of ‘seeding’ the MESSAGE_IDs into the queue. The filter is where we do most of the real mapping work doing queries based off those IDs and using it to map into HL7 or other message types.
It makes interface development very fluid and makes it easy to visualize how the data is manipulated.
We can import messages very conveniently by clicking on the central part of the Sample data control which has the word “None” present:

This comes up like:
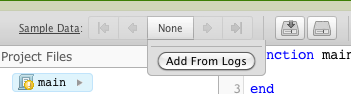
Clicking on Add From Logs gives:

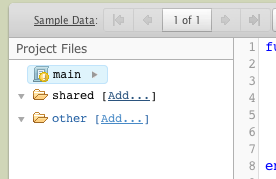
I clicked on the “1” which the MESSAGE_ID “1” in the queue for this channel which then imported it into the sample data associated with this channel. If you do the same your screen should display that you have 1 of 1 sample messages. Something like this:

Now have the slight problem that there is no real data in the NCHCCVISReport table which is meant to have the actual data we are mapping.
Next Step?
Now we have imported some sample data for our Filter component. The next section covers inserting sample data into the NCHCCVISReport table.
NHCCVISREPORT Test Data [top]
In the first step of the tutorial we created two tables NHCVIS and NHCVISReport. We put a row of data into NHCVIS here, but have yet to put any data into the NHCCVISRReport table which contains the actual data to be mapped. We will do that now, by running the query below in the Filter component that we just created.
NHCCVISRReport was a rather large table so to insert data into so I took a little more care with the form of the SQL I used to populate the table:
local conn = db.connect{
api=db.SQLITE,
name='test',
live=true
}
function main(Data)
conn:execute{
live=true,
sql=[[REPLACE INTO NHCCVISREPORT(
MESSAGE_ID,
MSHMessageControlID,
PIDPatientIDExternalIDID,
PIDPatientIDInternalIDID,
PIDPatientIDInternalIDCheckDigit,
PIDPatientNameFamilyName,
PIDPatientNameGivenName,
PIDDateTimeofBirth,
PIDSex,
PIDPatientAccountNumberID,
PVVisitNumberID,
PVAdmitDateTime,
OBRFillerOrderNumberEntityIdentifier,
OBRUniversalServiceIDIdentifier,
OBRUniversalServiceIDText,
OBRObservationDateTime,
OBRPlacerField,
OBXSetIDOBX,
OBXValueType,
OBXObservationIdentifierIdentifier,
OBXObservationValue,
OBXObservResultStatus,
OBXSetIDOBX1,
OBXValueType1,
OBXObservationIdentifierIdentifier1,
OBXObservationValue1,
OBXObservResultStatus1,
OBXSetIDOBX2,
OBXValueType2,
OBXObservationIdentifierIdentifier2,
OBXObservationIdentifierText2,
OBXObservationValue2,
OBXObservResultStatus2
)
VALUES(
1, -- MESSAGE_ID
1, -- MSHMessageControlID
'44', -- PIDPatientIDExternalIDID
'343', -- PIDPatientIDInternalIDID
'43', -- PIDPatientIDInternalIDCheckDigit
'Smith', -- PIDPatientNameFamilyName
'Fred', -- PIDPatientNameGivenName
'19901212', -- PIDDateTimeofBirth
'M', -- PIDSex
'534', -- PIDPatientAccountNumberID
'434', -- PVVisitNumberID
'20101211', -- PVAdmitDateTime
'10', -- OBRFillerOrderNumberEntityIdentifier
'121', -- OBRUniversalServiceIDIdentifier
'Some text', -- OBRUniversalServiceIDText
'20111210', -- OBRObservationDateTime
'3', -- OBRPlacerField
'1', -- OBXSetIDOBX
'TX', -- OBXValueType
'1', -- OBXObservationIdentifierIdentifier
'Wow', -- OBXObservationValue
'GOOD', -- OBXObservResultStatus
'1', -- OBXSetIDOBX1
'TX', -- OBXValueType1
'1231', -- OBXObservationIdentifierIdentifier1
'444', -- OBXObservationValue1
'434', -- OBXObservResultStatus1
'2323', -- OBXSetIDOBX2
'2323', -- OBXValueType2
'sdsd', -- OBXObservationIdentifierIdentifier2
'Text 2', -- OBXObservationIdentifierText2
'Another', -- OBXObservationValue2
'BAD' -- OBXObservResultStatus2
)
]]
}
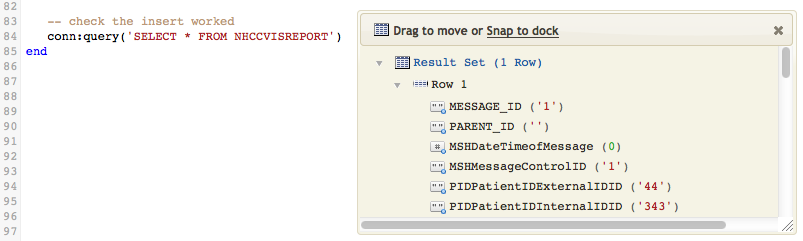
-- check the insert worked
conn:query('SELECT * FROM NHCCVISREPORT')
end
Notice I have again used the REPLACE keyword from SQLite and I have used Lua’s ability to represent a multiple line string using a [[…]] notation for convenience.
I included a SELECT statement to check that the data is inserted:
Once the insert was confirmed I replaced the the insert with something close to the real code for the Filter:
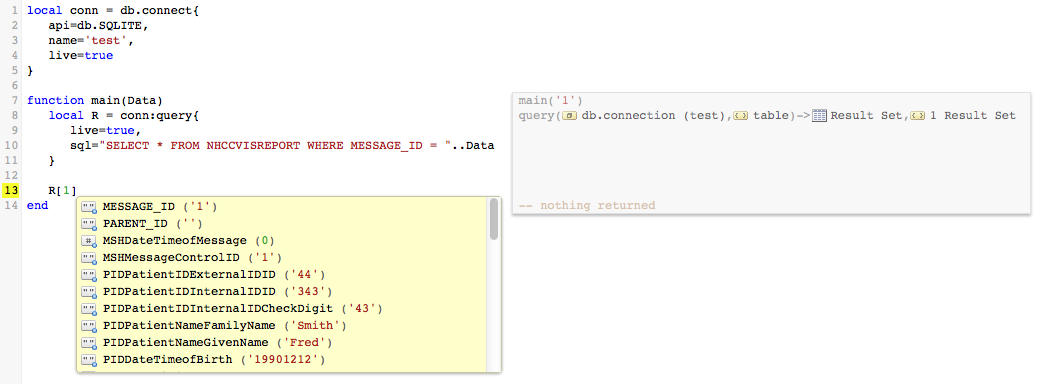
In the above screen shot I took advantage of the auto completion to see the resulting data coming back from the SELECT query. Notice how the query is generated dynamically off the the ‘1’ passed in the Data variable.
Here is the code in format you can copy and paste in:
local conn = db.connect{
   api=db.SQLITE,
   name='test',
   live=true
}

function main(Data)
   local R = conn:query{
      live=true,
      sql="SELECT * FROM NHCCVISREPORT WHERE MESSAGE_ID = "..Data
   }
end
Next Step?
Now we have inserted some test data into the NHCCVISREPORT table. The next stage is to create an empty HL7 message and start mapping data into it.
Create an empty HL7 Message [top]
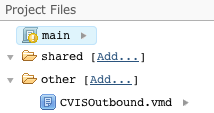
Before I can populate the message I needed to add the VMD provided by my client into the workspace. This is done by clicking on the Add… link in the Project Files pane:
Note: If you loaded the project file for this tutorial you can skip this step, as it already contains the file.
That brought up this dialog:
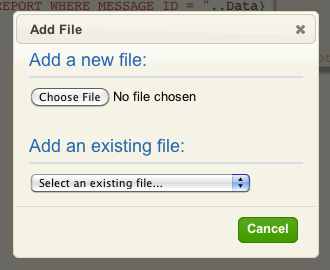
From there I just needed to use the Choose File button to select this VMD file CVISOutbound.vmd off my hard drive and load it into Iguana. After that it appears in the project files pane:
Now we can add one line to the script which will create the empty destination message:
local Msg = hl7.message{vmd='CVISOutbound.vmd', name='NHCCVIS'}
This line of code is easy to write thanks to the error messages and autocompletion that the Translator environment gives – try it!
Next we cover how to map the data.
Next Step?
Now we have loaded the VMD file. The next thing we cover is how to map the data.
Prepare to Map Data [top]
This is where you will fall in love with the Translator. In this part of the tutorial I am going to leverage synchronized annotation dialogs.
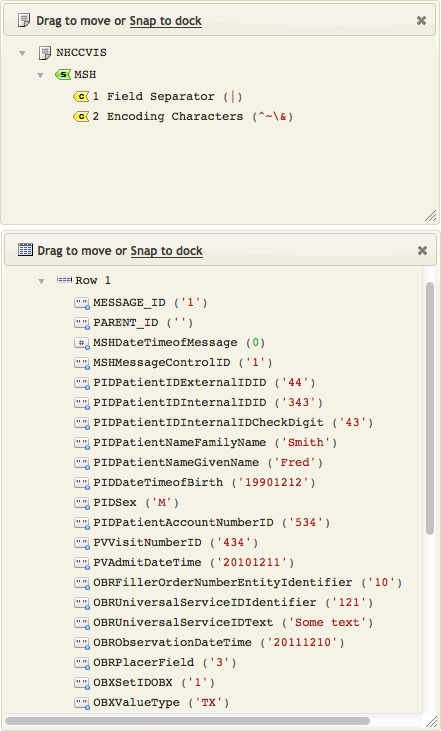
We’ll prepare our environment by opening up two dialogs:
- The first shows the results of the SQL query from NHCCVISREPORT
- The second shows the output HL7 message
One key point though is we want to see the HL7 message, after we have mapped data into it. To make that easy I will use a little trick of setting up a trace() function like so:
Note: The trace() function is now built in to Iguana so declaring it is no longer required (simply omit line 7).

To get our dialogs with the source and destination trees we can now double click on:
- The Result Set on line 2
- The NHCCVIS message icon on line 9
After arranging the dialogs we should get something like this:
Now when we do the mapping we will see the data change in real time.
Next Step?
Now we have set up two dialogs to monitor how our data changes in real time. The next step is to write the mappings, and see the dialogs in action.
Write the Mappings [top]
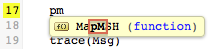
For writing the mappings I prefer to break the mapping code into smaller modular functions. We’ll start with the MSH segment. I like to start by putting in an empty mapping function. My preference is to use very brief variable names to make for more concise code, then I use the annotations to give visibility on what the variables are referring to:

Notice there is no annotation block appearing beside the MapMSH function? That is because the code is not being called. Until we call the function we do not get annotations. Also auto-completion will not work on the lines of code inside the MapMSH function.
To see an annotation we need to add a line of code to call the function like this:

The Iguana auto-completion function make typing code very easy.
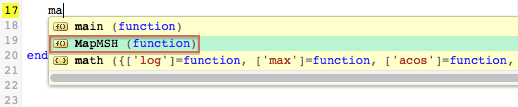
Try it out, just type a few letters of the name of the MapMSH():

Note: You don’t have to start at the beginning of a name, but the letters must be in the correct order:
Use the arrow keys to highlight the MapMSH() function then press enter to select, or just click on on your choice with the mouse:
The MapMSH() function will be inserted for you:

Then typing in Msg. will give you this:
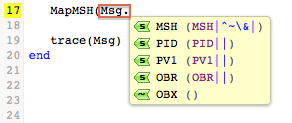
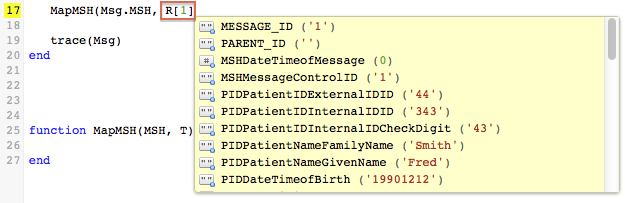
I selected the MSH segment and ignore the auto-completion dialog that comes up for the MSH segment fields. Instead I typed in “,” and followed it with R. for the second parameter:

Selecting Row 1 completes the code R[1], then simply enter a “)” to complete the function call:
Now we can start typing in the mappings:

Note: The return MSH on the last line of MapMSH() is not strictly necessary, it just makes it really easy to double click on the MSH segment to display it for debugging.
The auto-completion and annotations make it an absolute pleasure to iteratively build up the mappings. It’s neat seeing the live HL7 message be built up in real time as you add the mappings.
Here is the MSH segment before and after the mapping:
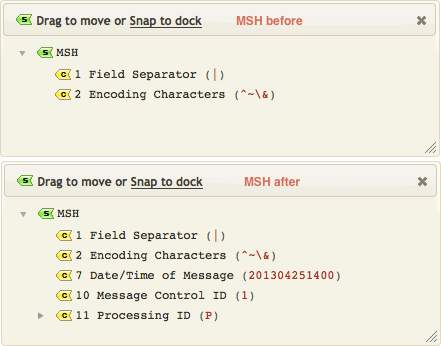
Mapping out the remaining segments is just a matter of repeating the process for each segment.

Now if we look at the returned PID segment notice that the date of birth is not correctly formatted for HL7:
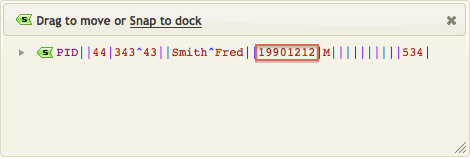
We can deal with that easily using the fuzzy time parser module and a little helper function.
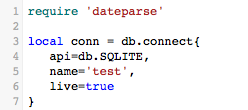
We first add require 'dateparse' to the top of our script:
Then we add this node extension function:
function node.HD(N)
   return os.date('%Y%m%d', dateparse.parse(N:nodeValue()))
end
Which we call by appending :HD() to the T.PIDDateTimeofBirth line:

From the annotations you can see the code does.
- We invoke the
:HD()method on the date of birth column.
- The
N:nodeValue()method converts the table column node into a string.
- This is parsed by the fuzzy date time parser
dateparse.parse()into a Lua time string (“1990-12-12 00:00:00“).
- The
os.date()function is called to formatformatthe date into the desired%Y%m%doutput format.
This might seem like a lot of work but in practice these little helper functions go into a standard shared module that you can use again and again.
For mapping the OBR segment I needed to create another helper function which I called HT to output a timestamp:
function node.HT(N)
   return os.date('%Y%m%d%H%M', dateparse.parse(N:S()))
end
Finally the last thing to do in the main function is push the message onto the queue:
First we need to add require 'node' at the top of the code:
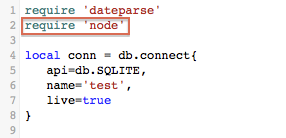
Then we add the code to push the message onto the queue:
queue.push{data=Msg:S()}
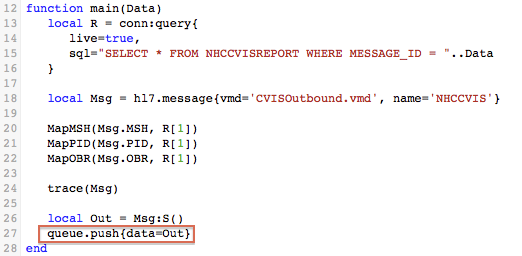
Note: I converted the Msg to Out as by convention we always use Out for the messages we send.
The :S() method calls tostring() which converts the populated HL7 node tree into a string and queue.push{} pushes that string into the queue.
Here’s the final code:
require 'dateparse'
require 'node'

local conn = db.connect{
   api=db.SQLITE,
   name='test',
   live=true
}

local function trace(a,b,c,d) return end

function main(Data)
   local R = conn:query{
      live=true,
      sql="SELECT * FROM NHCCVISREPORT WHERE MESSAGE_ID = "..Data
   }

   local Msg = hl7.message{vmd='CVISOutbound.vmd', name='NHCCVIS'}

   MapMSH(Msg.MSH, R[1])
   MapPID(Msg.PID, R[1])
   MapOBR(Msg.OBR, R[1])

   trace(Msg)

   local Out = Msg:S()
   queue.push{data=Out}
end

function MapMSH(MSH, T)
   MSH[10] = T.MSHMessageControlID
   MSH[7] = os.date('%Y%m%d%H%M')
   MSH[11][1] = 'P'
   return MSH
end

function node.HD(N)
   return os.date('%Y%M%d', dateparse.parse(N:nodeValue()))
end

function node.HT(N)
   return os.date('%Y%m%d%H%M', dateparse.parse(N:nodeValue()))
end

function MapPID(PID, T)
   PID[2][1] = T.PIDPatientIDExternalIDID
   PID[3][1] = T.PIDPatientIDInternalIDID
   PID[5][1] = T.PIDPatientNameFamilyName
   PID[5][2] = T.PIDPatientNameGivenName
   PID[7] = T.PIDDateTimeofBirth:HD()
   PID[8] = T.PIDSex
   PID[18][1] = T.PIDPatientAccountNumberID
   PID[3][2] = T.PIDPatientIDInternalIDCheckDigit
   return PID
end

function MapOBR(OBR, T)
   OBR[3][1] = T.OBRFillerOrderNumberEntityIdentifier
   OBR[4][1] = T.OBRUniversalServiceIDIdentifier
   OBR[4][2] = T.OBRUniversalServiceIDText
   OBR[7] = T.OBRObservationDateTime:HT()
   OBR[2][1] = T.OBRPlacerField
   return OBR
end
Next Step?
Now we have mapped the data to our outgoing HL7 message. The next step is to test the channel by committing a milestone and then running the channel.
Test the Channel [top]
First we need to create a milestone to save our code changes into the fossil repository:
- Click on the milestone icon on the toolbar:

- Enter a name for milestone and click Save:
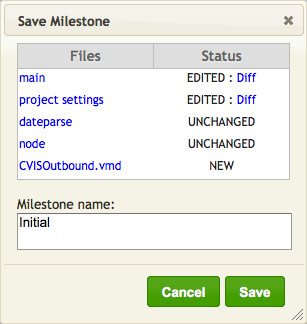
I called the milestone “Initial” but you can choose your own name.
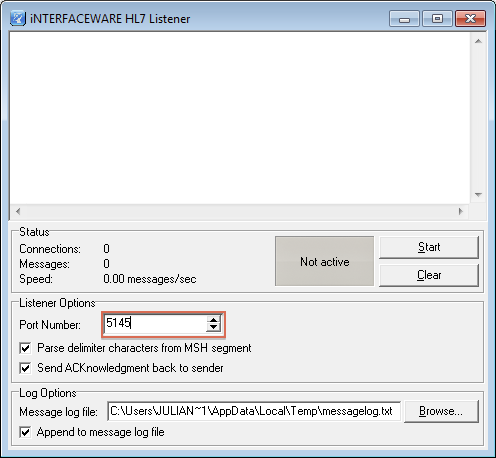
Next we need to start the the LLP Listener to listen for the messages that the channel sends:
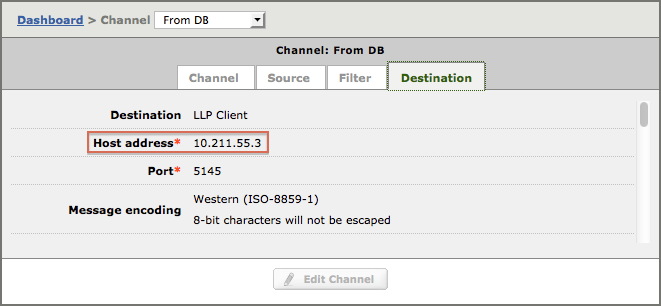
- We need to check the port number that the LLP client component is pointing at:

- Then we can run the listener and listen to this port:
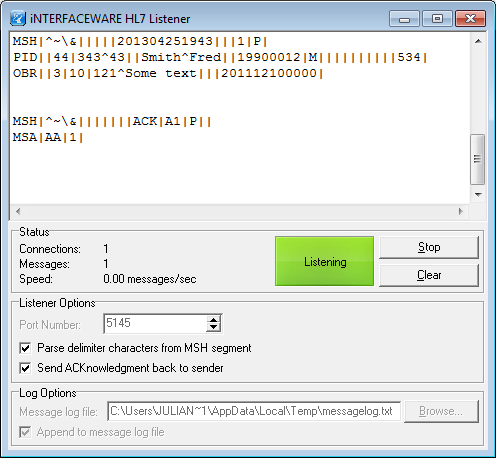
- Finally we can start the channel and we should see something like this:
Tip: if you are using a Mac then you can run the Listener in Parallels (using a Windows VM) and replace “localhost” in the Host Address field of the LLP Client destination component with the IP Address of your Windows Virtual Machine. Using a VM on a Linux box should work in much the same way.
I found the IP address by running the ipconfig command in a command window on my windows virtual machine:
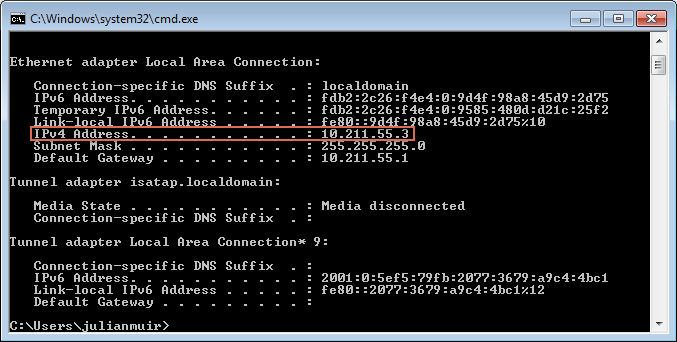
If you prefer to use the Windows GUI you can also find your IP Address under Control Panel>Network and Internet>Network Sharing Centre>Local Area Connection>Details>IPv4Address
Next Step?
Now we have tested the channel and confirmed that our NCCHVIS message is being sent out. Next we will resubmit a message and show you a quirk that can cause problems with previewing resubmissions.
Resubmit a Message [top]
Unfortunately the preview pane does not execute the Filter script, only the Destination script. This means that if a Filter script exists then the preview pane can display invalid results. However when the message is resubmitted the Filter script will run as expected (if it exists).
Our Filter reads an ID from the Iguana queue and retrieves the corresponding message from the database. Because the Filter script does not run, the corresponding message is not retrieved, which causes a preview error.
For example: If we resubmit the message ID of 1, the unprocessed ID (instead of the retrieved message) is previewed, which causes this error:

This is the message we would be seeing in the preview pane if the Filter script had been run:

However when the message is actually resubmitted the filter script will run. As you can see from the logs, the message has been re-processed correctly:

Next Step?
At this point you should know enough to map data from a database and transmit it as an HL7 message using LLP. If you wish you can omit the next section and jump to “Next Steps” at the end of the tutorial.
Now we will move on to creating the regression test channel, to compare the output from the new and old solutions.
Note: The regression test is an advanced exercise. It was needed for the client to confirm that the new channel was producing the correct results. It is included to reflect real world requirements.
Test: Compare to old Interface [top]
The Test phase is an advanced section of the tutorial, you can omit it if you wish.
The client needed to confirm that the data produced by the new channel was the same as before. To check this we created a regression test that compared the output of the new channel with the old version.
Test: Generate Test Data [top]
To be able to regression test this new Lua based interface I needed to have some sample input data to test with.
Obviously I could not get my hands on the real confidential data so instead I wrote a module called dbfill to generate some fake data and pushed it into the database. You will need to create a dummy channel and run the code in a From or To Translator component. You can delete the channel after the data is created.
This code shows the usage of the routine:
require 'dbfill'

local conn = db.connect{
   api=db.SQLITE,
   name='test'
}

function main()
   -- use to delete all the data first if you bad data
   -- conn:execute{sql=[[DELETE FROM NHCCVIS]], live = true}
   -- conn:execute{sql=[[DELETE FROM NHCCVISREPORT]], live = true}

   dbfill.generateDummySourceData('CVISOutbound.vmd', 'NHCCVIS',conn)

   -- confirm the data was generated
   conn:query('SELECT * FROM NHCCVIS')
   conn:query('SELECT * FROM NHCCVISREPORT')
end
Note: Use the SELECT queries to confirm that the dummy data was created. If you have more than 20 rows returned it means have some dummy row(s) from earlier, so you will need to use the DELETE statements to clear the tables.
The routine takes the vmd file, database connection and the name of the message to generate sample data for it.
This is the source code to the module:
dbfill = {}

local function trace(a,b,c,d) return end

local function RandomDate(Modifier)
   local T = 40700 - Modifier
   trace(T)
   return os.ts.date("%Y-%m-%dT%H:%M:%S", T)
end

local function RandomString(V, RowIndex)
   return V:nodeName()..RowIndex
end

local function FillValue(R, i, RowIndex)
   local T = R[i]:nodeType()
   if T == 'datetime' then
      R[i] = RandomDate(RowIndex*i)
   elseif T == 'string' then
      R[i] = RandomString(R[i], RowIndex)
   else
      error('Need to handle integers and doubles')
   end
end

local function MakeRow(T,RowIndex)
   for i =1,#T do
      FillValue(T, i, RowIndex)
   end
   return T
end

local function makeDummyDatabase(Vmd, Name)
   local T = db.tables{vmd=Vmd, name=Name}
   for i =1,20 do
      MakeRow(T.NHCCVISReport[i], i)
   end
   return T
end

local function ColumnList(Row)
   local L = ''
   for i =1, #Row-1 do
      L = L..Row[i]:nodeName()..',\n'
   end
   L = L..Row[#Row]:nodeName()
   return L
end

local function generateSql(T, DB)
   for TableIndex=1,#T do
      local C = ColumnList(T[TableIndex][1])
         ..", MESSAGE_ID, PARENT_ID"
      for RowIndex = 1, #T[TableIndex] do
         local Row = T[TableIndex][RowIndex]
         local S = 'REPLACE INTO '..T[TableIndex]:nodeName()
         ..'('..C..')\n VALUES('
         for ColumnIndex =1,#Row-1 do
            S = S..'\"'..Row[ColumnIndex]..'\",\n'
         end
         S = S..'\"'..Row[#Row]..'\"\n'
         S = S..',\"'..RowIndex..'\"\n'
         S = S..',\"'..RowIndex..'\")'
         trace(S)
         DB:execute{sql=S, live=true}
      end
   end
end

local function InsertMessageRow(Count, MessageName, DB)
   for i=1, Count do
      local S = 'REPLACE INTO '..MessageName..'(MESSAGE_ID, STATUS)'..' VALUES('..i..",'W')"
      DB:execute{sql=S, live=true}
   end
end

function dbfill.generateDummySourceData(Vmd, MessageName, D)
   local T = makeDummyDatabase(Vmd, MessageName)
   generateSql(T, D)
   InsertMessageRow(#T.NHCCVISReport, MessageName, D)
end

function dbfill.SaveMessage(Base, Msg, Data)
   local FileName = 'D:\\temp\\'..Base
                 ..Msg.MSH[10]..'.txt'
   trace(FileName)
   local F = io.open(FileName, "w")
   F:write(Data)
   F:close()
end

function dbfill.LoadMessage(Base, Msg)
   local FileName = 'D:\\temp\\'..Base
                 ..Msg.MSH[10]..'.txt'
   trace(FileName)
   local F = io.open(FileName, "r")
   return F:read("*a")
end

function dbfill.CompareMessage(Data)
   local Out = hl7.parse{vmd='CVISOutbound.vmd', data=Data}
   local Orig = dbfill.LoadMessage('orig', Out)
   return hl7.parse{vmd='CVISOutbound.vmd', data=Orig}
end
The code uses the SQLite specific REPLACE command which merges the data into the source database, otherwise errors would occur the second time the code is run. The code assumes that there is only one table per message and only covers string and date/time fields. If you would like the code to be extended to handle other databases and data types let us know.
Notice that the values including the dates are deterministically generated, they are always the same each time, this is important in order to be able to check between runs.
Next Step?
Now we’ve created some test data. The next step is to make the outputs from the old and new channels comparable.
Test: Make Data Comparable [top]
For regression testing to be effective one needs a way of comparing the inputs and outputs.
The solution I decided to go for was to write a To Translator component using Lua’s file handling logic to output each outbound message from both the old and new logic into it’s own file named <Message Control ID>.txt.
This is very easy to do with Iguana 5 since we have random access to the HL7 tree and the the file handling APIs. I set up one channel with the original logic like this:
From DB –> To Translator.
This is the configuration of the From DB part:

And the destination tab:

I clicked on Edit Script… to get the initial editor dialog and selected Blank Project:
Then I edited the project to get the basic “Hello World” script:

I clicked save milestone to get the first milestone saved:
Then I ran the channel and got 20 messages processed. At this stage nothing is being done to these messages. So my next step was to export these messages from the logs into the Translator so we can write the code to save each one into it’s own text file.
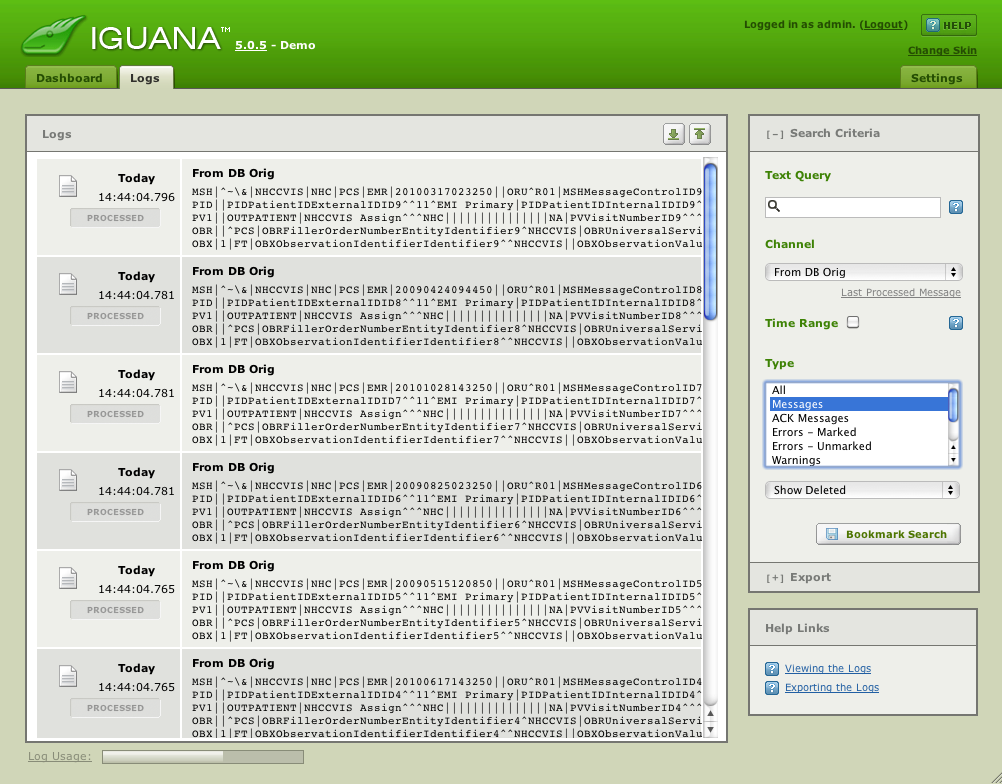
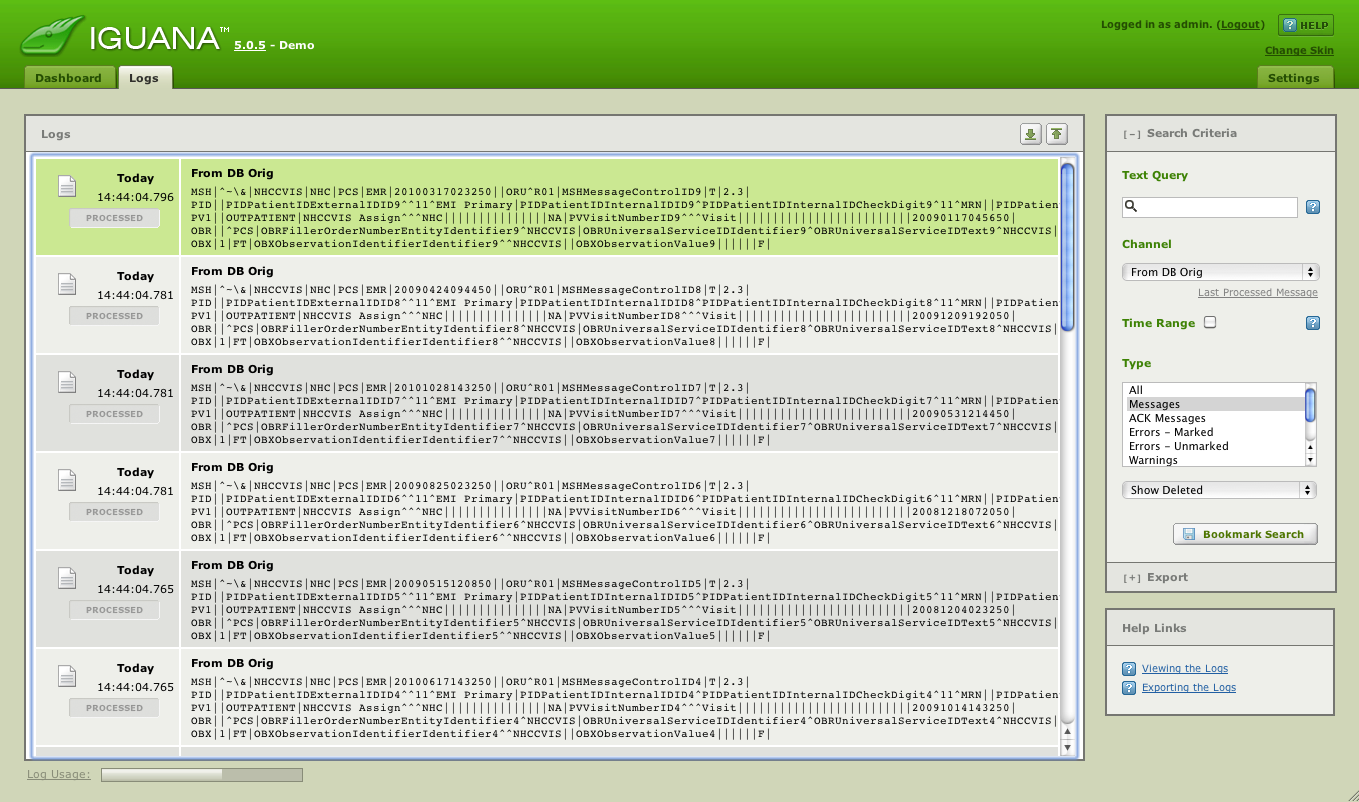
I went to the Logs tab and altered the search criteria to find the messages like so:
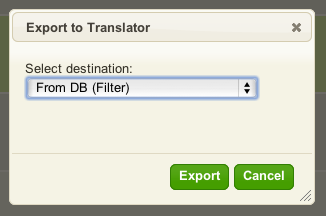
Then I clicked on the Export link below the Bookmark Search button:
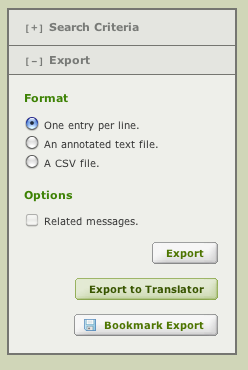
And clicked on “Export to Translator”. In the dialog which came up I selected the destination as
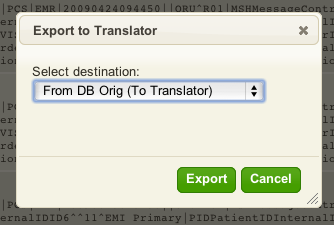
After clicking Export this dialog comes up:
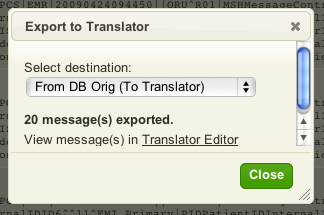
Which makes it easy to edit into the editor. Then I altered the main module to use a new routine I created in dbfill:

The dbfill.SaveMessage routine had the following simple code:

So I save the current milestone and then requeued the messages. This can be done by:
- Making sure the channel is stopped.
- Clicking on the “Queued” column in the dashboard.
This gives you a view something like this:
Then using the down arrow at the top right to scroll down to the bottom:

And repositioning the channel by clicking on the PROCESSED icon:
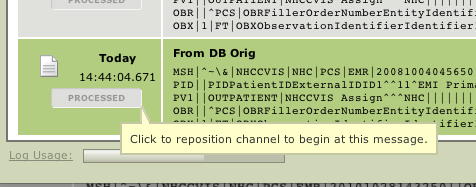
From there this dialog comes up:
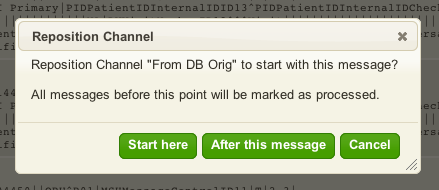
Clicking on “Start here” sets the queue at the beginning point. After that I restarted the channel and ended up with all my destination messages from the original code, converted into text files sitting in D:\temp:
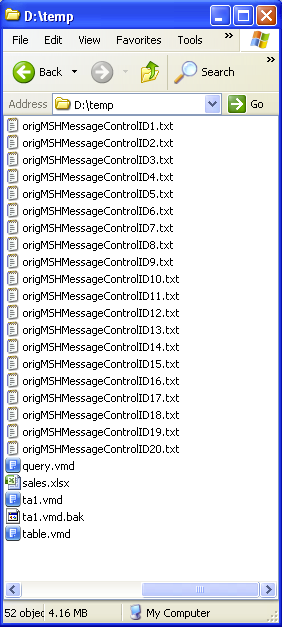
This provides a convenient data set from which to compare our output messages from the Translator Filter component we wrote in the first part of the tutorial.
Next Step?
Now that we have an original data set, the next step is compare the old and new data.
Test: Old Data versus New [top]
The most convenient place to compare the old and new functionality is within the Translator Filter component we wrote before.
Before I could do that though I needed to re-prime the database with the status fields set to ‘W’ on the polling table. So after carefully making sure that the original DB channel was off to stop it from polling the database I reran the dbfill routine:
dbfill.generateDummySourceData('CVISOutbound.vmd', 'NHCCVIS',D)
And queued up 20 messages. Then I did some tricky query logic on the logs to just export the IDs:

See how I used the phrase “NOT MSH” to screen out the HL7 messages and the Time Range to just get down to the 20 ID messages we wanted. I clicked on the Export tab and then on the Export to Translator button and selected the Filter component of the new channel we wrote in the tutorial:
Next Step?
Now we are at the point where we can begin to write the code to compare the output from the old logic and the new logic.
Test: Retrieve Old data [top]
So I added ‘dbfill’ to the filter routine and added a new routine called dbfill with this code:
function dbfill.CompareMessage(Data)
   local Out = hl7.parse{vmd='CVISOutbound.vmd', data=Data}
end
And then tweaked the main routine to call this code:
local Out = Msg:S()
dbfill.CompareMessage(Out)
queue.push{data=Out}
That told me my first problem with the new mapping code. It was missing the message type! Oops.
Easy enough to solve with two additional lines of script (on lines 23 and 24) in the MapMSH function:

Then I altered the dbfill routine to:
function dbfill.LoadMessage(Base, Msg)
   local FileName = 'D:temp'..Base
                 ..Msg.MSH[10]..'.txt'
   trace(FileName)
   local F = io.open(FileName, "r")
   return F:read("*a")
end

function dbfill.CompareMessage(Data)
   local Out = hl7.parse{vmd='CVISOutbound.vmd', data=Data}
   local Orig = dbfill.LoadMessage('orig', Out)
   return hl7.parse{vmd='CVISOutbound.vmd', data=Orig}
end
This is where the real power of the Translator shows through because we are returning a parsed node tree from the loading routine we can open up parallel dialogs for the original message and the new output message and compare them along side each other. This screen shot shows exactly that with the left hand side showing the new tree and the right hand side the original output:
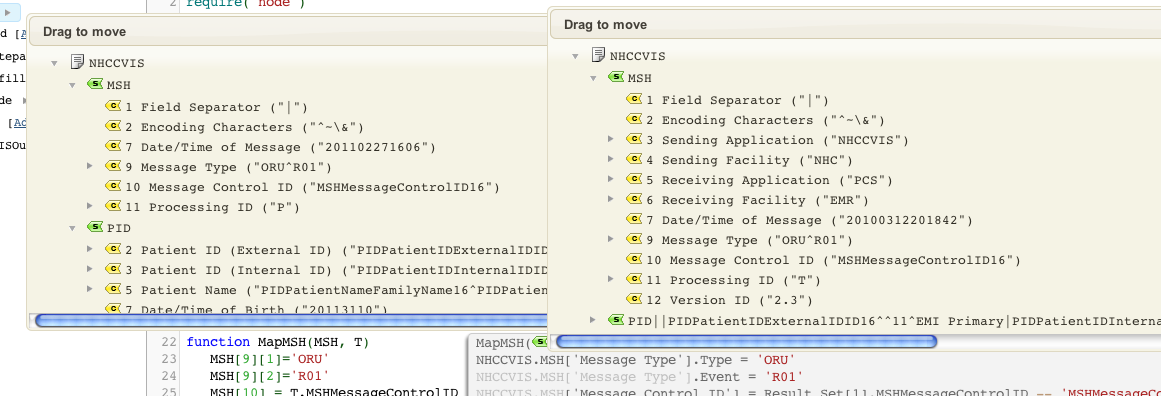
It’s easy to see the gaps that we have to fill in the new interface. I went through and added in the missing MSH fields:
function MapMSH(MSH, T)
   MSH[9][1]='ORU'
   MSH[9][2]='R01'
   MSH[3][1] = 'NHCCVIS'
   MSH[4][1] = 'NHC'
   MSH[5][1] = 'PCS'
   MSH[6][1] = 'EMR'
   MSH[12] = '2.3'
   MSH[10] = T.MSHMessageControlID
   MSH[7] = os.date('%Y%M%d%H%m')
   MSH[11][1] = 'T'
   return MSH
end
I went through the script putting in the mappings. Some observations:
- Having very regularly named source data made it quite easy see if data was set as a constant or came from the database.
- Deep auto-completion was very helpful in locating source data in the database table to map it.
To give an example see:
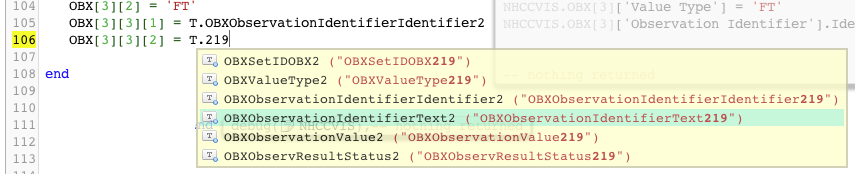
You can see in the above I was searching for the key phrase “219” in order to find the OBXObservationIdentifierText219 value.
Doing things this way makes for a very efficient work flow. It took me about 1/2 hour to flesh out the rest of the mappings. My script looked like this now:
require 'dateparse'
require 'node'
require 'dbfill'

local conn = db.connect{
   api=db.SQLITE,
   name='test',
   live=true
}

local function trace(a,b,c,d,) return end

function main(Data)
   local R = conn:query{
      live=true,
      sql="SELECT * FROM NHCCVISREPORT WHERE MESSAGE_ID = "..Data
   }

   local Msg = hl7.message{vmd='CVISOutbound.vmd', name='NHCCVIS'}

   MapMSH(Msg.MSH, R[1])
   MapPID(Msg.PID, R[1])
   MapPV1(Msg.PV1, R[1])
   MapOBR(Msg.OBR, R[1])
   MapOBX(Msg.OBX, R[1])
   trace(Msg)
   local Out = Msg:S()
   dbfill.CompareMessage(Out)
   queue.push{data=Out}
end

function MapMSH(MSH, T)
   MSH[9][1]='ORU'
   MSH[9][2]='R01'
   MSH[3][1] = 'NHCCVIS'
   MSH[4][1] = 'NHC'
   MSH[5][1] = 'PCS'
   MSH[6][1] = 'EMR'
   MSH[12] = '2.3'
   MSH[10] = T.MSHMessageControlID
   MSH[7] = os.date('%Y%M%d%H%m')
   MSH[11][1] = 'T'
   return MSH
end

function node.HD(N)
   return os.date('%Y%m%d', dateparse.parse(N:S()))
end

function node.HT(N)
   return os.date('%Y%m%d%H%M', dateparse.parse(N:S()))
end

function MapPID(PID, T)
   PID[2][1] = T.PIDPatientIDExternalIDID
   PID[2][3] = '11'
   PID[2][4][1] = 'EMI Primary'

   PID[3][1] = T.PIDPatientIDInternalIDID
   PID[3][2] = T.PIDPatientIDInternalIDCheckDigit
   PID[3][3] = '11'
   PID[3][4][1] = 'MRN'

   PID[5][1] = T.PIDPatientNameFamilyName
   PID[5][2] = T.PIDPatientNameGivenName
   PID[7] = T.PIDDateTimeofBirth:HD()
   PID[8] = T.PIDSex
   PID[18][1] = T.PIDPatientAccountNumberID
   PID[18][4][1] = "Visit"

   return PID
end

function MapPV1(PV1, T)
   PV1[2] = 'OUTPATIENT'
   PV1[3][1] = 'NHCCVIS Assign'
   PV1[3][4][1] = 'NHC'
   PV1[18] = 'NA'
   PV1[19][1] = T.PVVisitNumberID
   PV1[19][4][1] = 'Visit'
   PV1[44] = T.PVAdmitDateTime:HT()
end

function MapOBR(OBR, T)
   OBR[2][2] = 'PCS'
   OBR[3][1] = T.OBRFillerOrderNumberEntityIdentifier
   OBR[3][2] = 'NHCCVIS'
   OBR[4][1] = T.OBRUniversalServiceIDIdentifier
   OBR[4][2] = T.OBRUniversalServiceIDText
   OBR[4][3] = 'NHCCVIS'
   OBR[7] = T.OBRObservationDateTime:HT()
   OBR[18] = T.OBRPlacerField
   OBR[25] = 'F'
   OBR[27][6] = 'ROUTINE'
   return OBR
end

function MapOBX(OBX, T)
   OBX[1][1] = '1'
   OBX[1][2] = 'FT'
   OBX[1][3][1] = T.OBXObservationIdentifierIdentifier
   OBX[1][3][3] = 'NHCCVIS'
   OBX[1][5][1] = T.OBXObservationValue
   OBX[1][11] = 'F'
   OBX[2][1] = '2'
   OBX[2][2] = 'RP'
   OBX[2][3][1] = T.OBXObservationIdentifierIdentifier1
   OBX[2][11] = 'F'

   OBX[3][1] = '3'
   OBX[3][2] = 'FT'
   OBX[3][3][1] = T.OBXObservationIdentifierIdentifier2
   OBX[3][3][2] = T.OBXObservationIdentifierText2
   OBX[3][3][3] = 'NHCCVIS'
   OBX[3][5][1] = T.OBXObservationValue2
   OBX[3][11] = 'F'
end
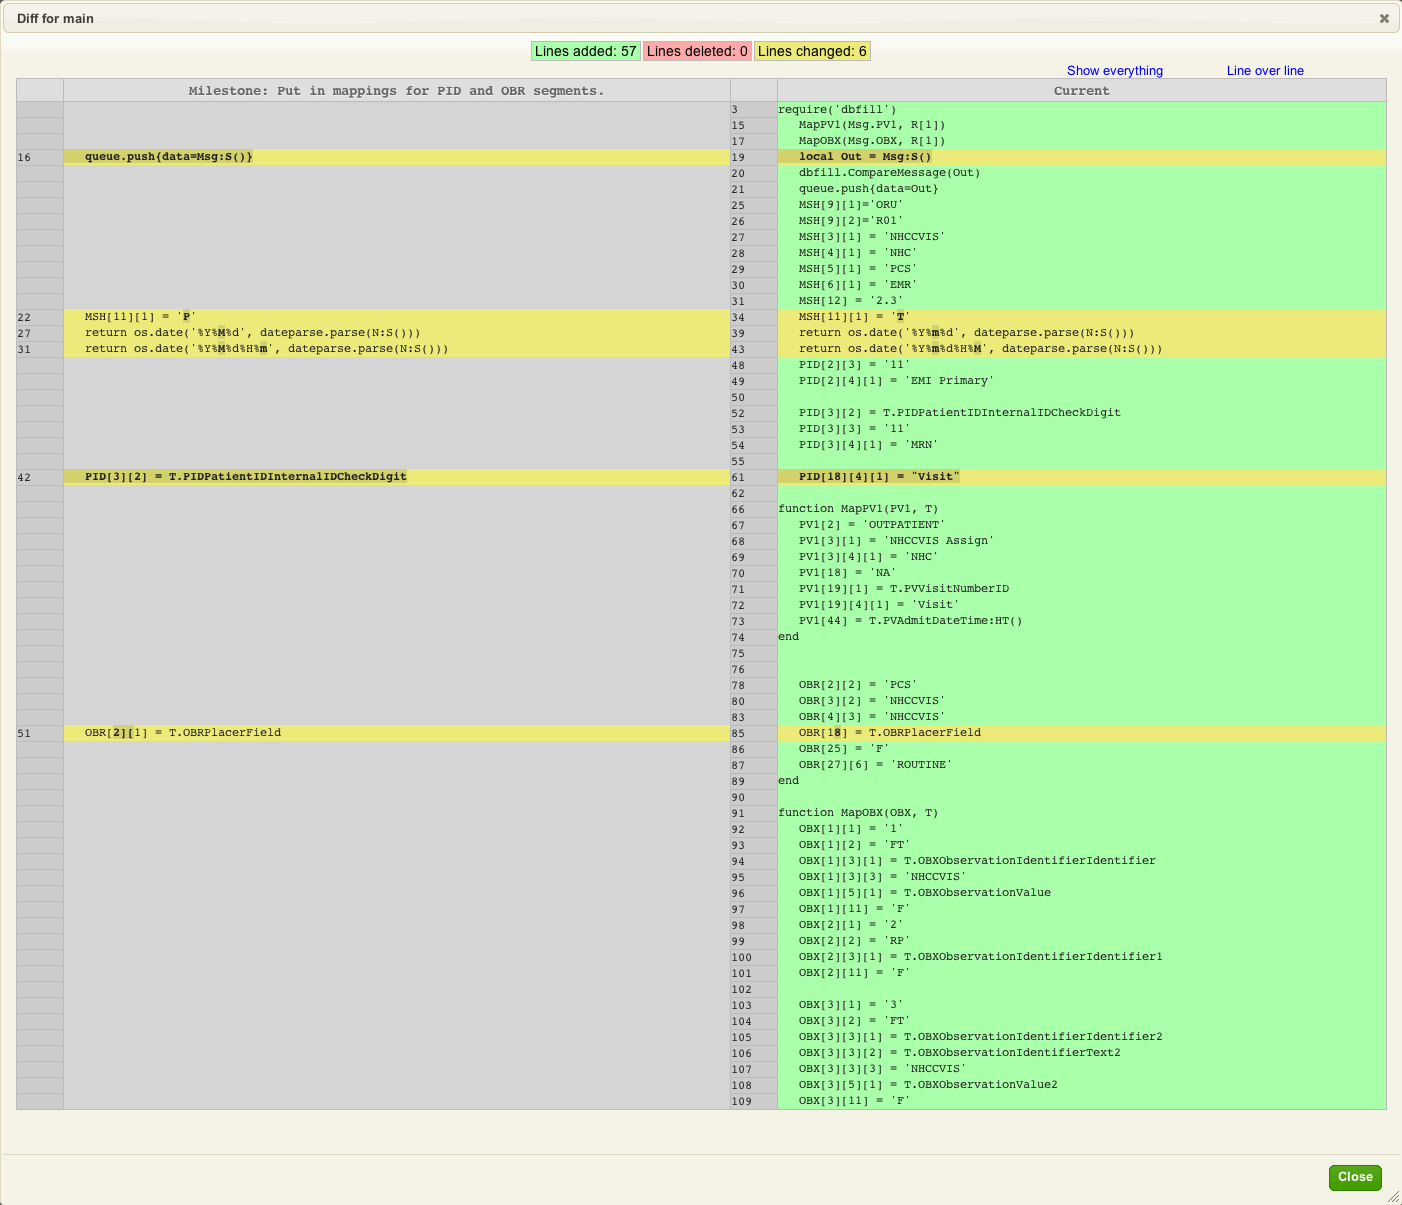
This screen shot shows the changes as we can see inside the editor, you can really see the power of having integrated version control in the Translator:
Next Step?
At this point our equivalent mapping is fairly complete. What is required now is to use the power of the Translator to programmatically identify the last few remaining differences between the old implementation of the interface and the new one.
Test: Compare Outputs [top]
One of the powerful things about the Translator is the ability to traverse messages as “node trees” programmatically.
This makes it possible to write expressive code which can list differences between HL7 messages in a convenient manner where you can see the results in real time.
That’s exactly what I did for the next phase. I tweaked the dbfill.CompareMessage routine to obtain the original message and parse it into an HL7 node tree:
local function LoadMessage(Base, Msg)
   local FileName = 'D:temp'..Base
                 ..Msg.MSH[10]..'.txt'
   trace(FileName)
   local F = io.open(FileName, "r")
   return F:read("*a")
end

function dbfill.CompareMessage(Data)
   local Result = nil
   local Out = hl7.parse{vmd='CVISOutbound.vmd', data=Data}
   local Orig = LoadMessage('orig', Out)
   if (Orig ~= Data) then
      Result = 'Original and current messages differ!'
   end
   return hl7.parse{vmd='CVISOutbound.vmd', data=Orig}, Result, Orig
end
And then I wrote a utility module called ‘diff’ would returns a nice human readable list of differences between the two trees like this:
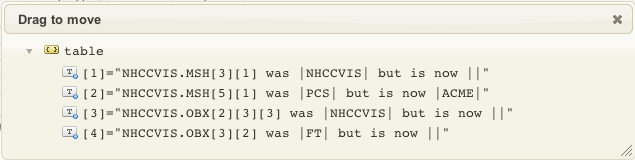
This made it very easy to locate the last few differences between the old interface and the new interface. The dialog would update in real time as I corrected the mappings. Here’s how it was called from the mapping routine:
There was still one small difference which my diff routine did not detect – this is because the older interface was appending a constant to a subfield using python whereas the vmd had it configured as a single field. The difference showed up when comparing the HL7 messages directly.
To resolve that problem would require a tweak to the vmd file.
Here’s the source code for the diff module, you need to create the diff module and paste this code into it.
Here’s the mapping file after the last set of changes:
require 'dateparse'
require 'node'
require 'dbfill'
require 'diff'
local conn = db.connect{
api=db.SQLITE,
name='test',
live=true
}
local function trace(a,b,c,d) return end
function main(Data)
local R = conn:query{
live=true,
sql="SELECT * FROM NHCCVISREPORT WHERE MESSAGE_ID = "..Data
}
local Msg = hl7.message{vmd='CVISOutbound.vmd', name='NHCCVIS'}
if #R == 0 then
print("Odd - unable to find message matching this one.")
return
end
MapMSH(Msg.MSH, R[1])
MapPID(Msg.PID, R[1])
MapPV1(Msg.PV1, R[1])
MapOBR(Msg.OBR, R[1])
MapOBX(Msg.OBX, R[1])
local Out = Msg:S()
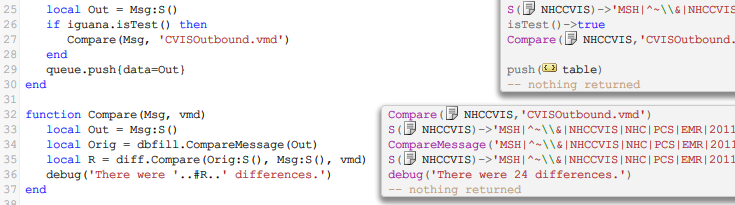
if iguana.isTest() then
Compare(Msg, 'CVISOutbound.vmd')
end
queue.push{data=Out}
end
function Compare(Msg)
local Out = Msg:S()
local Orig = dbfill.CompareMessage(Out)
local R = diff.Compare(Orig:S(), Msg:S(), vmd)
trace('There were '..#R..' differences.')
end
function MapMSH(MSH, T)
MSH[9][1]='ORU'
MSH[9][2]='R01'
MSH[3][1] = 'NHCCVIS'
MSH[4][1] = 'NHC'
MSH[5][1] = 'PCS'
MSH[6][1] = 'EMR'
MSH[12] = '2.3'
MSH[10] = T.MSHMessageControlID
MSH[7] = T.MSHDateTimeofMessage:HT()
MSH[11][1] = 'T'
return MSH
end
function node.HD(N)
return os.date('%Y%m%d', dateparse.parse(N:S()))
end
function node.HT(N)
return os.date('%Y%m%d%H%M%S', dateparse.parse(N:S()))
end
function MapPID(PID, T)
PID[2][1] = T.PIDPatientIDExternalIDID
PID[2][3] = '11'
PID[2][4][1] = 'EMI Primary'
PID[3][1] = T.PIDPatientIDInternalIDID
PID[3][2] = T.PIDPatientIDInternalIDCheckDigit
PID[3][3] = '11'
PID[3][4][1] = 'MRN'
PID[5][1] = T.PIDPatientNameFamilyName
PID[5][2] = T.PIDPatientNameGivenName
PID[7] = T.PIDDateTimeofBirth:HD()
PID[8] = T.PIDSex
PID[18][1] = T.PIDPatientAccountNumberID
PID[18][4][1] = "Visit"
return PID
end
function MapPV1(PV1, T)
PV1[2] = 'OUTPATIENT'
PV1[3][1] = 'NHCCVIS Assign'
PV1[3][4][1] = 'NHC'
PV1[18] = 'NA'
PV1[19][1] = T.PVVisitNumberID
PV1[19][4][1] = 'Visit'
PV1[44] = T.PVAdmitDateTime:HT()
end
function MapOBR(OBR, T)
OBR[2][2] = 'PCS'
OBR[3][1] = T.OBRFillerOrderNumberEntityIdentifier
OBR[3][2] = 'NHCCVIS'
OBR[4][1] = T.OBRUniversalServiceIDIdentifier
OBR[4][2] = T.OBRUniversalServiceIDText
OBR[4][3] = 'NHCCVIS'
OBR[7] = T.OBRObservationDateTime:HT()
OBR[18] = T.OBRPlacerField
OBR[25] = 'F'
OBR[27][6] = 'ROUTINE'
return OBR
end
function MapOBX(OBX, T)
OBX[1][1] = '1'
OBX[1][2] = 'FT'
OBX[1][3][1] = T.OBXObservationIdentifierIdentifier
OBX[1][3][3] = 'NHCCVIS'
OBX[1][5][1] = T.OBXObservationValue
OBX[1][11] = 'F'
OBX[2][1] = '2'
OBX[2][2] = 'RP'
OBX[2][5][1] = T.OBXObservationValue1
OBX[2][3][1] = T.OBXObservationIdentifierIdentifier1
OBX[2][3][3] = 'NHCCVIS'
OBX[2][11] = 'F'
OBX[3][1] = '3'
OBX[3][2] = 'FT'
OBX[3][3][1] = T.OBXObservationIdentifierIdentifier2
OBX[3][3][2] = T.OBXObservationIdentifierText2
OBX[3][3][3] = 'NHCCVIS'
OBX[3][5][1] = T.OBXObservationValue2
OBX[3][11] = 'F'
end
Next Step?
The final step is make our last tweaks to code and the VMD file. However before that we will show the the source code for the diff module.
Test: Code for the diff Module [top]
This is a utility module called ‘diff’ that returns a nice human readable list of differences between two trees.
If you have not already done so you need to create a “diff” module in your project, and paste this code into it.
diff={}

local function trace(a,b,c,d) return end

local function DisplayParent(Parent)
   local P = ''
   local Root = Parent.Root
   local i = 1
   while i <= #Parent.Address do
      if Root:nodeType() == 'segment_repeated' then
         P = P..Root:nodeName()..'['..Parent.Address[i]..']'
         Root = Root[Parent.Address[i]][Parent.Address[i+1]]
         i = i + 2
      else
         if Root:nodeType() == 'segment'  then
            P = P..Root:nodeName()
         elseif Root:nodeType() == 'message' then
            P = P..Root:nodeName()..'.'
         else
            P = P..'['..Parent.Address[i-1]..']'
         end
         Root = Root[Parent.Address[i]]
         i = i + 1
      end
   end
   return P
end

local function Compare(Orig, New, List, Parent)
   trace(List)
   if #Orig ~= #New then
      List[#List+1] = DisplayParent(Parent)..Orig:nodeName()..' has different number of children.'
   end
   for i=1,#Orig do
      Parent.Address[#Parent.Address+1] = i
      if #Orig[i] == 0 then
         trace(Orig[i]:nodeName())
         if Orig[i]:isNull() then
            if New[i]:childCount() == 0 then
               if not New[i]:isNull() then
                  List[#List+1] = New[i]:nodeName()..' should be empty but it is now '..New[i]
               end
            end
         elseif Orig[i]:nodeValue() ~= New[i]:nodeValue() then
            List[#List+1] = DisplayParent(Parent)..'['..i..'] was |'..
               Orig[i]:nodeValue()..'| but is now |'..New[i]:nodeValue().."|"
         end
      else
         Compare(Orig[i], New[i], List, Parent)
      end
      Parent.Address[#Parent.Address] = nil
   end
   return List
end

local function CheckHl7Message(P, Usage)
   if type(P) ~= 'userdata' or P:nodeType() ~= 'message'  then
      error(Usage,3)
   end
end

local DiffUsage=[[
Compares two HL7 messages for differences

Expects two HL7 strings and a VMD as
arguments and returns a table listing
differences - if any.

 e.g. local List = diff.Compare(Orig, New)
]]

function diff.Compare(Orig, New, Vmd)
   Orig = hl7.parse{data=Orig, vmd=Vmd}
   New  = hl7.parse{data=New, vmd=Vmd}
   CheckHl7Message(Orig, DiffUsage)
   CheckHl7Message(New, DiffUsage)
   return Compare(Orig, New, {}, {Root=Orig, Address={}})
end
Next Step?
The final step is to tweak the code and the VMD file to cope with the last two errors.
Test: Final Code Tweaks [top]
So in the vmd file the OBR.18 field was defined as a string – i.e. a ST composite type. There was a fragment of python script that appended ^NHCCVIS to the value.
Effectively this made the OBR.18.2 set to this value.
The difference showed up when comparing the strings directly. The other little difference is the the original interface appended \r to the last segment whereas the Translator interface did not.
This was easy to resolve by tweaking the vmd file and the editing the script. I also modified the script to tell me if the generated message was identical or not. The other trivial difference was a trailing \r at the end of the message. I made it so that test code will only run within the editor in test mode.
So here’s the final code. The CVISOutbound.vmd vmd file and the filter module:
require 'dateparse'
require 'node'
require 'dbfill'
require 'diff'

local conn = db.connect{
   api=db.SQLITE,
   name='test',
   live=true
}

local function trace(a,b,c,d) return end

function main(Data)
   local R = conn:query{
      live=true,
      sql="SELECT * FROM NHCCVISREPORT WHERE MESSAGE_ID = "..Data
   }

   local Msg = hl7.message{vmd='CVISOutbound.vmd', name='NHCCVIS'}

   if #R == 0 then
      print("Odd - unable to find message matching this one.")
      return
   end

   MapMSH(Msg.MSH, R[1])
   MapPID(Msg.PID, R[1])
   MapPV1(Msg.PV1, R[1])
   MapOBR(Msg.OBR, R[1])
   MapOBX(Msg.OBX, R[1])
   if iguana.isTest() then
      Compare(Msg)
   end
   queue.push{data=Msg:S()}
end

function Compare(Msg)
   local Out = Msg:S()
   local Orig, Different = dbfill.CompareMessage(Out)
   if Different then
      local R = diff.Compare(Orig, Msg)
      trace('There were '..#R..' differences.')
   else
      trace('Messages match!')
   end
end

function MapMSH(MSH, T)
   MSH[9][1]='ORU'
   MSH[9][2]='R01'
   MSH[3][1] = 'NHCCVIS'
   MSH[4][1] = 'NHC'
   MSH[5][1] = 'PCS'
   MSH[6][1] = 'EMR'
   MSH[12] = '2.3'
   MSH[10] = T.MSHMessageControlID
   MSH[7] = T.MSHDateTimeofMessage:HT()
   MSH[11][1] = 'T'
   return MSH
end

function node.HD(N)
   return os.date('%Y%m%d', dateparse.parse(N:S()))
end

function node.HT(N)
   return os.date('%Y%m%d%H%M%S', dateparse.parse(N:S()))
end

function MapPID(PID, T)
   PID[2][1] = T.PIDPatientIDExternalIDID
   PID[2][3] = '11'
   PID[2][4][1] = 'EMI Primary'

   PID[3][1] = T.PIDPatientIDInternalIDID
   PID[3][2] = T.PIDPatientIDInternalIDCheckDigit
   PID[3][3] = '11'
   PID[3][4][1] = 'MRN'

   PID[5][1] = T.PIDPatientNameFamilyName
   PID[5][2] = T.PIDPatientNameGivenName
   PID[7] = T.PIDDateTimeofBirth:HD()
   PID[8] = T.PIDSex
   PID[18][1] = T.PIDPatientAccountNumberID
   PID[18][4][1] = "Visit"

   return PID
end

function MapPV1(PV1, T)
   PV1[2] = 'OUTPATIENT'
   PV1[3][1] = 'NHCCVIS Assign'
   PV1[3][4][1] = 'NHC'
   PV1[18] = 'NA'
   PV1[19][1] = T.PVVisitNumberID
   PV1[19][4][1] = 'Visit'
   PV1[44] = T.PVAdmitDateTime:HT()
end

function MapOBR(OBR, T)
   OBR[2][2] = 'PCS'
   OBR[3][1] = T.OBRFillerOrderNumberEntityIdentifier
   OBR[3][2] = 'NHCCVIS'
   OBR[4][1] = T.OBRUniversalServiceIDIdentifier
   OBR[4][2] = T.OBRUniversalServiceIDText
   OBR[4][3] = 'NHCCVIS'
   OBR[7] = T.OBRObservationDateTime:HT()
   OBR[18][1] = T.OBRPlacerField
   OBR[18][2] = 'NHCCVIS'
   OBR[25] = 'F'
   OBR[27][6] = 'ROUTINE'
   return OBR
end

function MapOBX(OBX, T)
   OBX[1][1] = '1'
   OBX[1][2] = 'FT'
   OBX[1][3][1] = T.OBXObservationIdentifierIdentifier
   OBX[1][3][3] = 'NHCCVIS'
   OBX[1][5][1] = T.OBXObservationValue
   OBX[1][11] = 'F'

   OBX[2][1] = '2'
   OBX[2][2] = 'RP'
   OBX[2][5][1] = T.OBXObservationValue1
   OBX[2][3][1] = T.OBXObservationIdentifierIdentifier1
   OBX[2][3][3] = 'NHCCVIS'
   OBX[2][11] = 'F'

   OBX[3][1] = '3'
   OBX[3][2] = 'FT'
   OBX[3][3][1] = T.OBXObservationIdentifierIdentifier2
   OBX[3][3][2] = T.OBXObservationIdentifierText2
   OBX[3][3][3] = 'NHCCVIS'
   OBX[3][5][1] = T.OBXObservationValue2
   OBX[3][11] = 'F'
end
The dbfill module:
dbfill = {}

local function trace(a,b,c,d) return end

local function RandomDate(Modifier)
   local T = 40700 - Modifier
   trace(T)
   return os.ts.date("%Y-%m-%dT%H:%M:%S", T)
end

local function RandomString(V, RowIndex)
   return V:nodeName()..RowIndex
end

local function FillValue(R, i, RowIndex)
   local T = R[i]:nodeType()
   if T == 'datetime' then
      R[i] = RandomDate(RowIndex*i)
   elseif T == 'string' then
      R[i] = RandomString(R[i], RowIndex)
   else
      error('Need to handle integers and doubles')
   end
end

local function MakeRow(T,RowIndex)
   for i =1,#T do
      FillValue(T, i, RowIndex)
   end
   return T
end

local function makeDummyDatabase(Vmd, Name)
   local T = db.tables{vmd=Vmd, name=Name}
   for i =1,20 do
      MakeRow(T.NHCCVISReport[i], i)
   end
   return T
end

local function ColumnList(Row)
   local L = ''
   for i =1, #Row-1 do
      L = L..Row[i]:nodeName()..',n'
   end
   L = L..Row[#Row]:nodeName()
   return L
end

local function generateSql(T, DB)
   for TableIndex=1,#T do
      local C = ColumnList(T[TableIndex][1])
         ..", MESSAGE_ID, PARENT_ID"
      for RowIndex = 1, #T[TableIndex] do
         local Row = T[TableIndex][RowIndex]
         local S = 'REPLACE INTO '..T[TableIndex]:nodeName()
         ..'('..C..')n VALUES('
         for ColumnIndex =1,#Row-1 do
            S = S..'"'..Row[ColumnIndex]..'",n'
         end
         S = S..'"'..Row[#Row]..'"n'
         S = S..',"'..RowIndex..'"n'
         S = S..',"'..RowIndex..'")'
         trace(S)
         DB:execute{sql=S, live=true}
      end
   end
end

local function InsertMessageRow(Count, MessageName, DB)
   for i=1, Count do
      local S = 'REPLACE INTO '..MessageName..'(MESSAGE_ID, STATUS)'..' VALUES('..i..",'W')"
      DB:execute{sql=S, live=true}
   end
end

function dbfill.generateDummySourceData(Vmd, MessageName, D)
   local T = makeDummyDatabase(Vmd, MessageName)
   generateSql(T, D)
   InsertMessageRow(#T.NHCCVISReport, MessageName, D)
end

function dbfill.SaveMessage(Base, Msg, Data)
   local FileName = 'D:temp'..Base
                 ..Msg.MSH[10]..'.txt'
   trace(FileName)
   local F = io.open(FileName, "w")
   F:write(Data)
   F:close()
end

function dbfill.LoadMessage(Base, Msg)
   local FileName = 'D:temp'..Base
                 ..Msg.MSH[10]..'.txt'
   trace(FileName)
   local F = io.open(FileName, "r")
   return F:read("*a")
end

-- gets equivalent old message
-- the name is a blind...
function dbfill.CompareMessage(Data)
   local Out = hl7.parse{vmd='CVISOutbound.vmd', data=Data}
   local Orig = dbfill.LoadMessage('orig', Out)
   return hl7.parse{vmd='CVISOutbound.vmd', data=Orig}
end
Here’s the source code for the diff module.
And the code for the “From Translator” channel:
require('dbfill')

 --dbfill.generateDummySourceData('CVISOutbound.vmd', 'NHCCVIS',D)
And the code for the “To Translator” channel we used to record the original messages from the old interface:
require 'dbfill'

local conn = db.connect{
 api=db.SQLITE,
 name='test',
 live=true
}

function main()
 --dbfill.generateDummySourceData('CVISOutbound.vmd', 'NHCCVIS',D)

 local R = conn:query(
 "SELECT MESSAGE_ID FROM NHCCVIS WHERE STATUS = 'W'"
 )
 for i=1, #R do
 PushId(R[i].MESSAGE_ID:nodeValue())
 conn:execute(
 "UPDATE NHCCVIS SET STATUS='R' WHERE MESSAGE_ID = "
 ..R[i].MESSAGE_ID
 )
 end
end

function PushId(Id)
 queue.push{data=Id}
end
Next Step?
Now we have completed the regression test it only remains to review what we learned and consider the next steps.
Next Steps [top]
So this tutorial has been useful in terms of:
- Showing a good way of leveraging the Translator to be convenient for doing a From DB to HL7 interface using the best practice of driving things off a seed ID.
- Demonstrating using the environment for regression testing.
On our side we’re keen to build up a set of nice tutorials to help customers that are motivated to migrate to the Translator from their existing interfaces – if you are interested then please contact us at support@interfaceware.com.
One thing that is a little unusual about this tutorial is the structure of the table that was populating the interface. This table was set up by our client specifically for driving this particular interface and he populated it through a mixture of stored procedures and VB.NET code. That made sense to do with the From Database channel component in Iguana 4 but with the Translator it would be a lot easier to do that work within the Translator and make a number of SELECT queries to pull data from a variety of tables.
- See our other interface tutorials (Iguana 5 documentation) in this section
- See our general tutorials (Iguana 5 documentation) section