Saving a Milestone
Contents
When using the Iguana Translator, you can save a milestone at any time.
To help you keep track of milestone status in the editor, these icons in the Project Files panel indicate when files are added or changed:
| Icon | Meaning |
|---|---|
 |
This yellow (!) icon indicates that a file was changed since the last milestone. |
 |
This green (+) icon indicates that a file was created since the last milestone. |
Tip: If the yellow (!) is displayed at the top of the Project Files window, it indicates that the project was changed since the last milestone:
To save a milestone:
- Click the Save Milestone button, located at the top of the Iguana Translator screen:

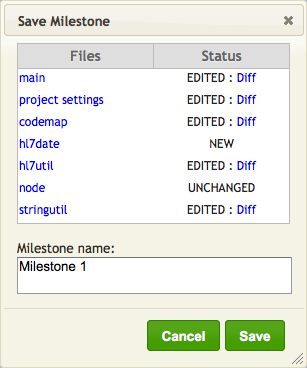
The Save Milestone window appears: - In the Milestone name field, type the milestone name that you want to use. The default is “Milestone X” where X is incremented each time a milestone is saved.
- Click Save to save the milestone.

In the Save Milestone window, you can compare any file or script named in the Project Manager panel with the saved copy of this file or script that exists on the system. To compare a file, click the Diff link located next to its name:

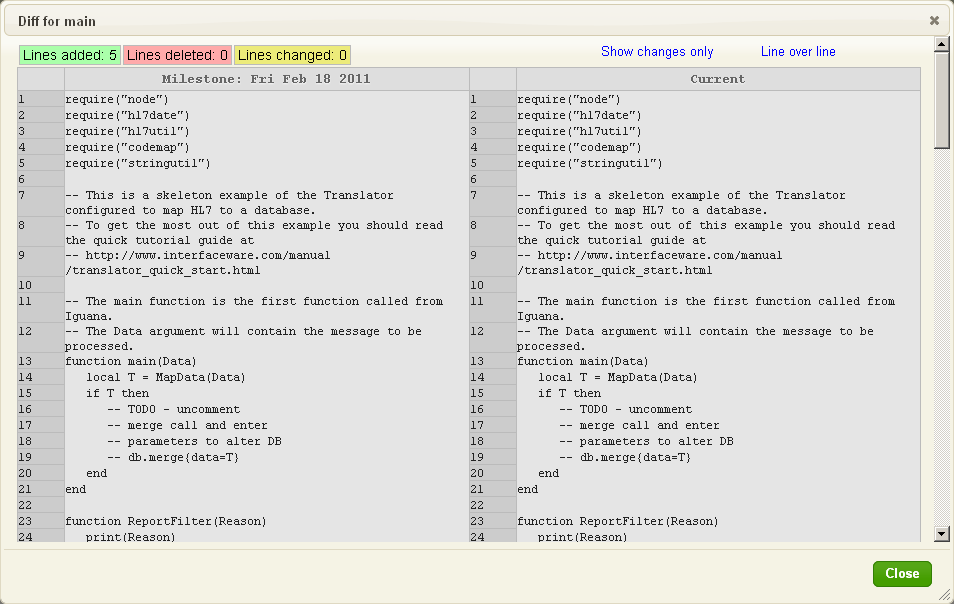
A difference window appears, displaying the differences between the saved file and the current version of the file:

For information on how to work with this difference window, see Using the Difference Window to Track Script Changes.
Note: The list of saved files displayed in the Save Milestone window includes a file named project settings. This file is automatically generated by the Iguana Translator, and contains code that specifies what files are displayed in the Project Manager panel. You will not need to edit this file.
