Set up the channel
Contents
There is no particular rule with regards to how you might use Iguana to trigger generating your finished CDA document. For this tutorial, we are going to trigger it with a simple web service call. To do that, we’ll need to set up a web service channel. We will also take a moment to import the completed code for a quick once-over of our final goal.
Step 1: Set up the channel
- From the Dashboard, click Add Channel. The Add Channel dialog appears.
- Select the following components:
- Source = From HTTPS
- Destination = To Channel
- Click the Configure Channel button. The Configure New Channel window appears.
- Click the Channel tab and enter the following information:
- Channel Name = CDA channel
- Description = Trying out the CDA module
- Click the Source tab and enter the following information:
- Use translator = Translator
- URL path = cda
These settings will a) trigger a script via the Translator (where we will add all our code), and b) define the URL that we will use to serve up our final CDA document. We don’t need to do anything with the Filter and Destination components.
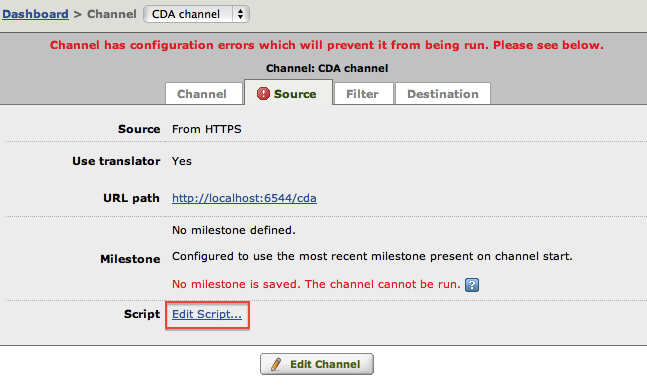
- Click the Add Channel button. The channel is created and several warnings appear. Don’t worry! This is just Iguana reminding us that before we can run the channel, we’ll need to commit at least one milestone. We’ll perform this step shortly.
Step 2: Add the code
Before we get into creating the CDA document sample ourselves, let’s have a quick look at the final result that we are aiming for. To do this, simply import the completed code following the steps below:
- Download this project zip file: NIST_Validated_CDA_Example_minimal.zip
- Open the source component’s script in the Translator:
- In the dialog that appears, choose Import project from zip file, browse to select the project zip file, then click Import.
- Commit your first milestone to save these changes.
- Return to the Dashboard and click the Start button to run the channel.
- Hover your mouse over the channel’s HTTPS source component and click on the URL Path hyperlink provided:
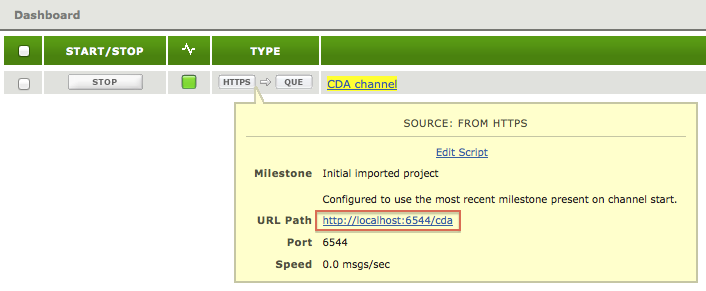
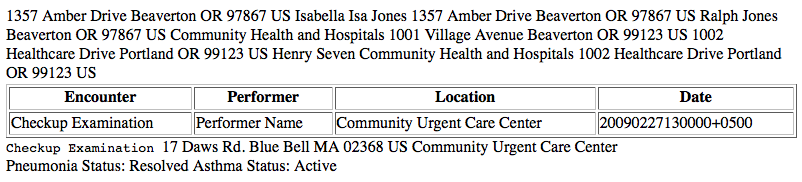
The resulting CDA document is displayed in response to your web call:
At this point, we recommend that you return to the script and browse around. If it seems like a mountain of code, don’t panic! We are going to spend the rest of this tutorial re-creating this code so that you can get a much better idea of how our CDA process works. Soon you’ll be churning out CDA documents without a breaking a sweat!
What’s Next?
Let’s clear out the code and rebuild it from scratch. This will give you the opportunity to see our CDA API in action.