Populate the CDA body
Contents
To complete our ‘structuredBody’ element, we will add an ‘encounters’ element and a ‘problems’ element:

Adding this information follows the same process as before: create and append the new elements, create and call their corresponding “fill” functions, then use the CDA API to build the code that develops the node tree.
The ‘structureBody’ element contains even more values than our header’s ‘recordTarget’ element, so the project zip file that you’ve just imported already includes their corresponding pre-built “fill” functions with all the correct values in place. That said, we will take this opportunity to review how they implement two new techniques: the addAttr() function and the setInner() function.
Before we dive into those topics, let’s finish up the code. Add the following lines to the main() function to create the two sub-elements and call their respective “fill” functions:
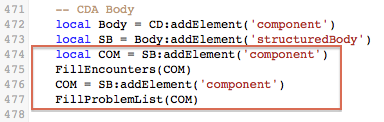
Done! Here are the resulting annotations:

Here is a copy-and-paste version of the completed main() function, should you need it:
end

function main(Data)
   local Doc = cda.new()
   local CD = Doc.ClinicalDocument

   -- CDA Header
   FillHeader(CD)
   local RT = CD:addElement('recordTarget')
   FillPatient(RT)
   local A = CD:addElement('author')
   FillAuthor(A)
   local C = CD:addElement('custodian')
   FillCustodian(C)

   -- CDA Body
   local Body = CD:addElement('component')
   local SB = Body:addElement('structuredBody')
   local COM = SB:addElement('component')
   FillEncounters(COM)
   COM = SB:addElement('component')
   FillProblemList(COM)

   net.http.respond{body=tostring(Doc)}

   -- TEST CODE: write CDA to file (in Iguana install dir)
   -- unformatted xml
   if iguana.isTest() then
      local f = io.open('cda_xml.xml','w+')
      f:write(tostring(Doc))
      f:close()
      -- formatted with xsl stylesheet
      f = io.open('cda_web.xml','w+')
      f:write('n')
      f:write(tostring(Doc))
      f:close()
   end
end
About setAttr()
Similar to the CDA API’s other “set” functions, our setAttr() function is smart. It will populate an existing attribute or append and populate a missing attribute, all in one simple step. Let’s have a look at this in action:
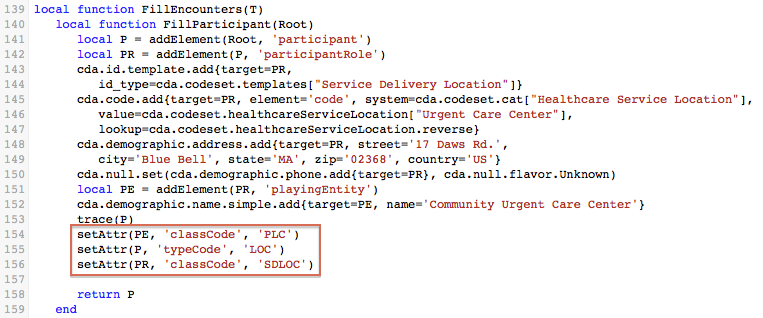
At the end of the FillEncounters() function, notice the three calls to setAttr():
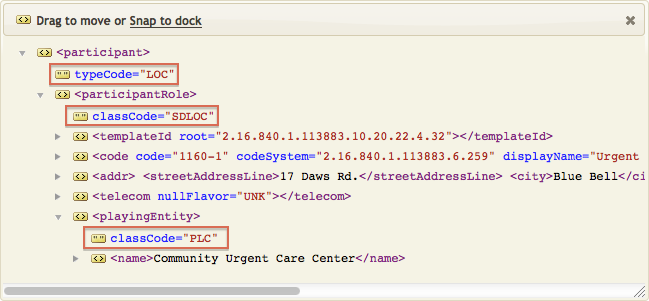
As you can see, these calls have produced three fully-completed attributes in the resulting annotations:
About setInner()
The setInner() function is a handy way to to add XML or HTML content directly to a text element that uses an ED datatype. Encapsulated data (ED) is the way that HL7 (and hence CDA) transmits data in formats not defined by HL7. It is often used to encapsulate “human readable” content within a CDA. This includes things like HTML, images, video, audio, waveforms, genetic sequences, multimedia, etc.
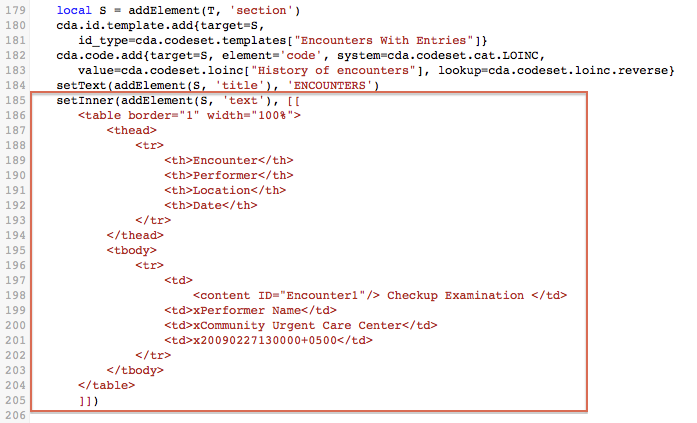
In this case, we are simply using this technique to store an encounter as a “human readable” XML table in the FillEncounters() function:
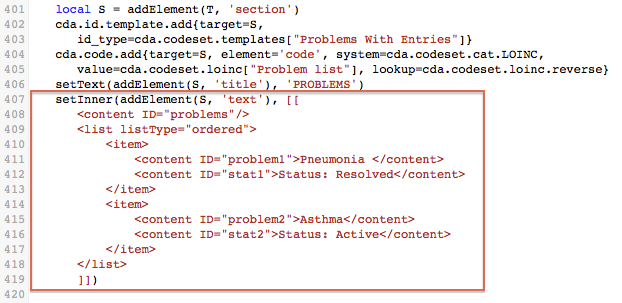
We also use it to store multiple problems as a “human readable” XML list in the FillProblemList() function:
You might consider it a stretch to think that XML content is “human readable information”, but when it’s rendered in a web browser, it looks pretty great!

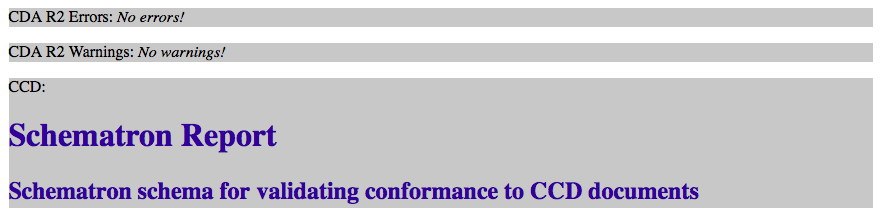
Review and Validate
At this point, let’s use the NIST Validation Tool (or the Lantana validation tool) to check our changes to the cda_xml.xml file. Since our CDA is now complete, there should be no errors!