Add a 'custodian' element
Contents
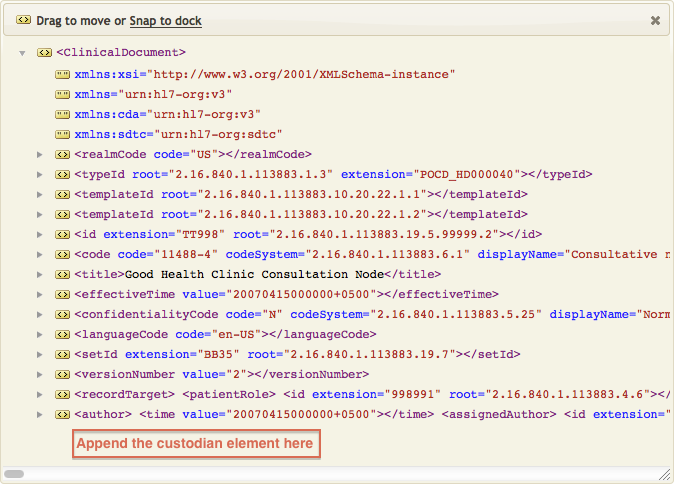
Guess what? This is the last thing we need to complete our CDA document’s header! To add the ‘custodian’ element, we will follow exactly the same steps to create, append, and populate the new element:

| Attribute | Example Data | Live Data |
|---|---|---|
| assignedCustodian.representedOrganization.id.extension | hard coded string: ‘99999999′ | change/map/generate value |
| assignedCustodian.representedOrganization.id.root | hard coded string: ‘2.16.840.1.113883.4.6′ | change/map/generate value |
| assignedCustodian.representedOrganization.name | hard coded string: ‘Community Health and Hospitals‘ | change/map/generate value |
| assignedCustodian.representedOrganization.telecom.use | hard coded string: ‘WP’ | change/map/generate value |
| assignedCustodian.representedOrganization.telecom.value | hard coded string: ‘tel:(555)555-1002‘ | change/map/generate value |
| assignedCustodian.representedOrganization.addr.use | hard coded string:’WP’ | change/map/generate value |
| assignedCustodian.representedOrganization.addr.streetAddressLine | hard coded string: ‘1002 Healthcare Drive‘ | change/map/generate value |
| assignedCustodian.representedOrganization.addr.city | hard coded string: ‘Portland’ | change/map/generate value |
| assignedCustodian.representedOrganization.addr.state | hard coded string: ‘OR’ | change/map/generate value |
| assignedCustodian.representedOrganization.addr.postalCode | hard coded string: ‘99123’ | change/map/generate value |
| assignedCustodian.representedOrganization.addr.country | hard coded string: ‘US’ | change/map/generate value |
Adding Code
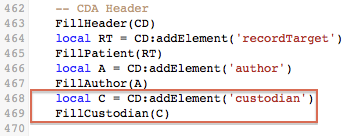
A pre-built FillCustodian() function is included in the project zip file that you imported in the previous step, so there is no need to develop it. Simply add the following lines to your main() function. As with the others, this will create/append the ‘custodian’ element and call the FillCustodian() function to populate it:

Let’s take a quick look at the FillCustodian() function. This is a very simple chunk of code! It uses addElement to create two sub-elements. It also uses several of the CDA API’s “add” functions to populate them with the required values:

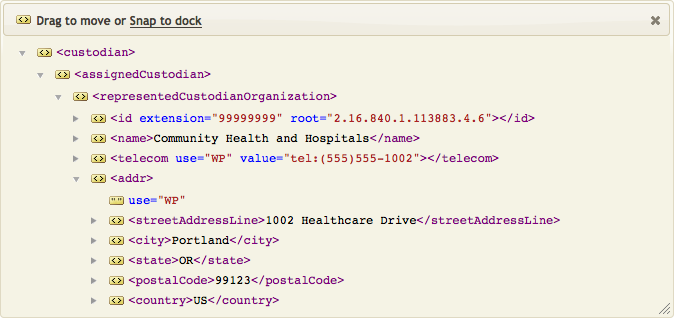
Here are the resulting annotations:

Review and Validate
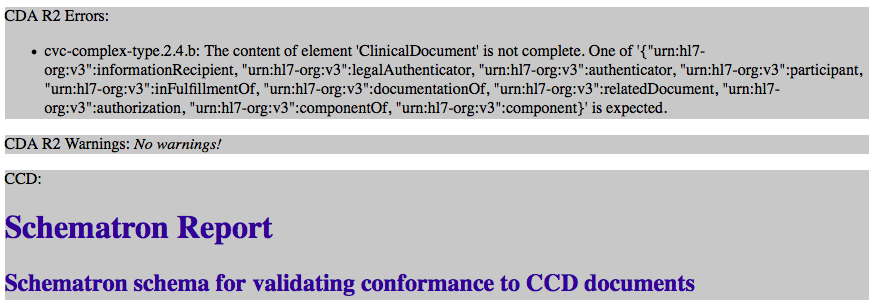
At this point, let’s use the NIST Validation Tool (or the Lantana validation tool) to check our completed header in the cda_xml.xml file.
This time we get a rather confusing validation error! This is actually telling us that something is missing, but it doesn’t seem to know what…

