Write the Mappings
Contents
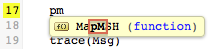
For writing the mappings I prefer to break the mapping code into smaller modular functions. We’ll start with the MSH segment. I like to start by putting in an empty mapping function. My preference is to use very brief variable names to make for more concise code, then I use the annotations to give visibility on what the variables are referring to:

Notice there is no annotation block appearing beside the MapMSH function? That is because the code is not being called. Until we call the function we do not get annotations. Also auto-completion will not work on the lines of code inside the MapMSH function.
To see an annotation we need to add a line of code to call the function like this:

The Iguana auto-completion function make typing code very easy.
Try it out, just type a few letters of the name of the MapMSH():

Note: You don’t have to start at the beginning of a name, but the letters must be in the correct order:
Use the arrow keys to highlight the MapMSH() function then press enter to select, or just click on on your choice with the mouse:
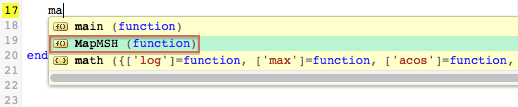
The MapMSH() function will be inserted for you:

Then typing in Msg. will give you this:
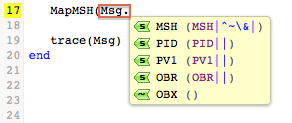
I selected the MSH segment and ignore the auto-completion dialog that comes up for the MSH segment fields. Instead I typed in “,” and followed it with R. for the second parameter:

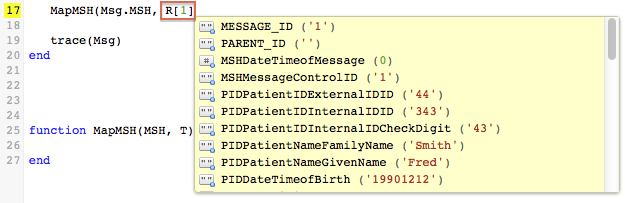
Selecting Row 1 completes the code R[1], then simply enter a “)” to complete the function call:
Now we can start typing in the mappings:

Note: The return MSH on the last line of MapMSH() is not strictly necessary, it just makes it really easy to double click on the MSH segment to display it for debugging.
The auto-completion and annotations make it an absolute pleasure to iteratively build up the mappings. It’s neat seeing the live HL7 message be built up in real time as you add the mappings.
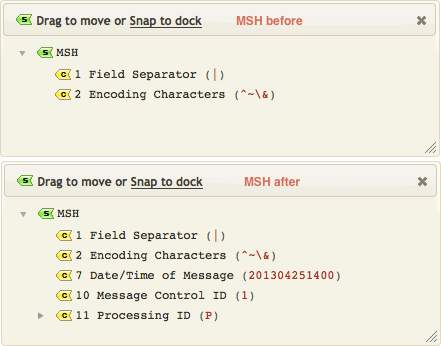
Here is the MSH segment before and after the mapping:
Mapping out the remaining segments is just a matter of repeating the process for each segment.

Now if we look at the returned PID segment notice that the date of birth is not correctly formatted for HL7:
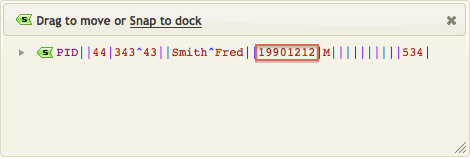
We can deal with that easily using the fuzzy time parser module and a little helper function.
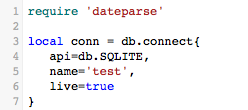
We first add require 'dateparse' to the top of our script:
Then we add this node extension function:
function node.HD(N)
   return os.date('%Y%m%d', dateparse.parse(N:nodeValue()))
end
Which we call by appending :HD() to the T.PIDDateTimeofBirth line:

From the annotations you can see the code does.
- We invoke the
:HD()method on the date of birth column.
- The
N:nodeValue()method converts the table column node into a string.
- This is parsed by the fuzzy date time parser
dateparse.parse()into a Lua time string (“1990-12-12 00:00:00“).
- The
os.date()function is called to formatformatthe date into the desired%Y%m%doutput format.
This might seem like a lot of work but in practice these little helper functions go into a standard shared module that you can use again and again.
For mapping the OBR segment I needed to create another helper function which I called HT to output a timestamp:
function node.HT(N)
   return os.date('%Y%m%d%H%M', dateparse.parse(N:S()))
end
Finally the last thing to do in the main function is push the message onto the queue:
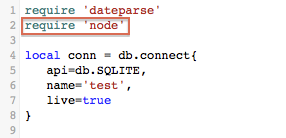
First we need to add require 'node' at the top of the code:
Then we add the code to push the message onto the queue:
queue.push{data=Msg:S()}
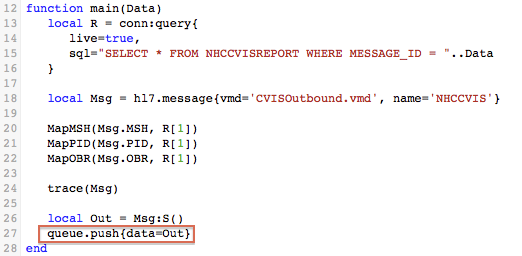
Note: I converted the Msg to Out as by convention we always use Out for the messages we send.
The :S() method calls tostring() which converts the populated HL7 node tree into a string and queue.push{} pushes that string into the queue.
Here’s the final code:
require 'dateparse'
require 'node'

local conn = db.connect{
   api=db.SQLITE,
   name='test',
   live=true
}

local function trace(a,b,c,d) return end

function main(Data)
   local R = conn:query{
      live=true,
      sql="SELECT * FROM NHCCVISREPORT WHERE MESSAGE_ID = "..Data
   }

   local Msg = hl7.message{vmd='CVISOutbound.vmd', name='NHCCVIS'}

   MapMSH(Msg.MSH, R[1])
   MapPID(Msg.PID, R[1])
   MapOBR(Msg.OBR, R[1])

   trace(Msg)

   local Out = Msg:S()
   queue.push{data=Out}
end

function MapMSH(MSH, T)
   MSH[10] = T.MSHMessageControlID
   MSH[7] = os.date('%Y%m%d%H%M')
   MSH[11][1] = 'P'
   return MSH
end

function node.HD(N)
   return os.date('%Y%M%d', dateparse.parse(N:nodeValue()))
end

function node.HT(N)
   return os.date('%Y%m%d%H%M', dateparse.parse(N:nodeValue()))
end

function MapPID(PID, T)
   PID[2][1] = T.PIDPatientIDExternalIDID
   PID[3][1] = T.PIDPatientIDInternalIDID
   PID[5][1] = T.PIDPatientNameFamilyName
   PID[5][2] = T.PIDPatientNameGivenName
   PID[7] = T.PIDDateTimeofBirth:HD()
   PID[8] = T.PIDSex
   PID[18][1] = T.PIDPatientAccountNumberID
   PID[3][2] = T.PIDPatientIDInternalIDCheckDigit
   return PID
end

function MapOBR(OBR, T)
   OBR[3][1] = T.OBRFillerOrderNumberEntityIdentifier
   OBR[4][1] = T.OBRUniversalServiceIDIdentifier
   OBR[4][2] = T.OBRUniversalServiceIDText
   OBR[7] = T.OBRObservationDateTime:HT()
   OBR[2][1] = T.OBRPlacerField
   return OBR
end
Next Step?
Now we have mapped the data to our outgoing HL7 message. The next step is to test the channel by committing a milestone and then running the channel.