Test the Channel
Contents
When you have completed the mapping script and have set up the database tables, the final step is to test the channel to ensure that data is being processed properly.
To test the channel:
- From the Dashboard click the Start button for your channel. The status indicator should turn green.
- Hover your cursor over the LLP icon in the Type column. This displays information about the source component, including the port that it is using:

Make a note of this port number. - Open the HL7 Simulator. On Windows, you can do this by clicking the Windows Start button, then selecting All Programs, iNTERFACEWARE, HL7 Analytical Tools, and HL7 Simulator.The HL7 Simulator window appears:

Note: If you are using a Mac then you can run the Simulator in Parallels (using a Windows VM) and replace “localhost” in the Host field with the IP Address of your Mac. Using a VM on a Linux/Unix box should work in much the same way.
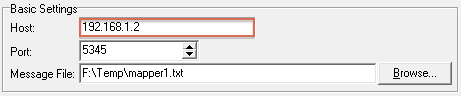
- In the Port field, specify the port through which to send the test message. This is the port number from step 2.
- In the Message File field, browse for or type the location of the test messages that you want to send. For this tutorial you can download mapper1.txt and use the single message it contains.
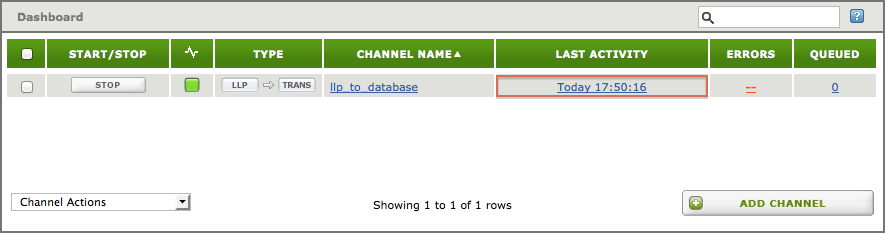
- Click Start. The Last Activity column in the Dashboard should indicate that the channel has been recently active:
- Check your database tables to see whether the data was successfully loaded.
- In the HL7 Simulator, click Stop to stop the simulation.
- In the Dashboard, click Stop to stop the channel.
Now you know how to use Iguana Translator to send data from an LLP connection to a database. You can also use the Iguana Translator to perform a variety of other mapping operations.
What’s Next?
- For more details on how to use the Iguana Translator, see Understanding the Translator GUI
- You may also want to look at the Database to HL7 Tutorial
- If you have specific questions try using the wiki search box, as we have many helpful examples and tips
If you need further help you can also contact support at support@interfaceware.com.
Back to: Introduction